FOOD Fad: I’ve Got a Bone to Pick

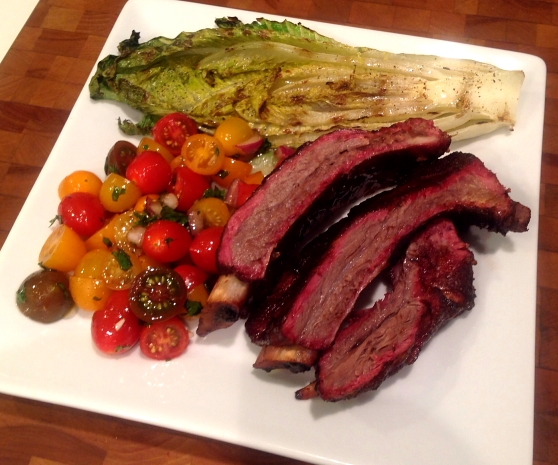
FOOD FANATICS see trends come and go, but sometimes chefs can take a good thing and turn it into a cliché. Case in point: these bone dishes we’ve been seeing a little too much of:

SONY DSC

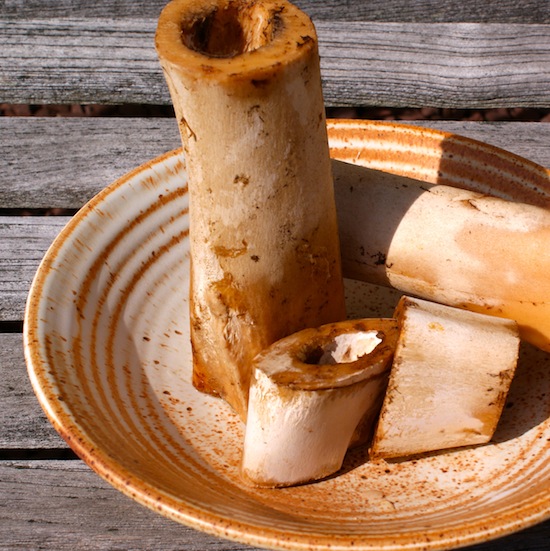
Marrow Overkill — A giant shank cut lengthwise is too much of a good thing.                        (I went to a top buffet in Vegas where they had platters of bone marrow).  My friend was like “omg they have bone marrow…I’m so going for that”.  I did too but it wasn’t the high point of my dinner.

Bone-In Burger — A burger with a bone sticking out just for laughs is…laughable.
Bone Broth — C’mon: Broth was made with bones centuries before the paleo craze.

I’m laughing because all of a sudden “bone broth” is a thing People are drinking the liquid all day long as a medicinal to prevent sickness or keep from getting more sick than they already are (like when you have a basic cold).

Most of us grew up with our grandmothers making soup from scratch which meant first making a stock from chicken or beef bones – same as today (unless you buy “already made” broth from a can or box which every grocery stores sells).  I know people who buy broth from a butcher for $10 a litre.  To make a good batch of soup you’d need at least 3-4 litres. And to make your own don’t forget that marrow no longer comes cheap.  At $4-5 a lb. it doesn’t seem like much but you’ll need several bones to make a large pot of soup and with all the extras you can prepare to spend about $30 to make it worthwhile.  Anything time consuming you want to have lots of.

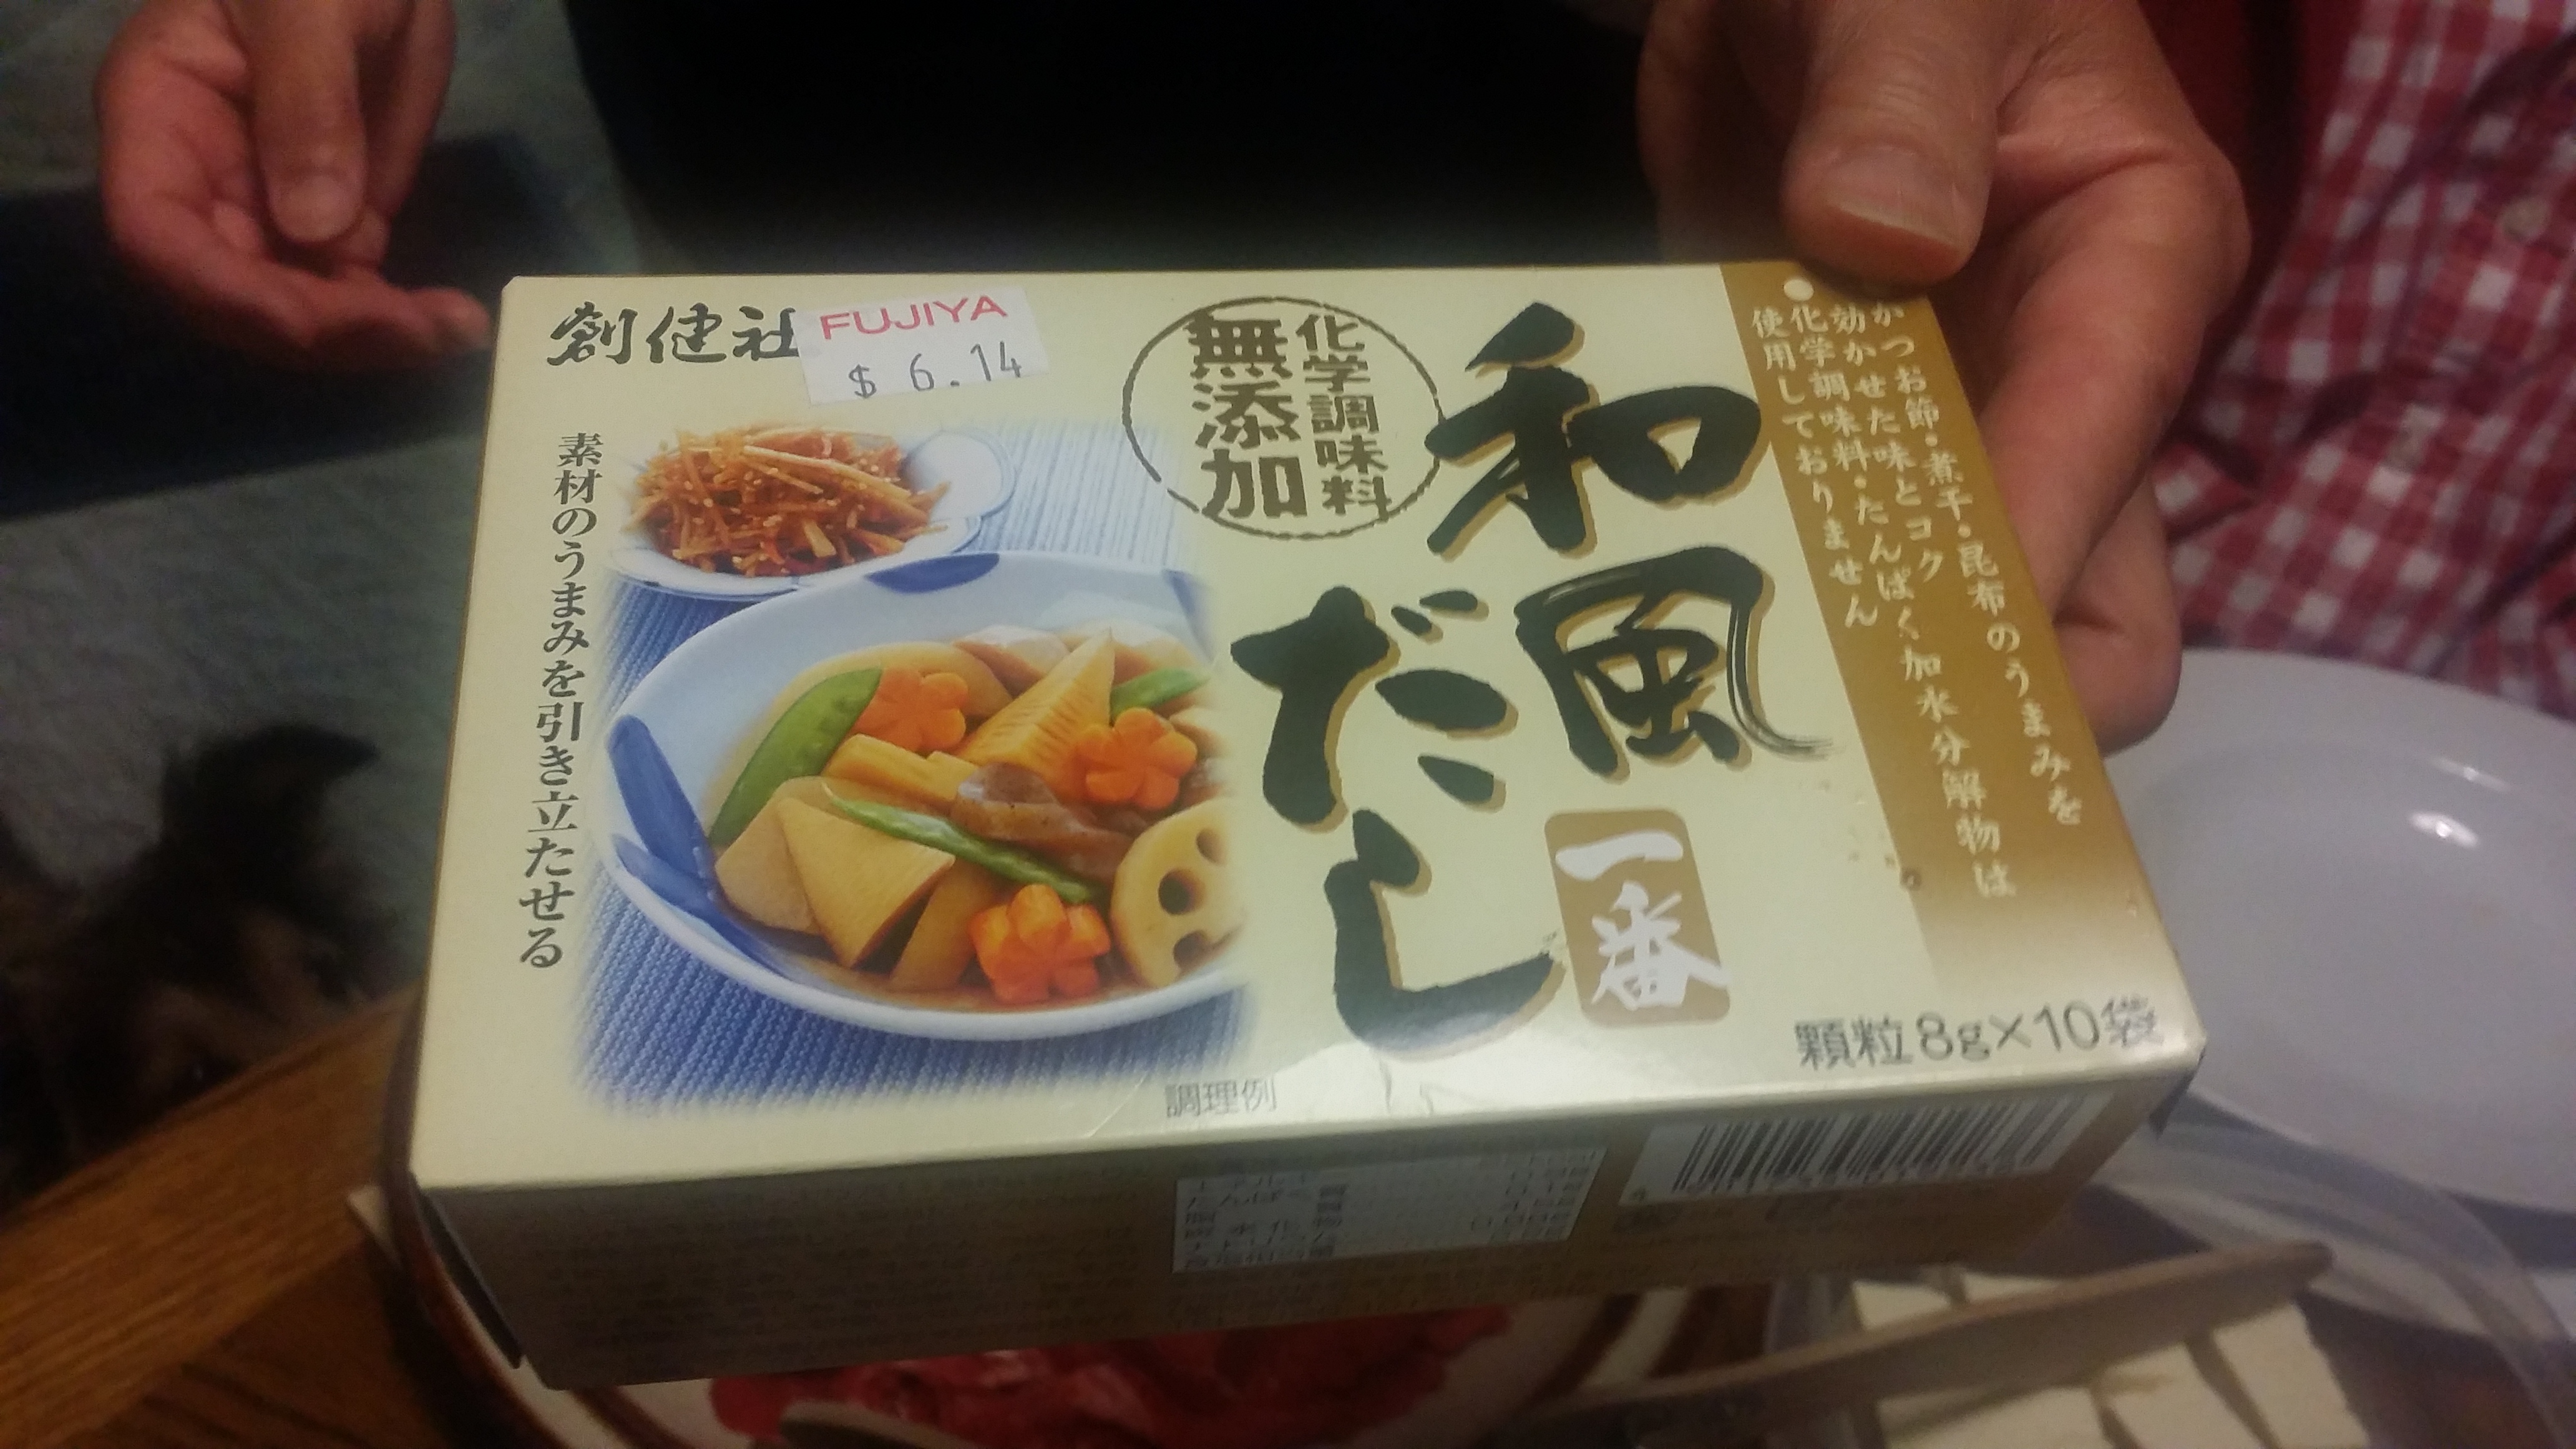
Making a homemade *stock (or broth) from bones does take time to do properly but it’s so worthwhile.  You cannot recreate a good soup solely from adding Knorr® bouillon cubes to water.  But if a recipe calls for only adding a little stock (eg: rice or risotto) I use “better than bouillon” in its many forms (beef, chicken or veggie depending). It’s the next best thing if homemade is not on hand.

I credit the bone broth trend for giving me a kick to going back to making wholesome soups from scratch.

Homemade Beef Broth - made with bones
Back to Basic Homemade Beef Broth

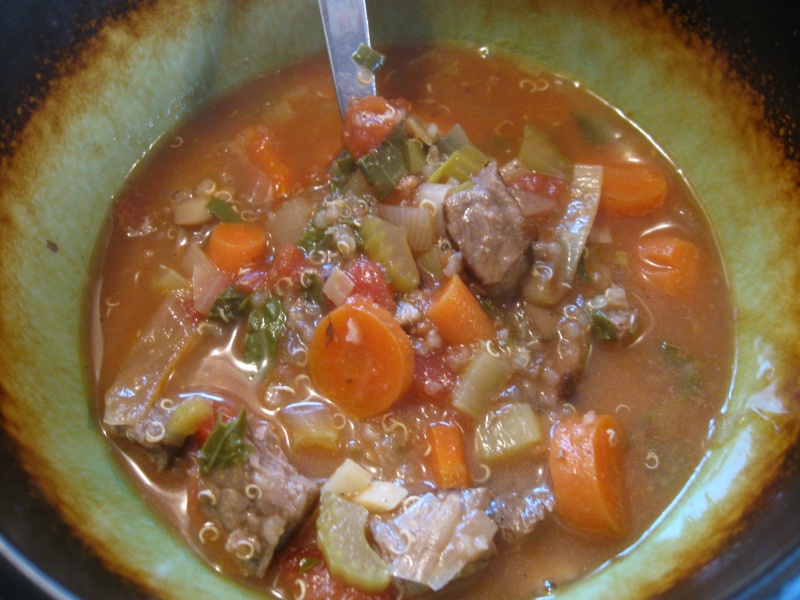
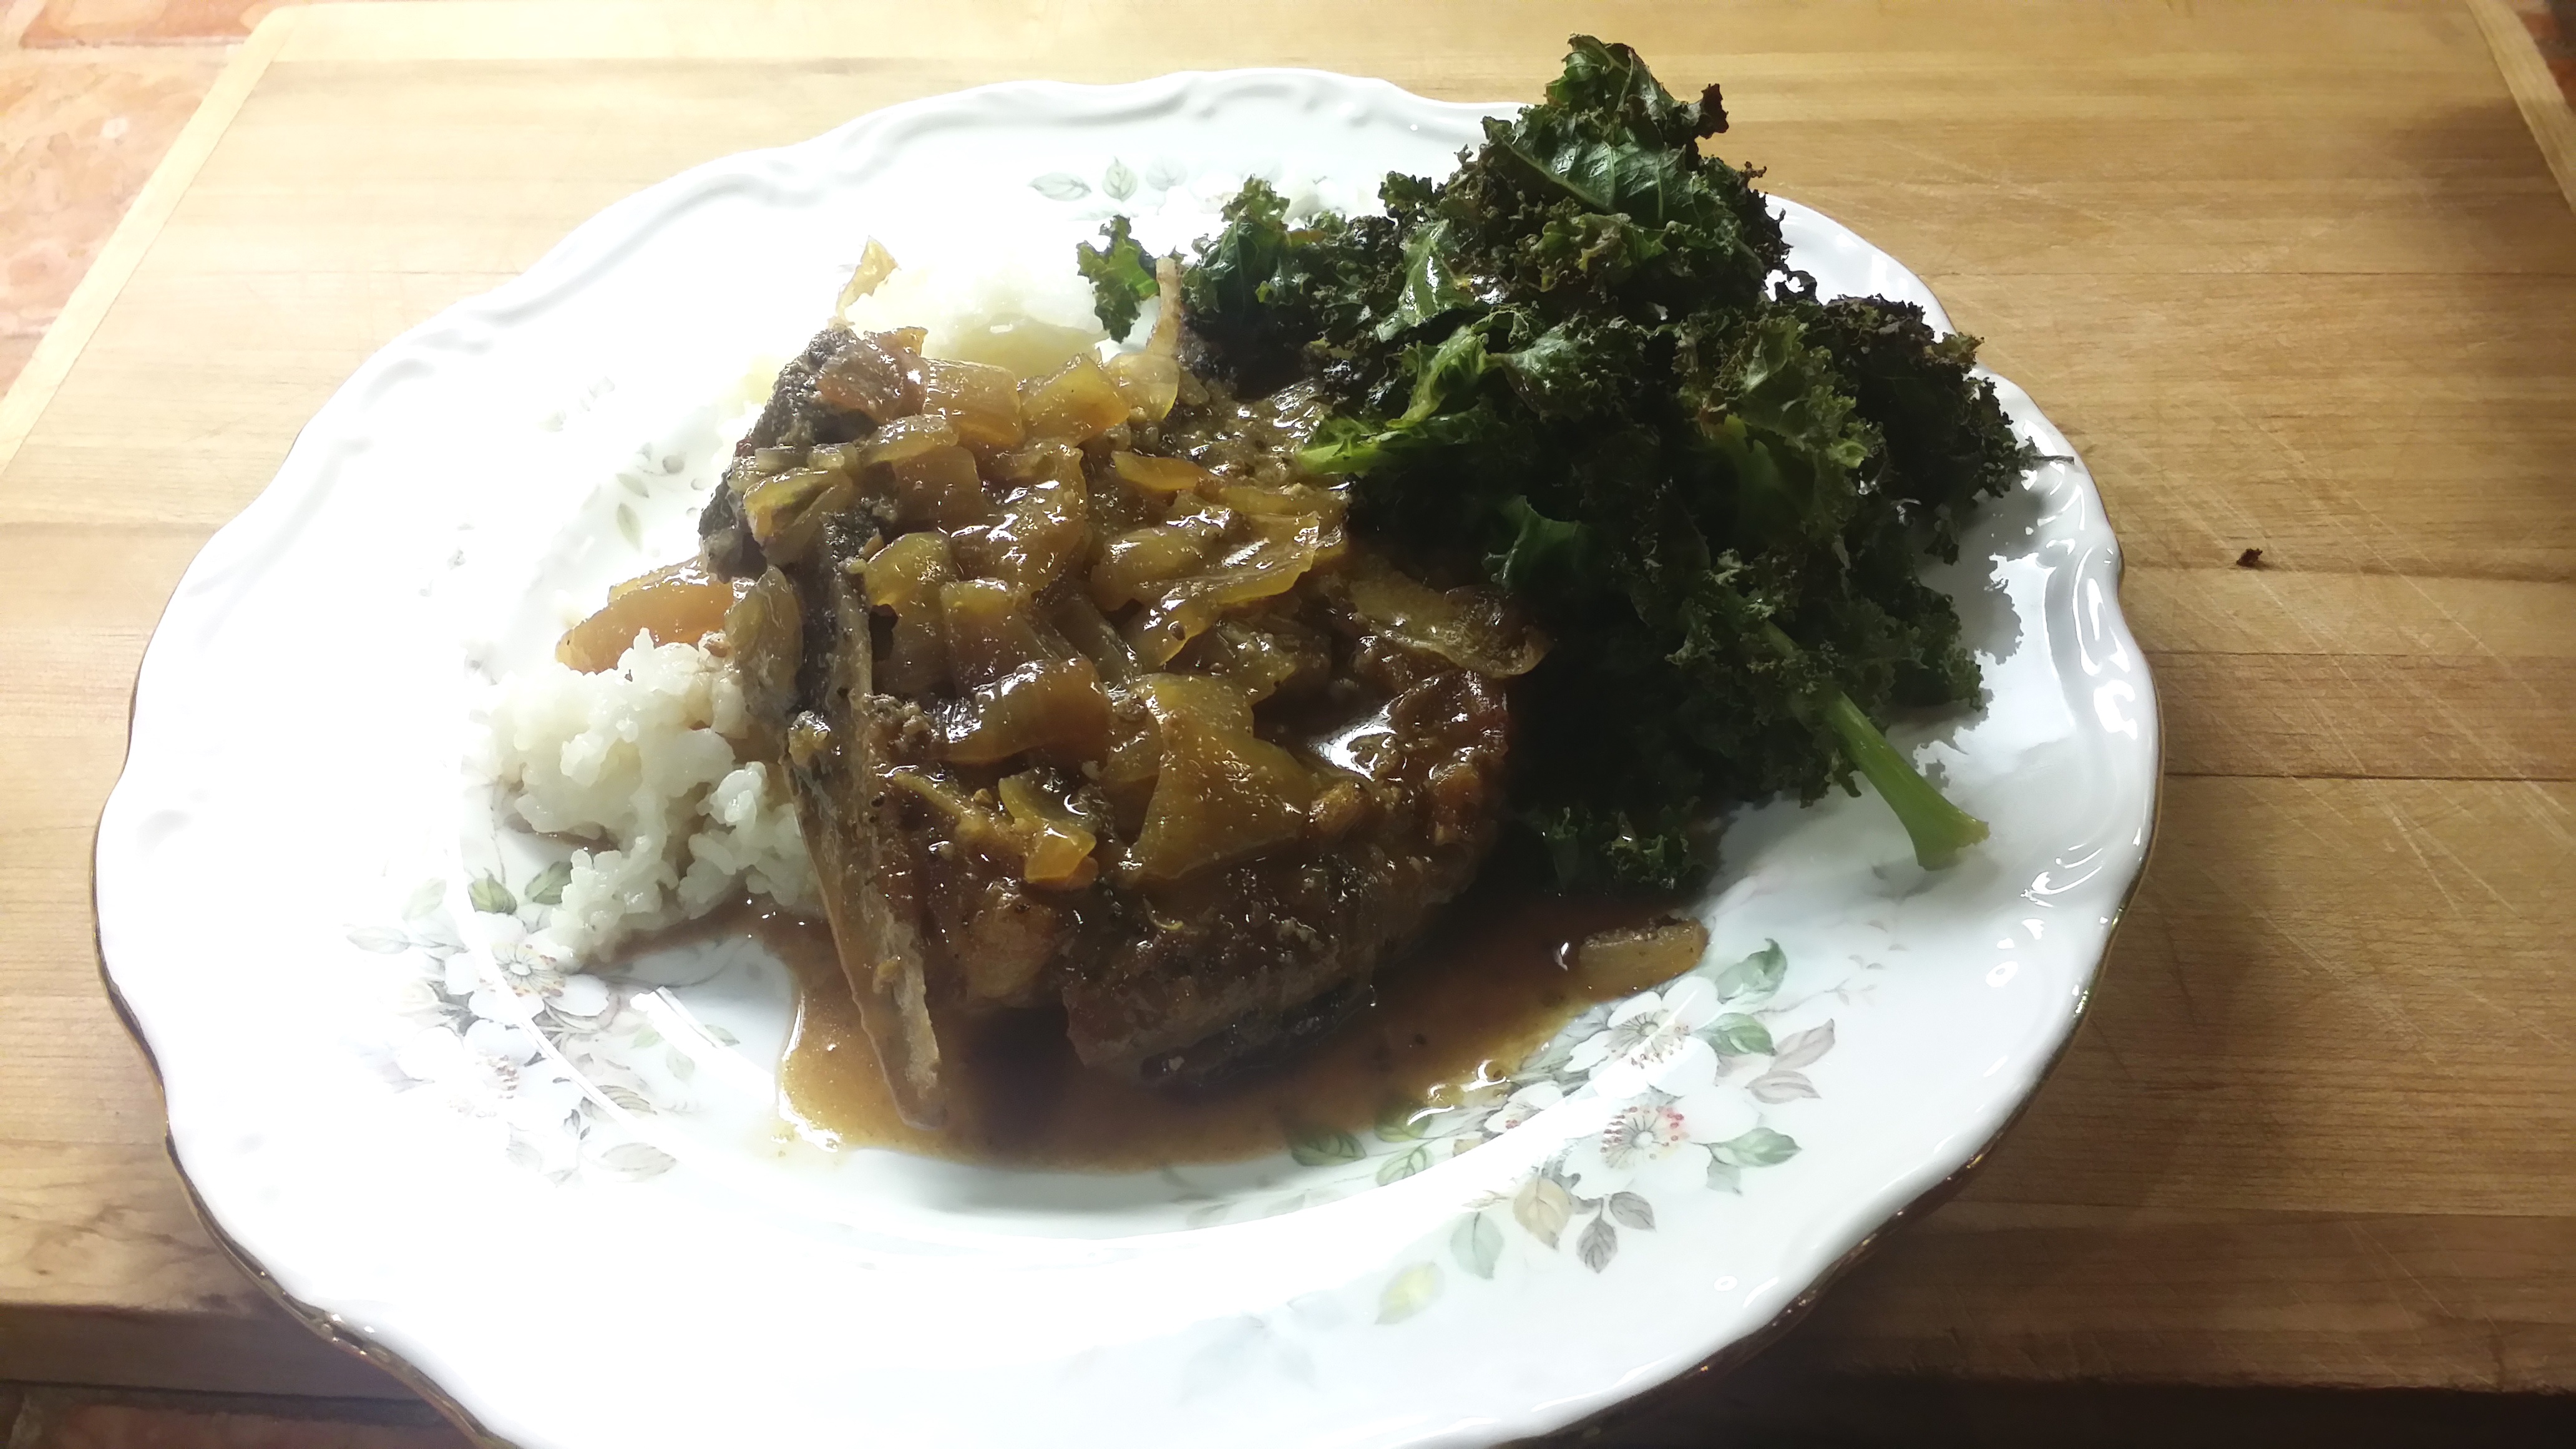
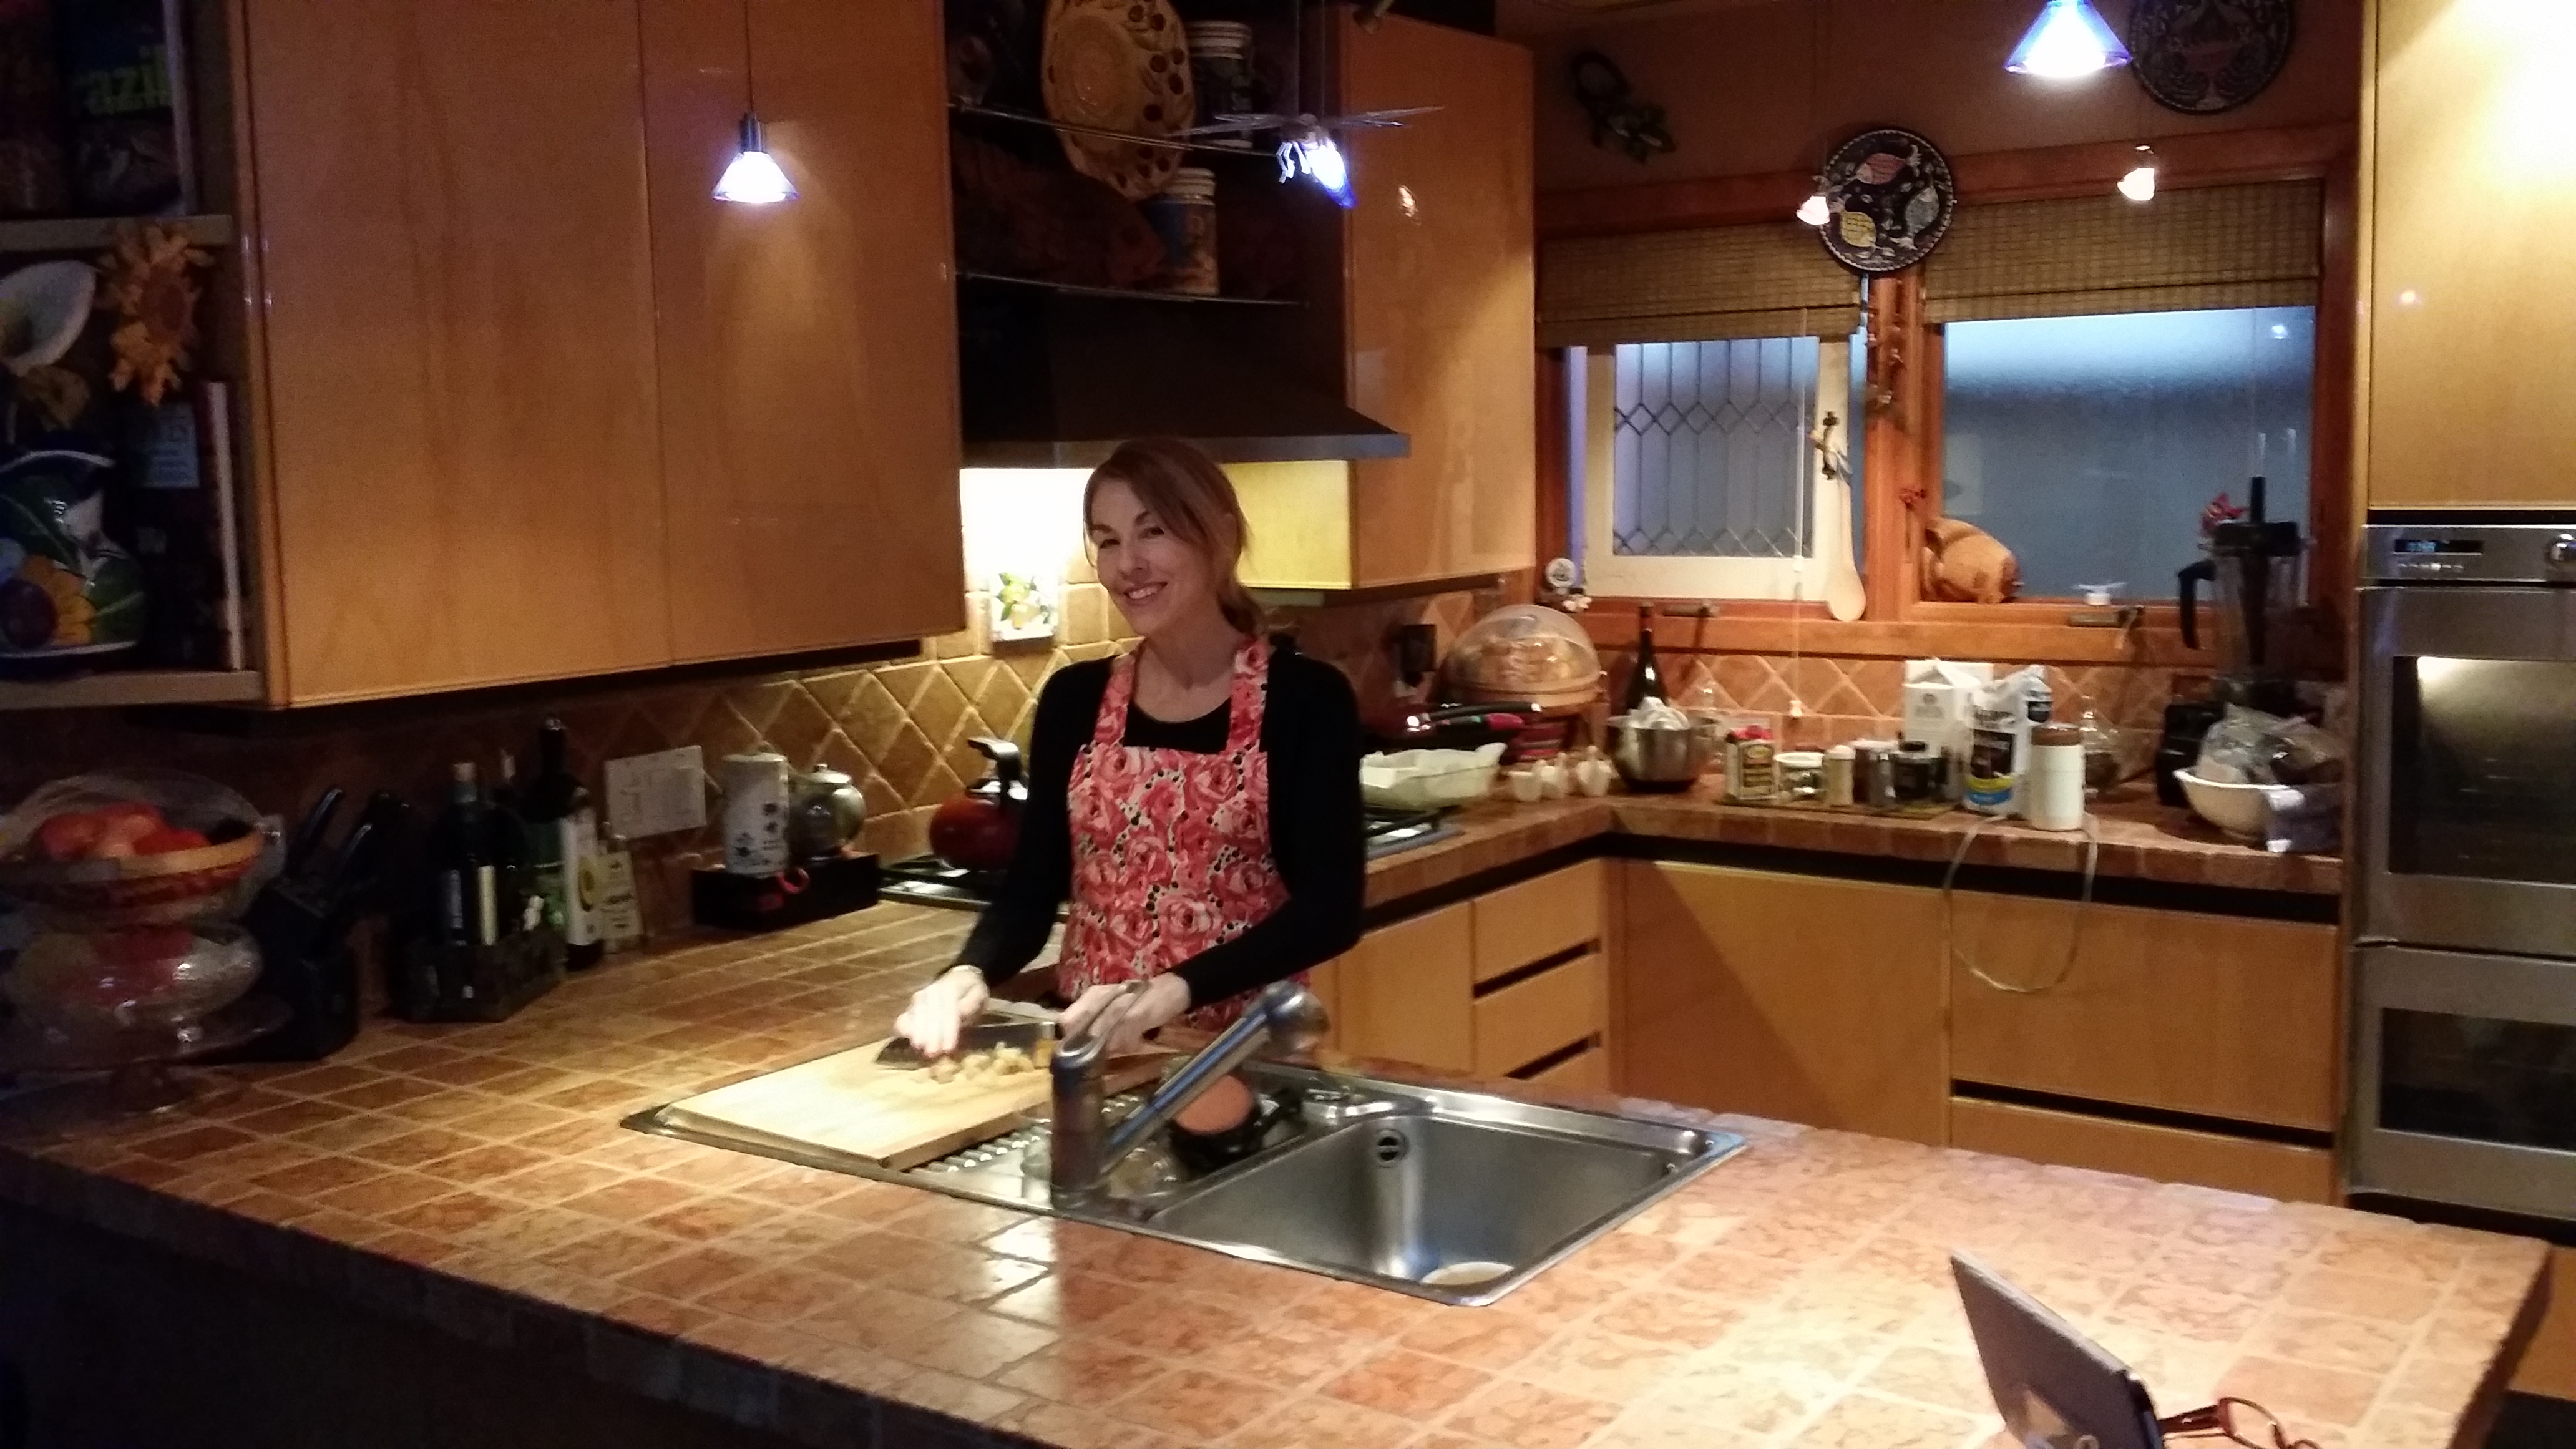
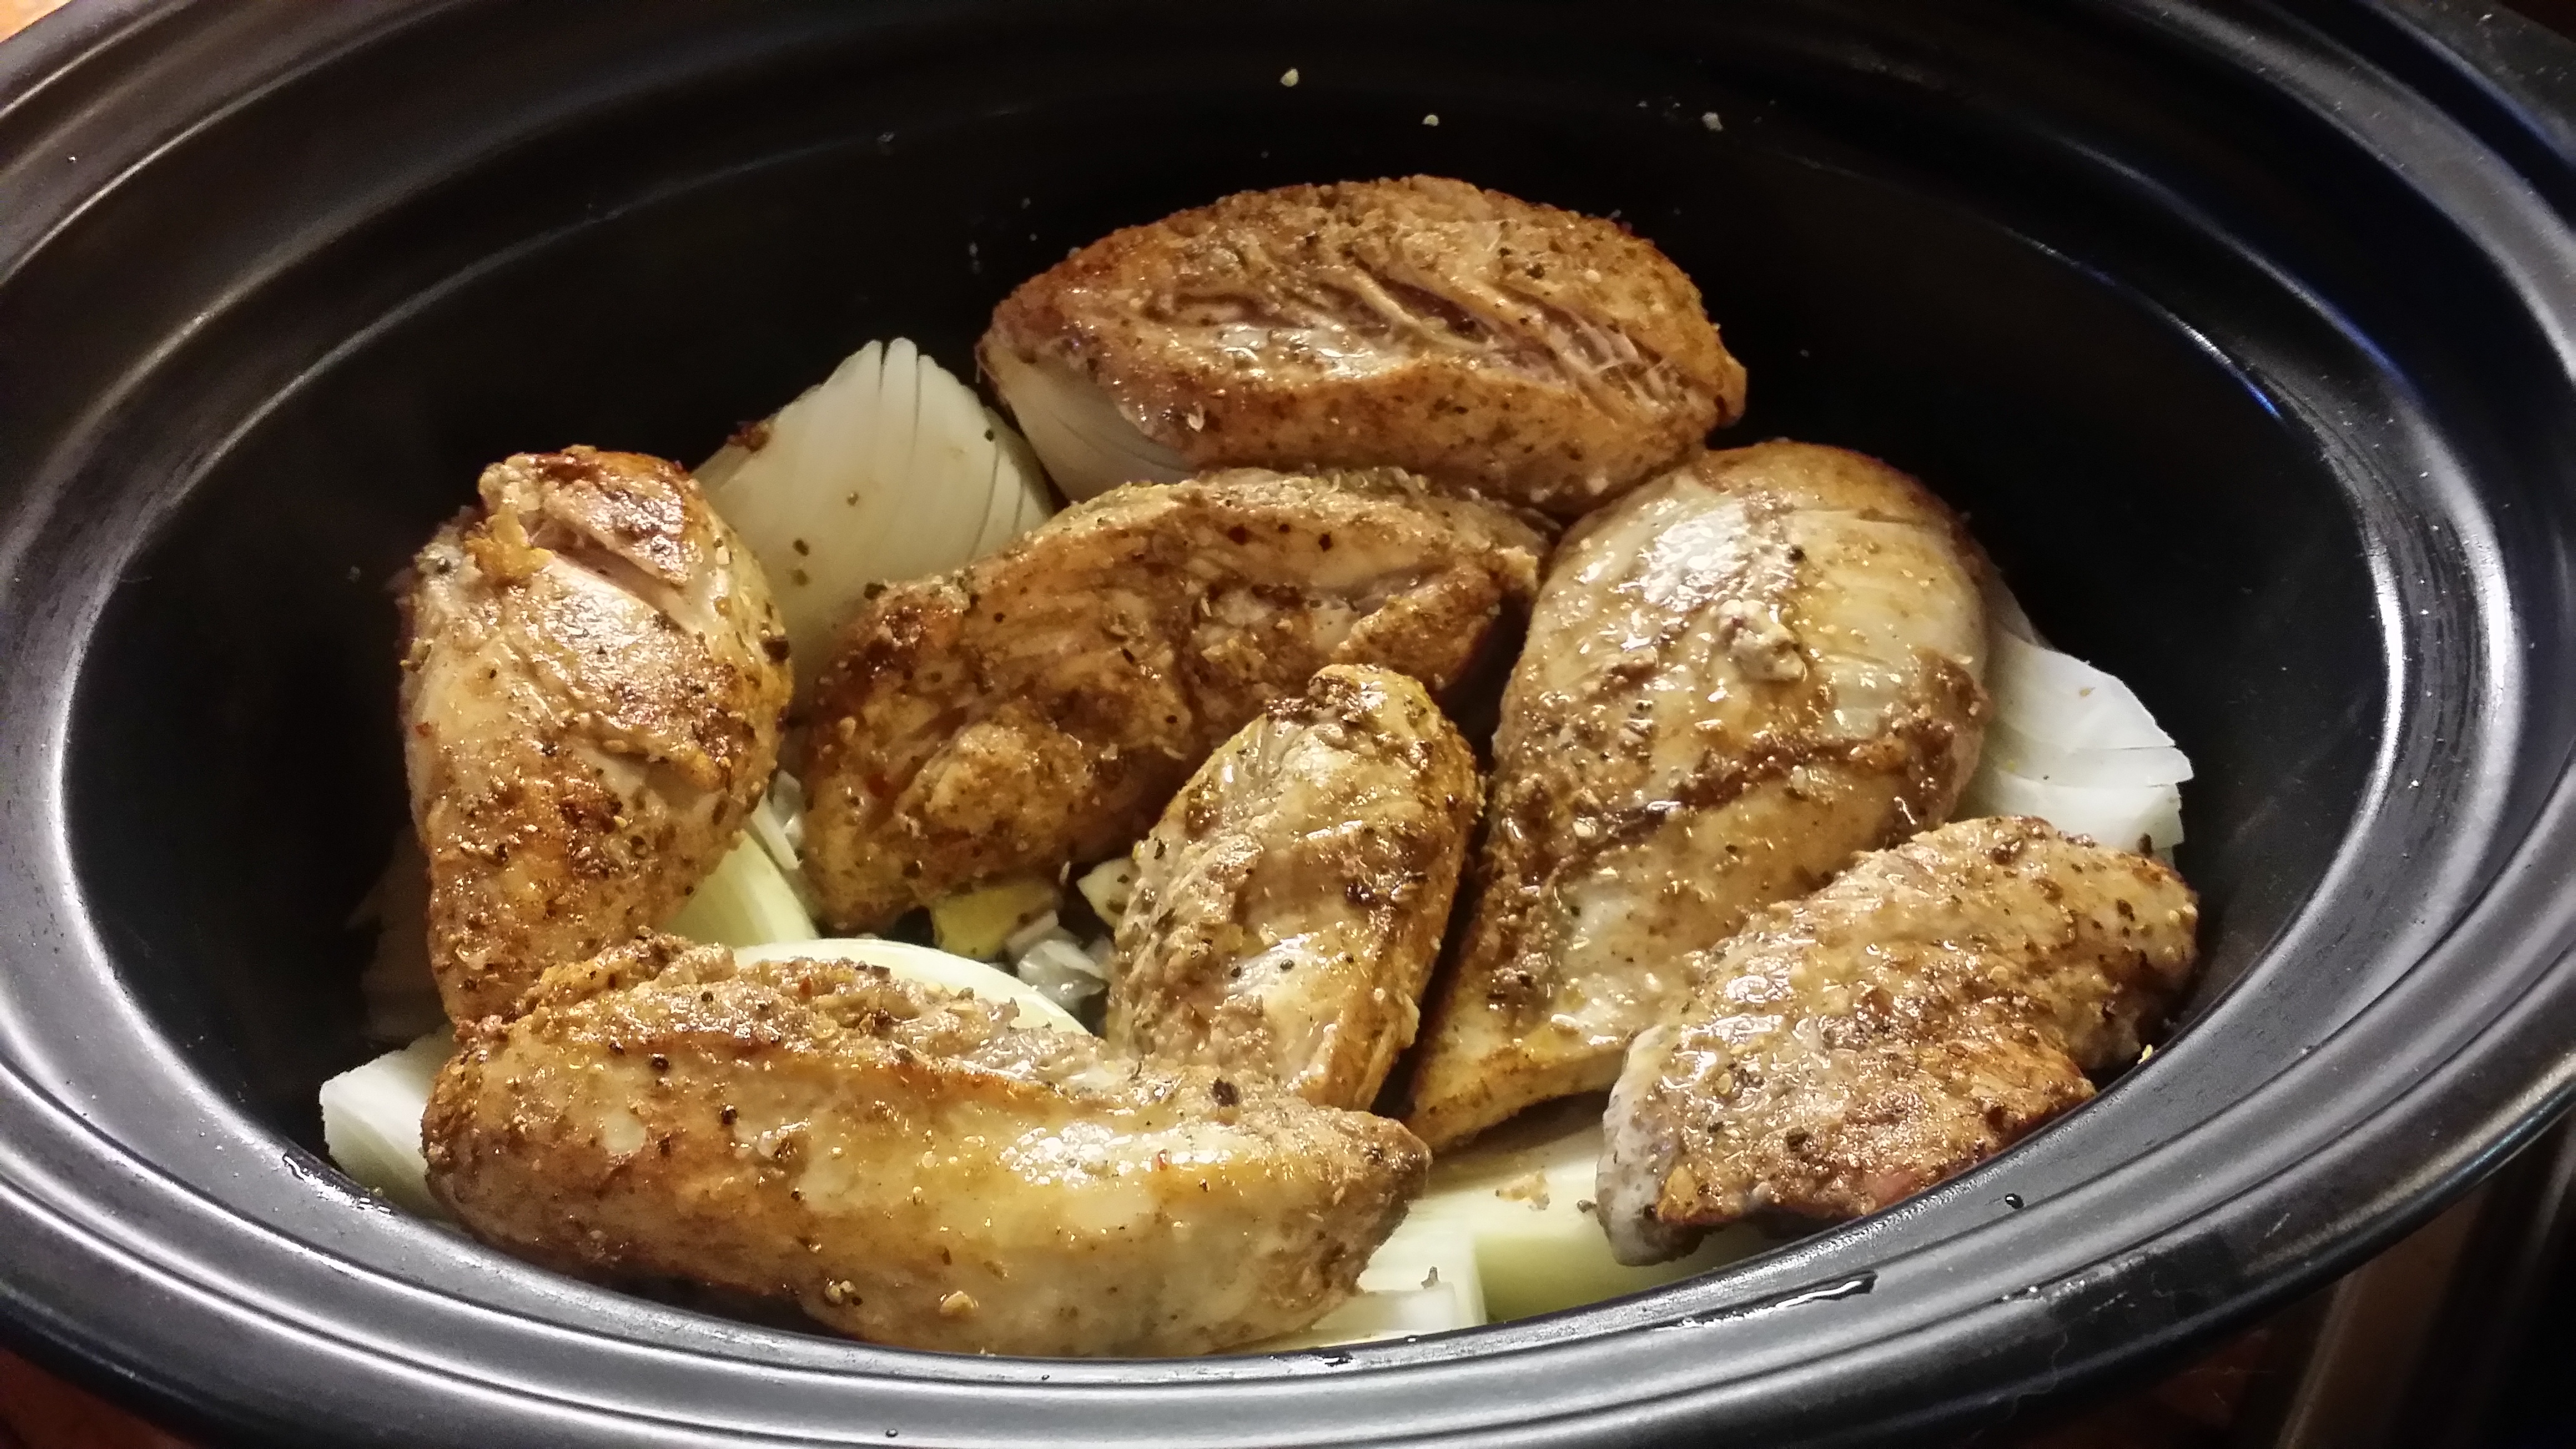
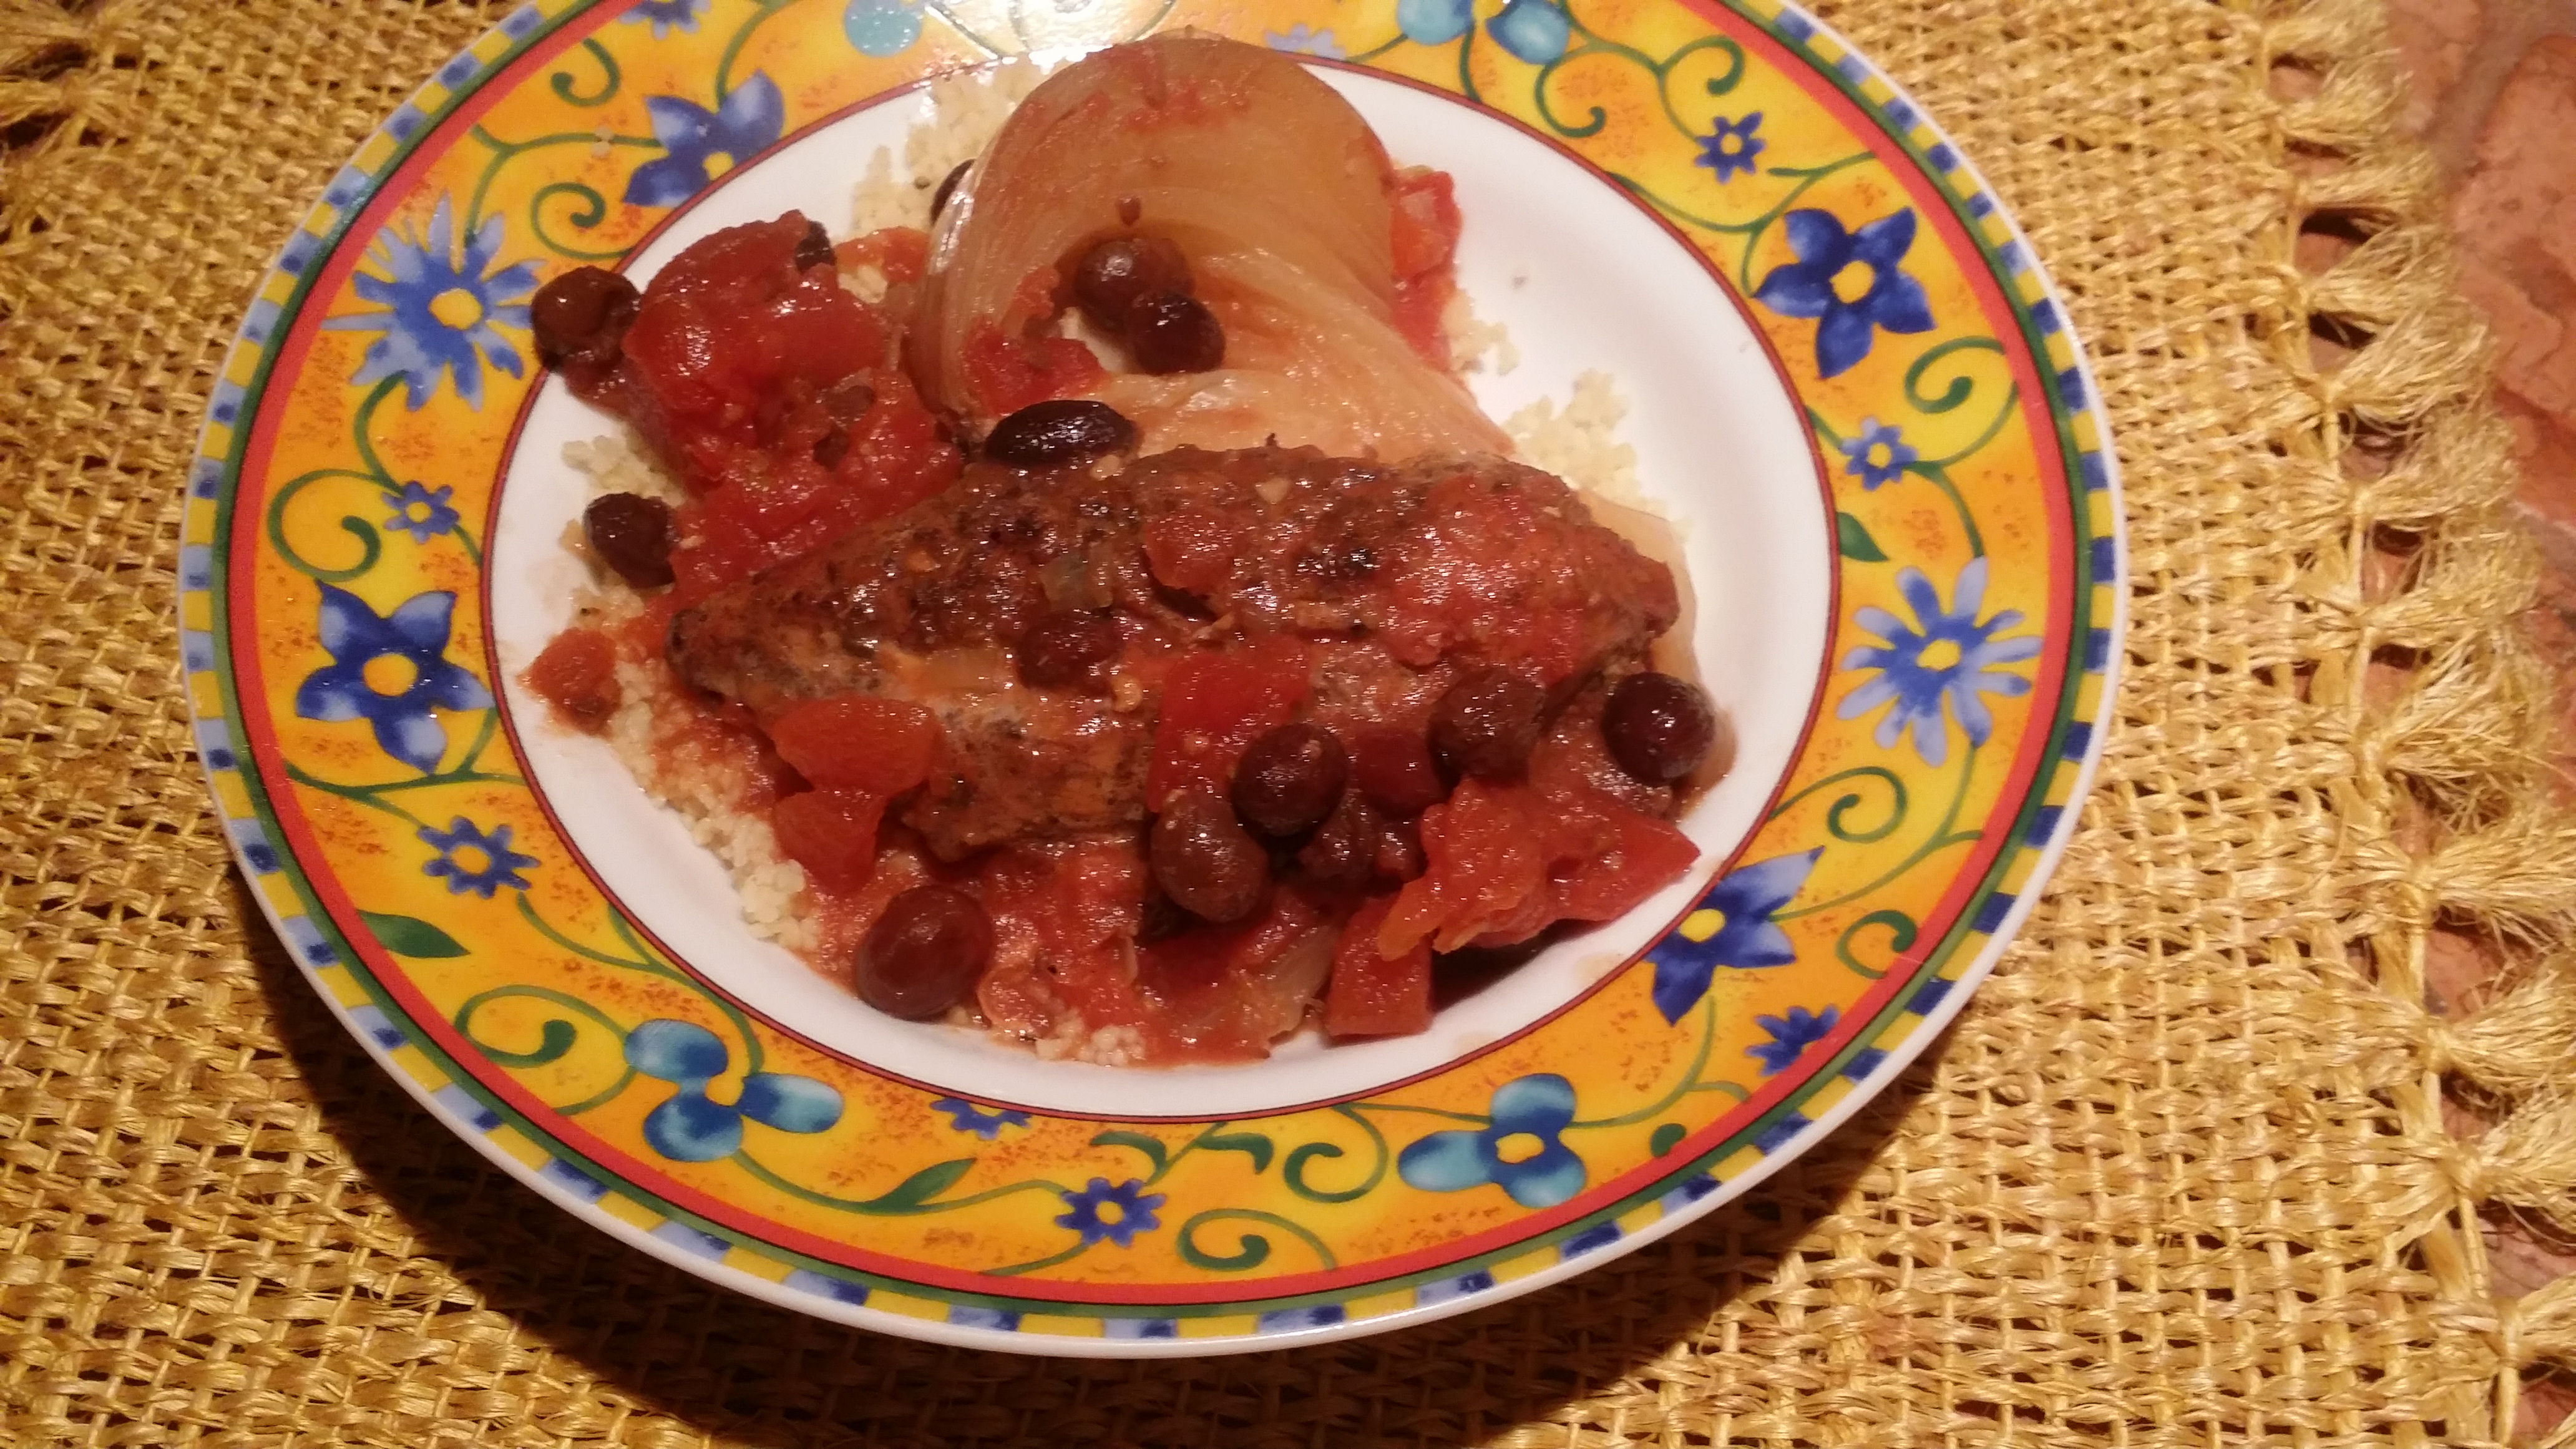
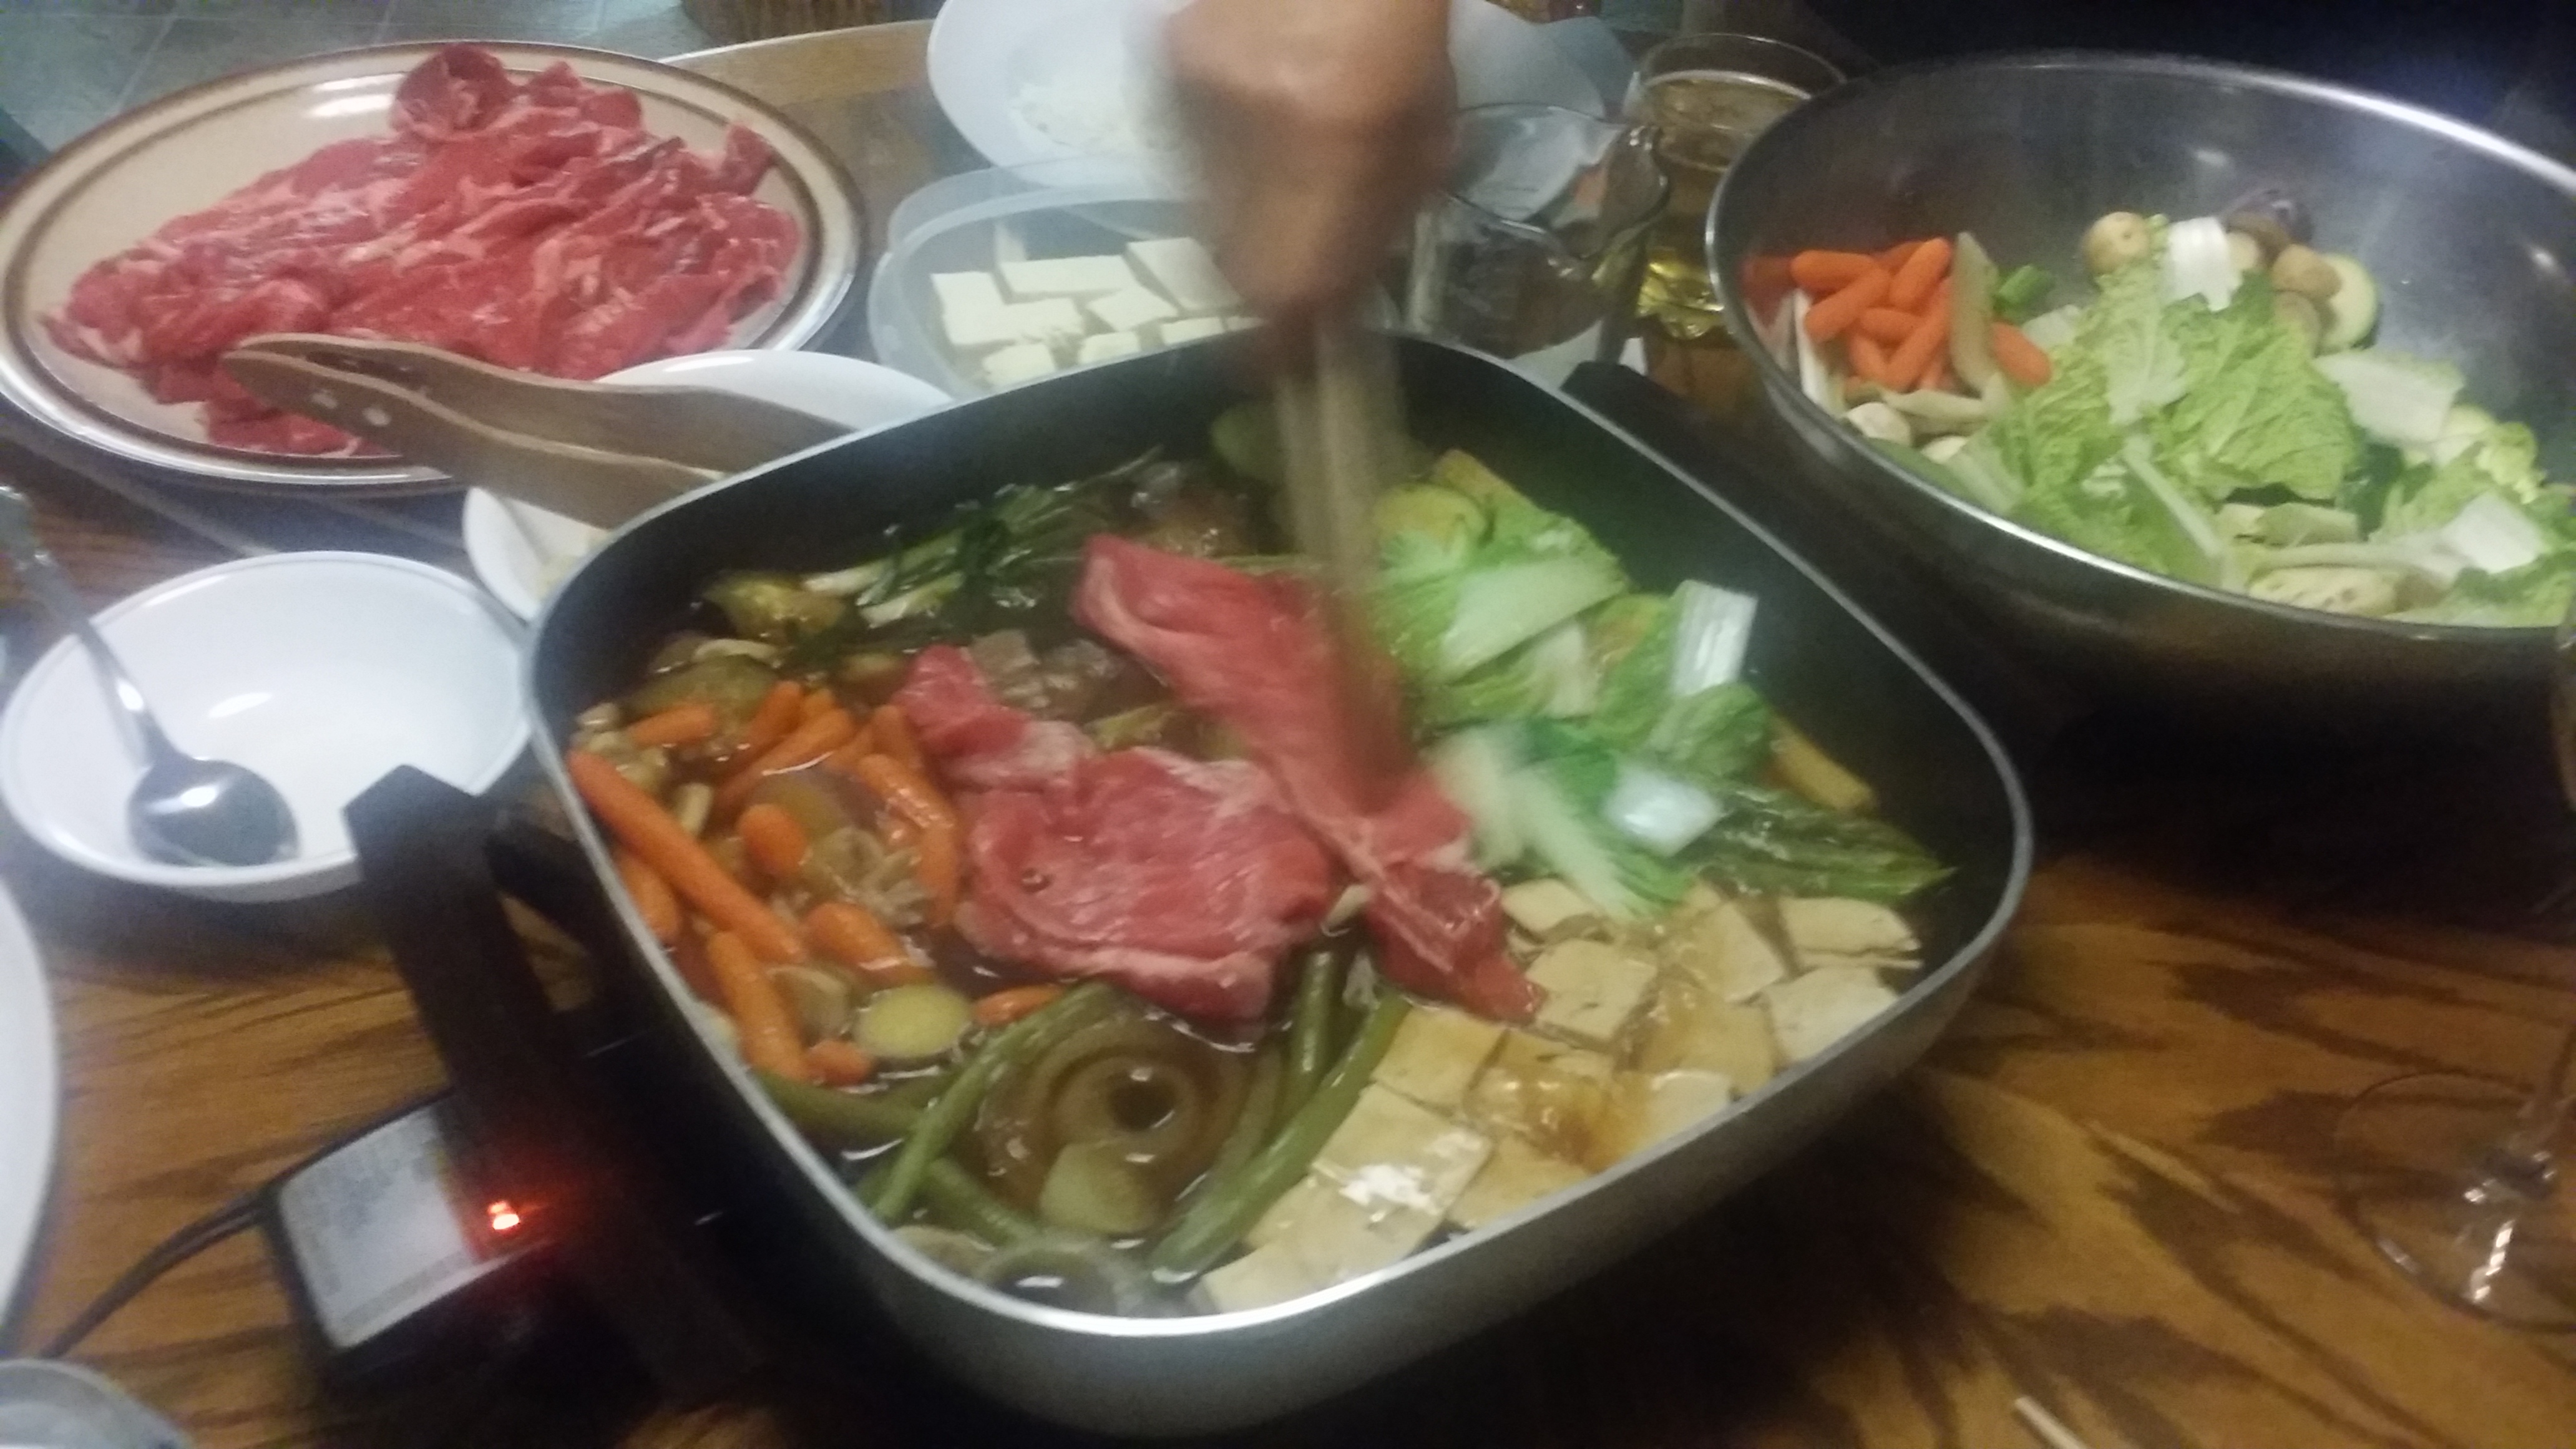
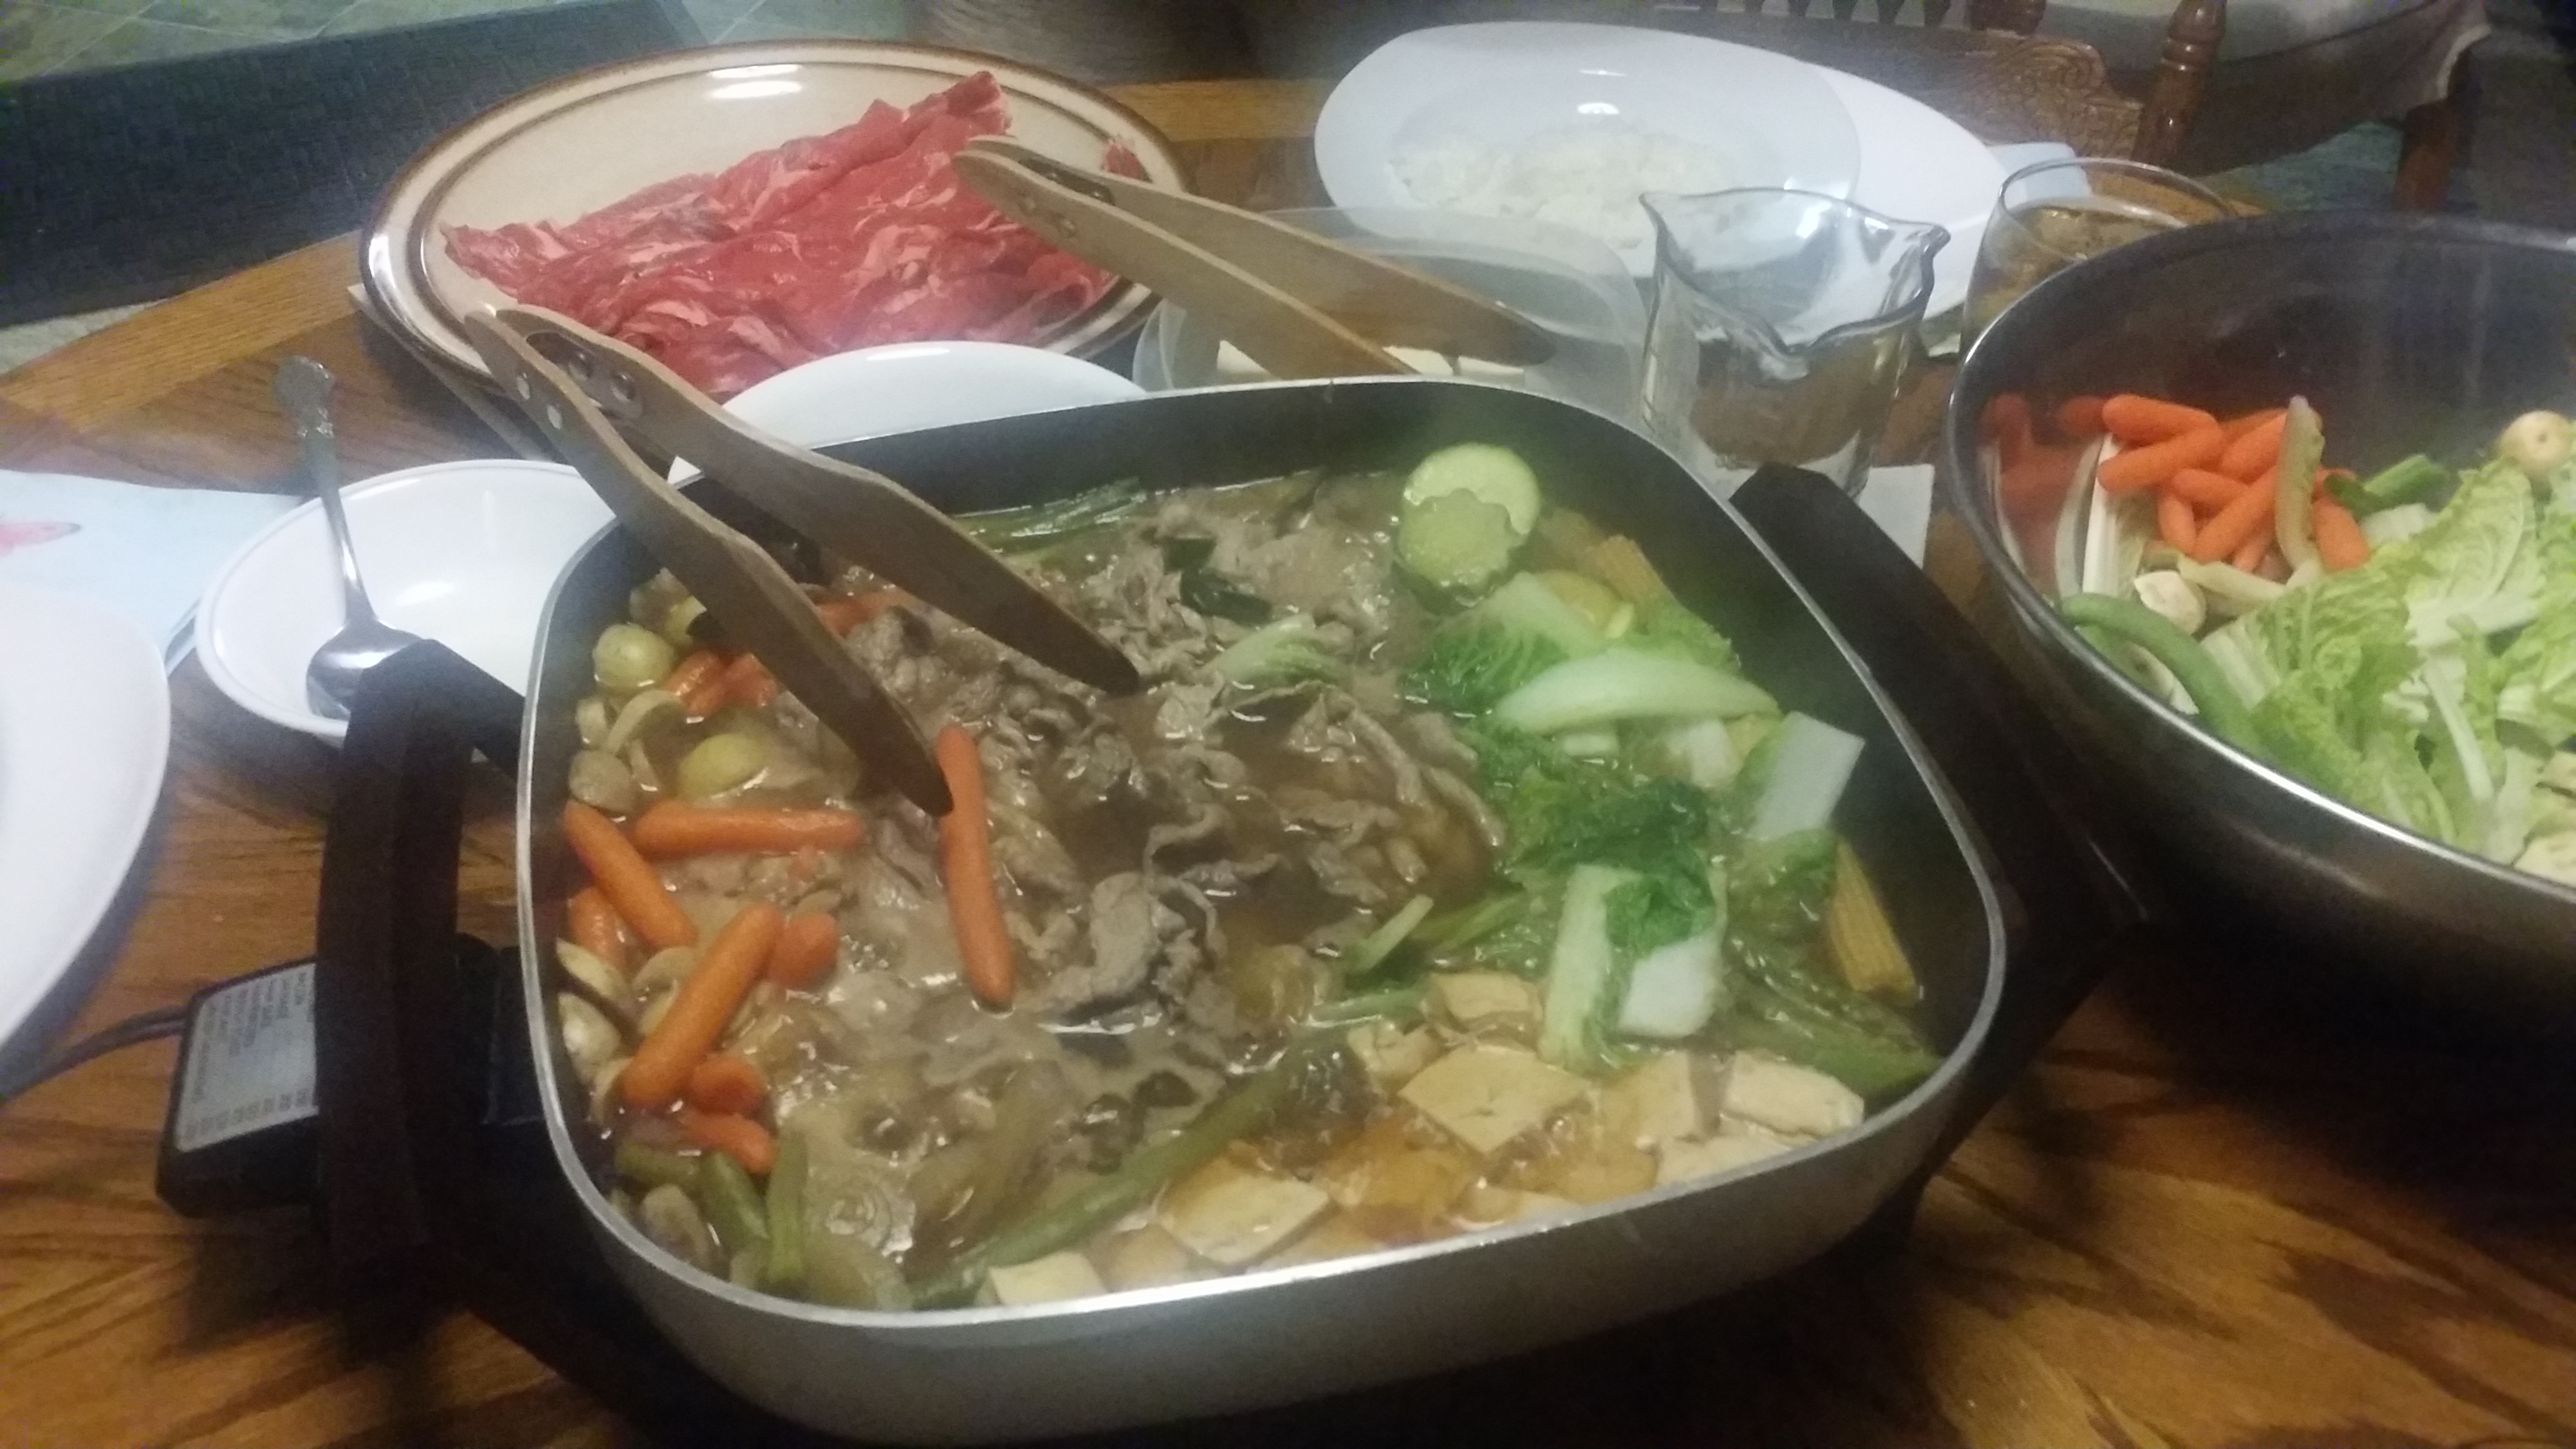
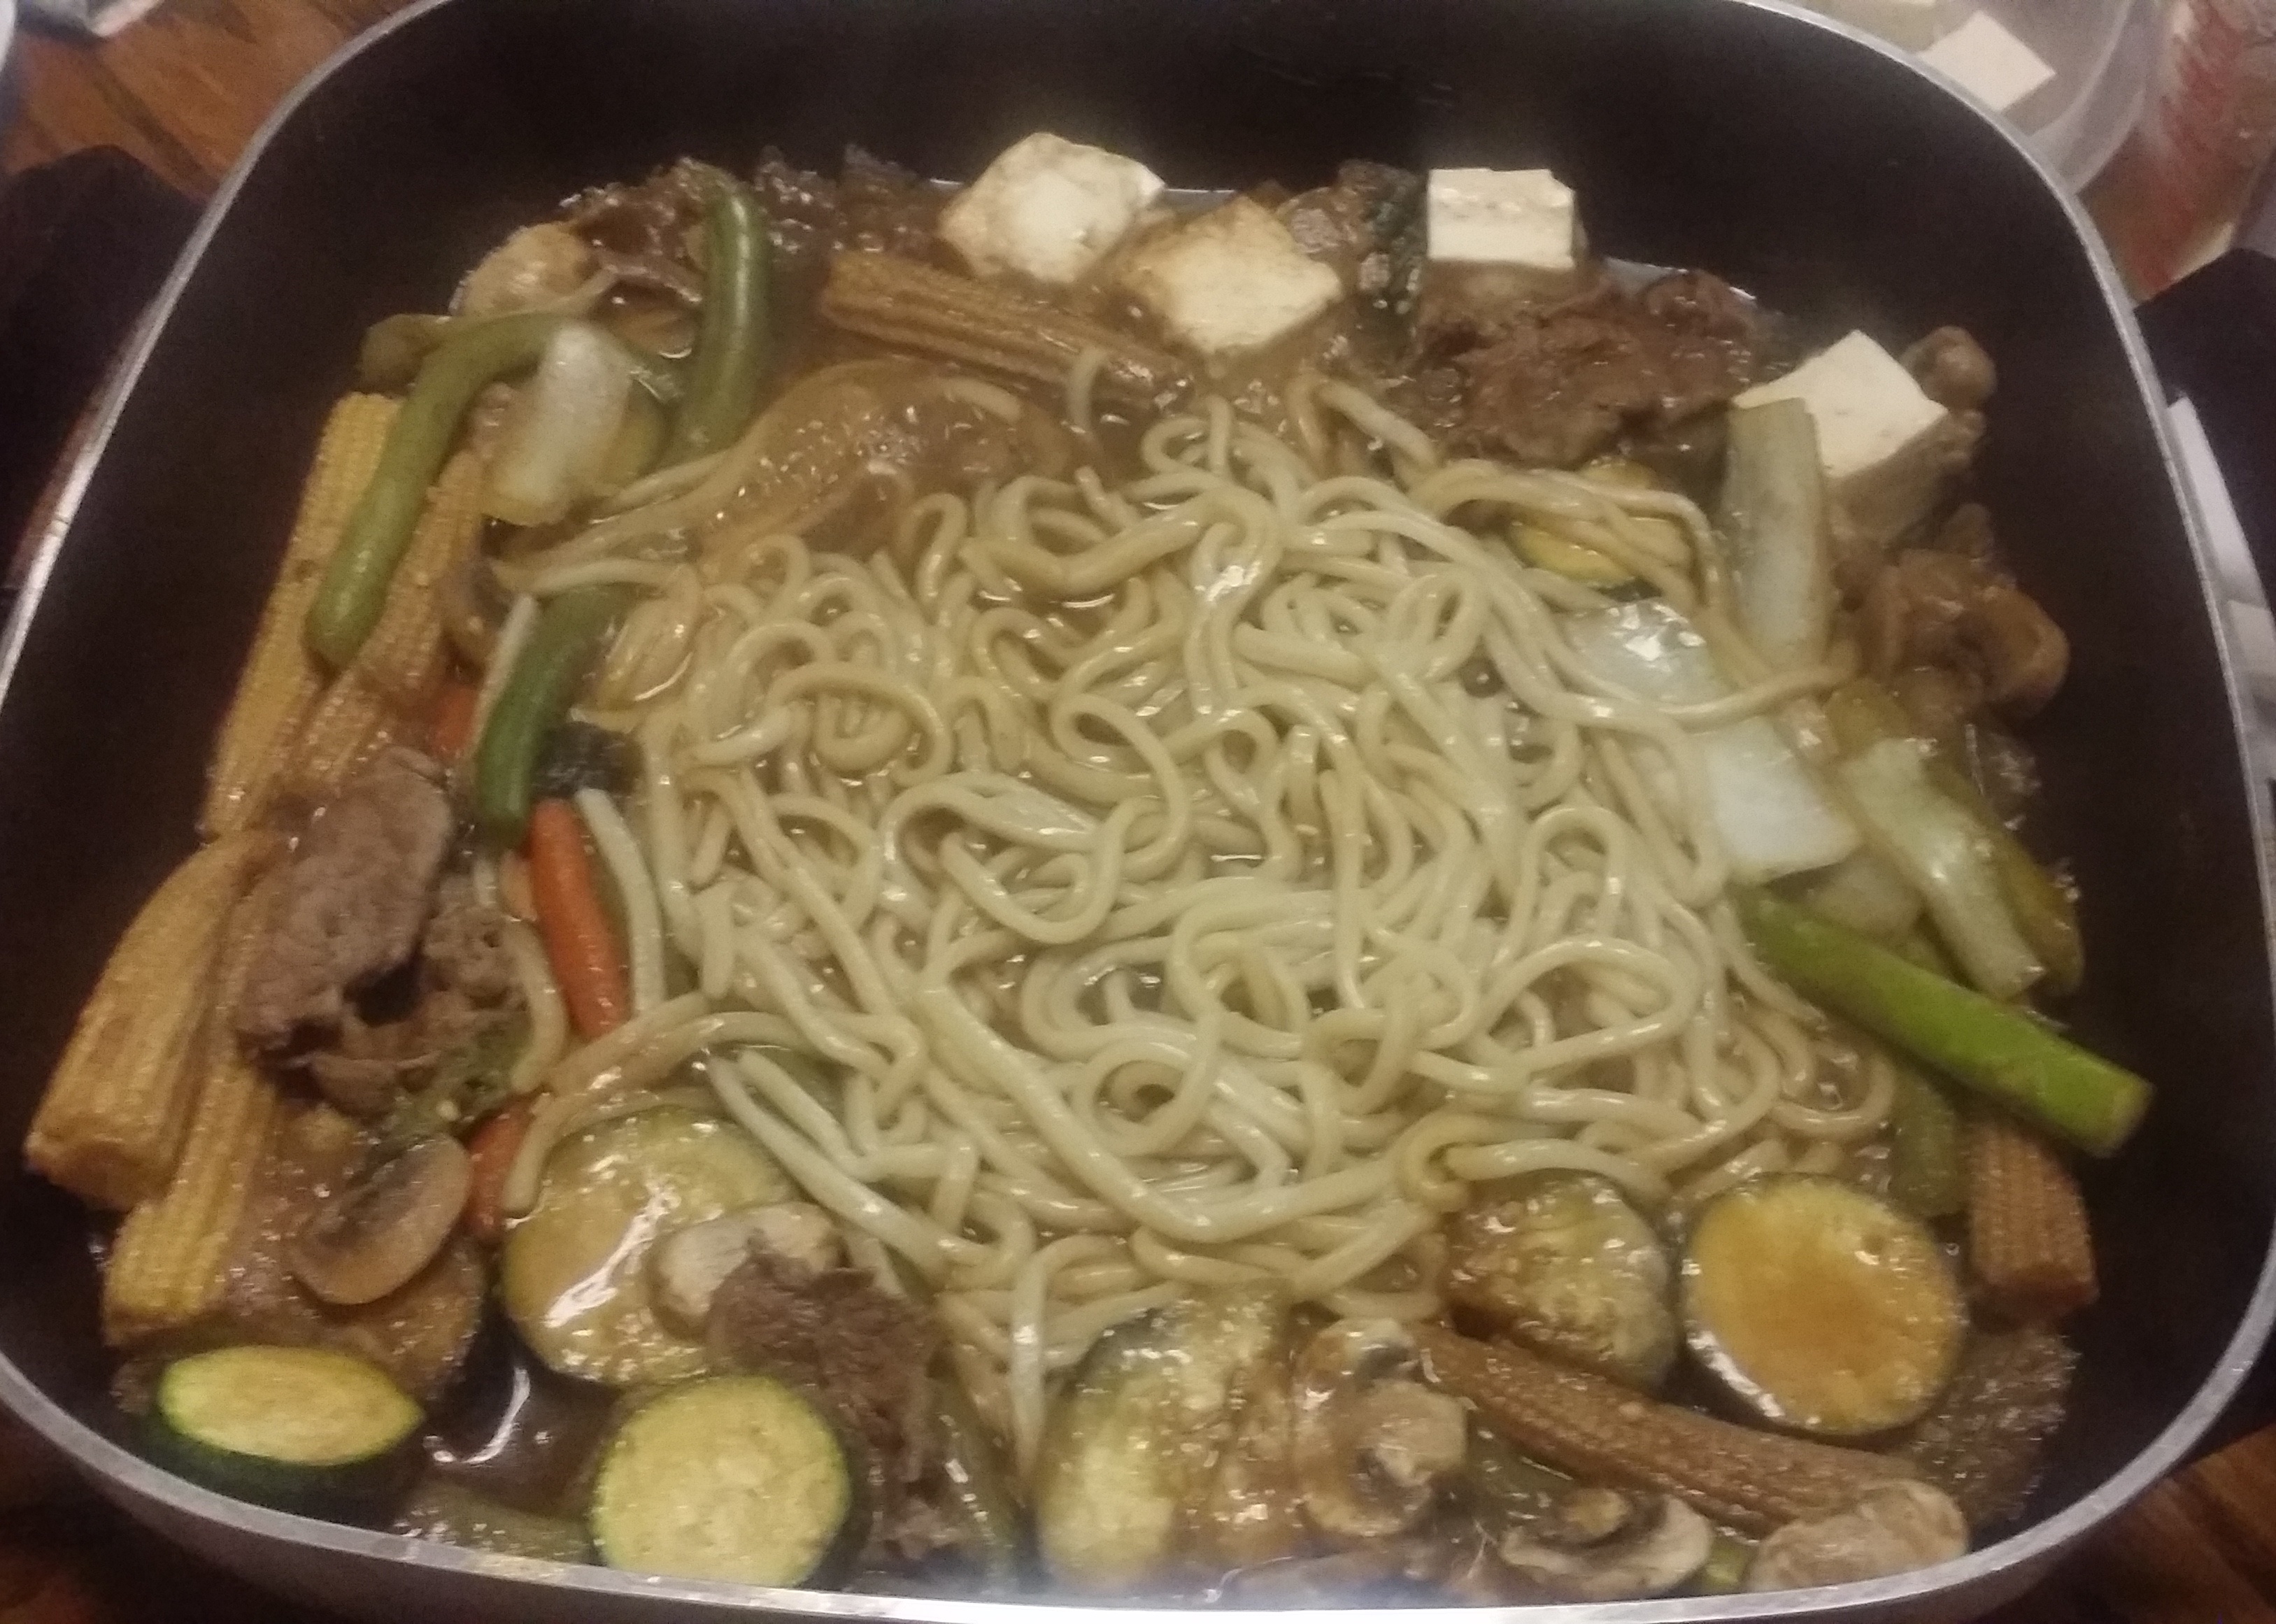
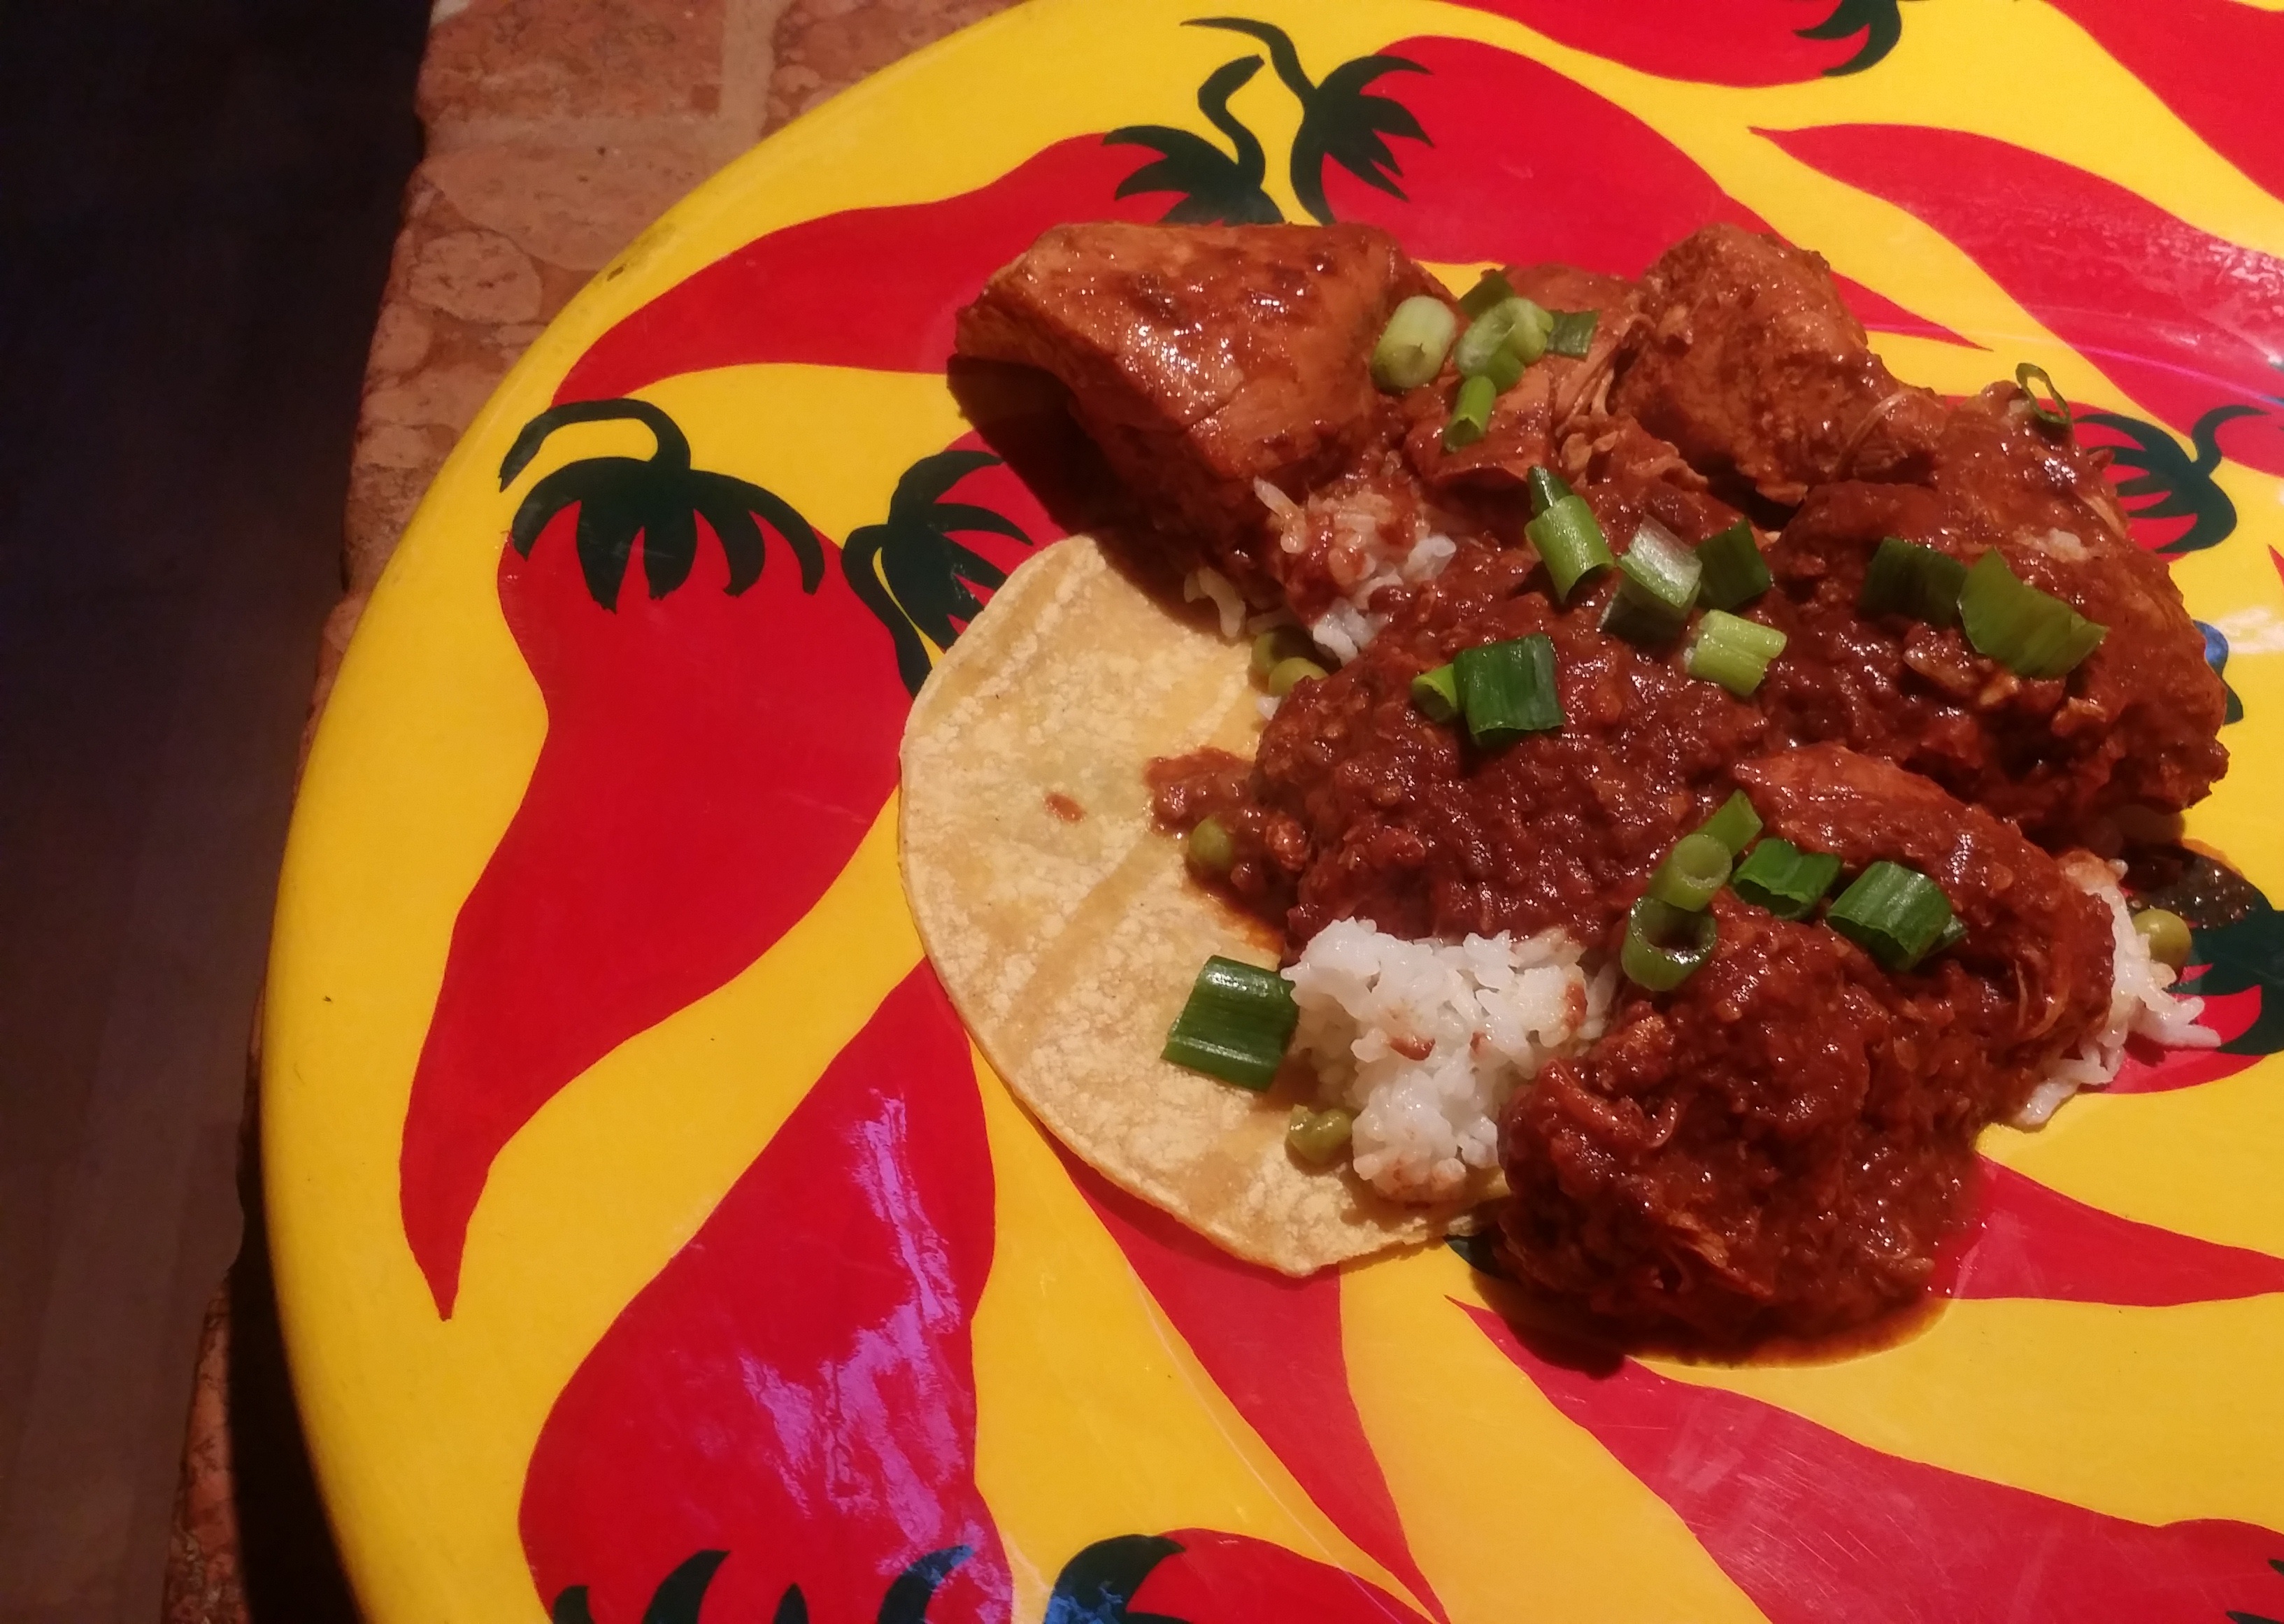
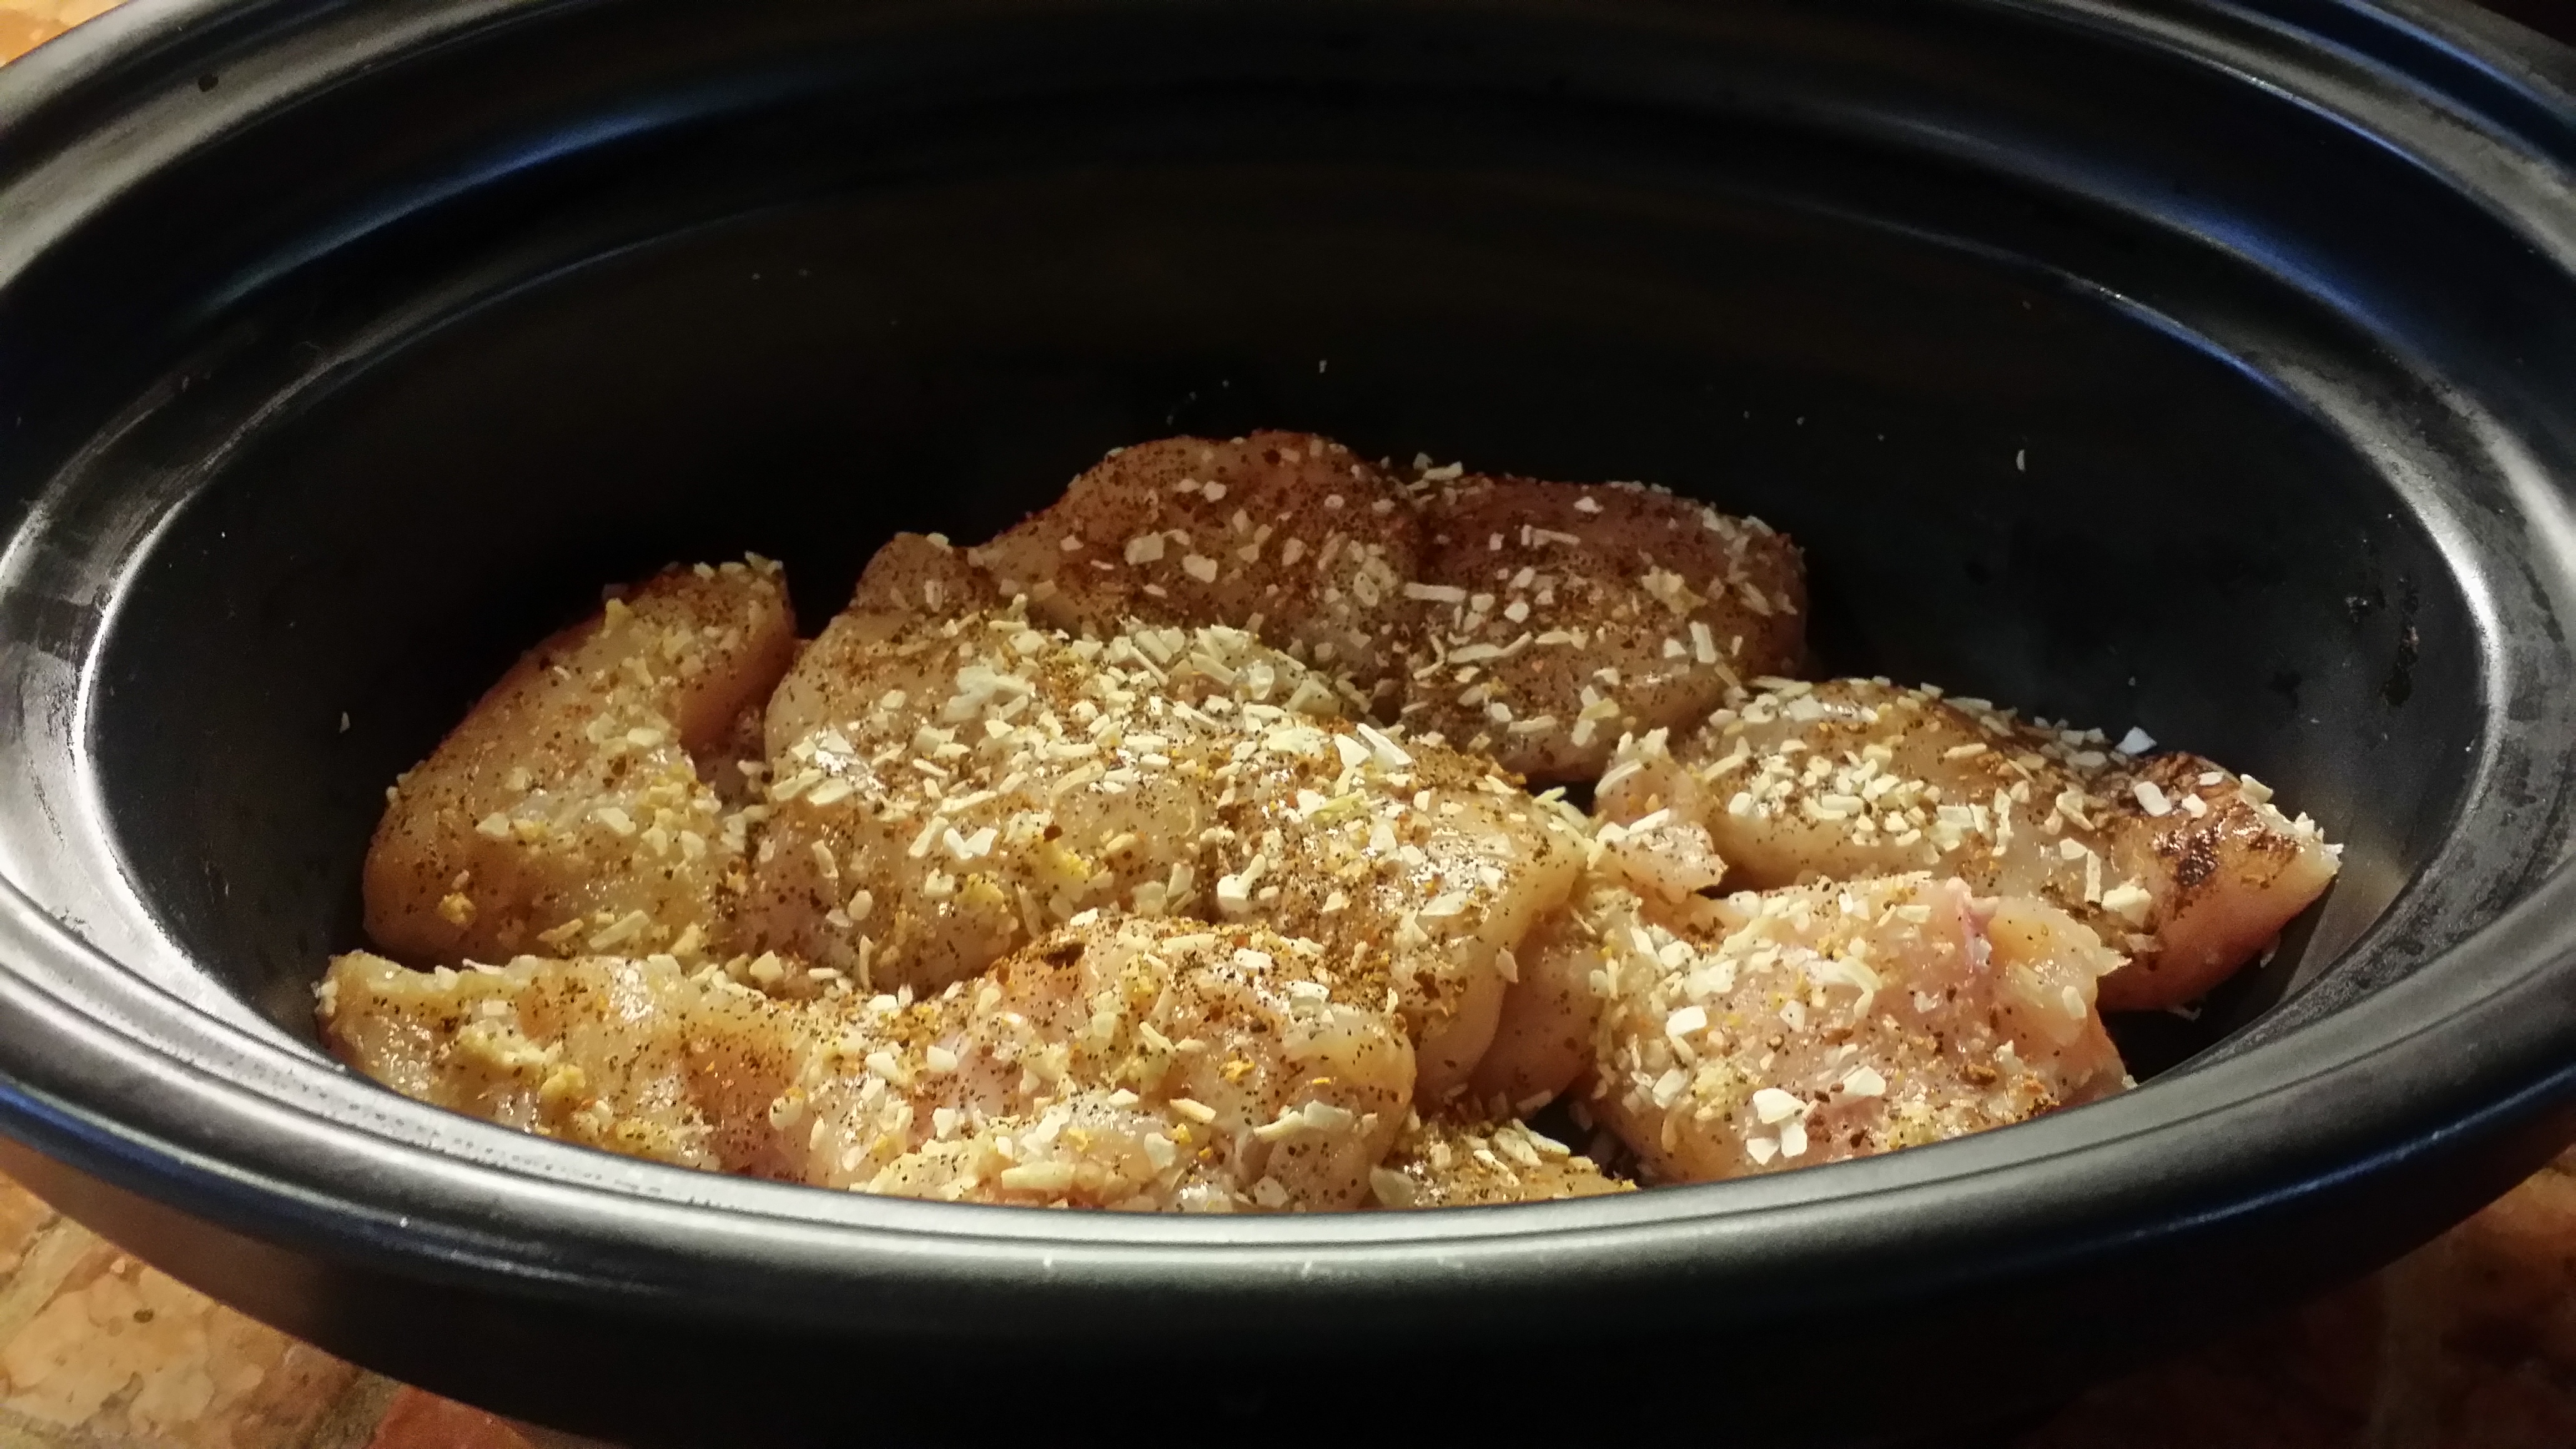
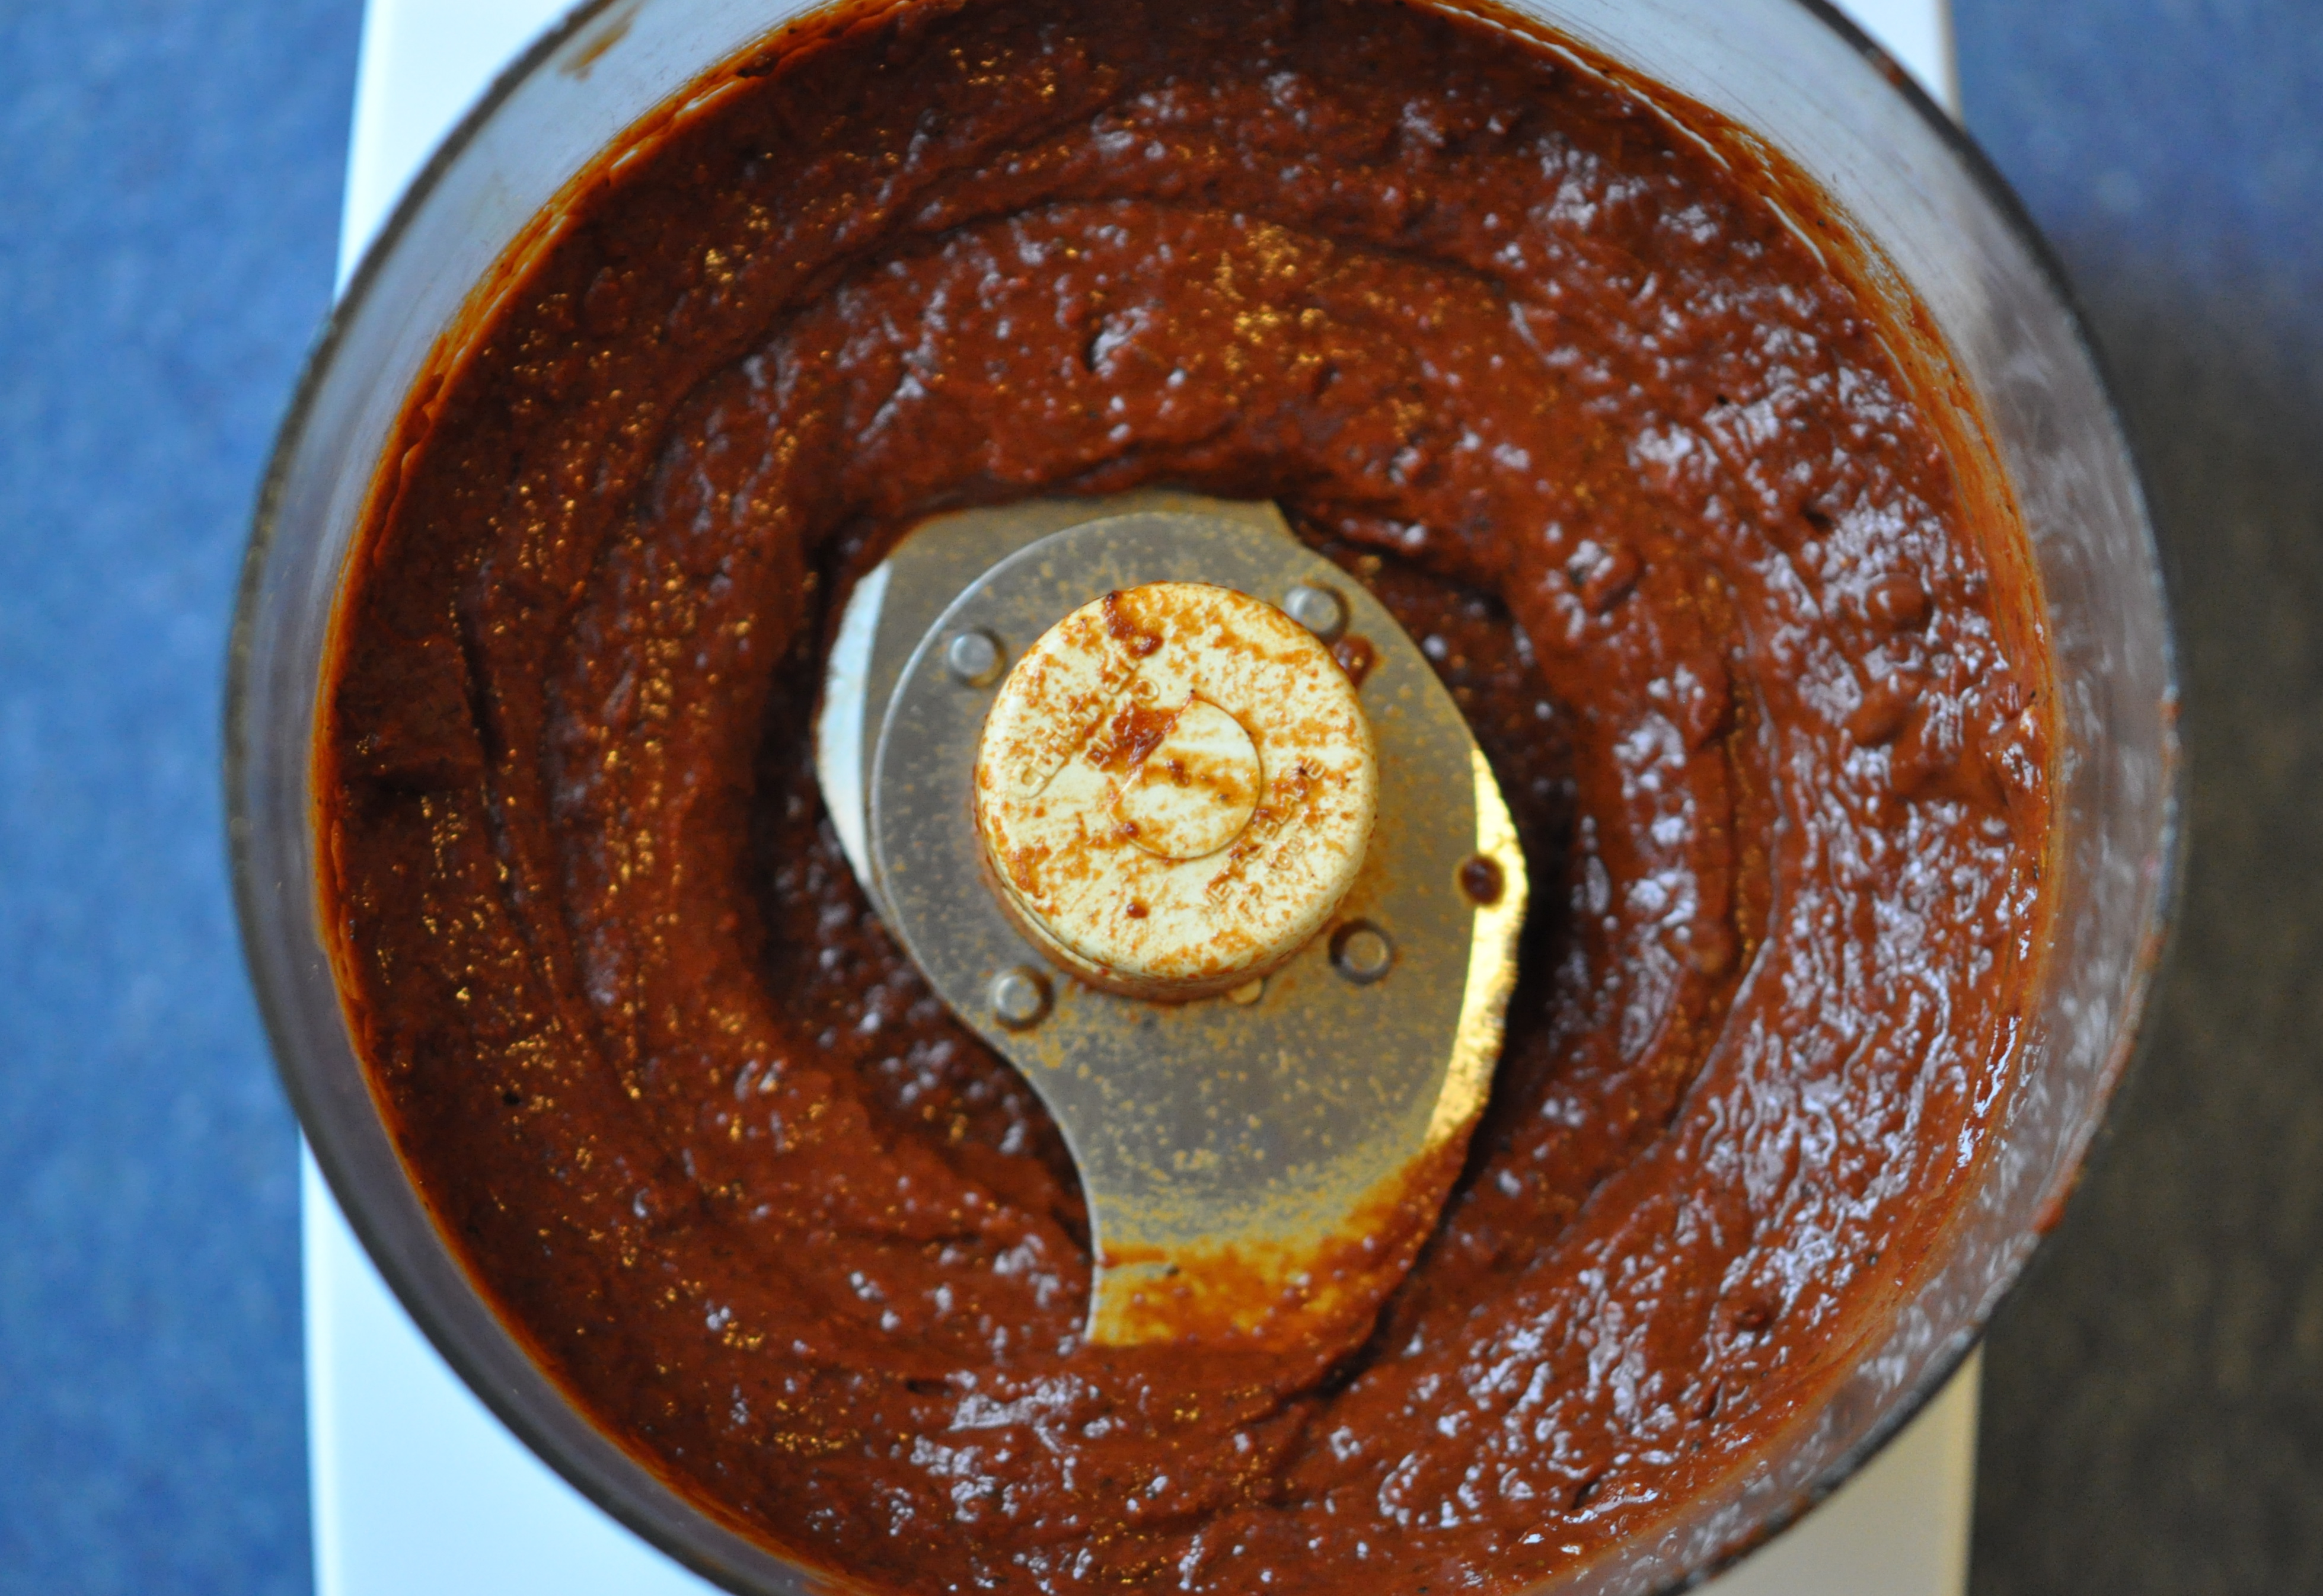
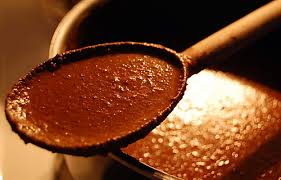
Nothing replaces it. The ‘bone broth’ most people are now referring to is the kind that you cook for up to two days where the bones begin to disintegrate and then you strain everything through a sieve to get only the liquid.  This has to be done with chicken because beef bones don’t really disintegrate entirely. I can’t even tell you how long it would take if they did. With beef you make sure to get bones with as much marrow in them as possible because the marrow is what gives you the nutritive qualities that have all the healthy benefits. Bone broth builds bones, and the likely reason is it’s high in gelatin — collagen. And collagen is what provides the framework for good bones. That’s what’s needed to lay on calcium and other minerals. Gelatin is one of the healthiest foods you can eat and has benefits ranging from reducing wrinkles (I’m told it’s even better than botox but I wouldn’t know!), healing joints, building stronger bones, and even improving dental health. The biggest benefit of gelatin is that it is apparently a gut healer.bones2
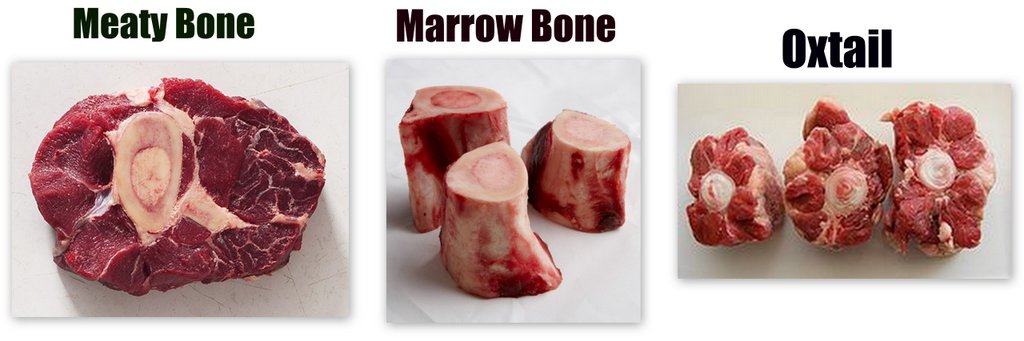
I’ve been buying large grass fed beef shanks with marrow and add **oxtail for flavour.  I brown them first before putting them into my large slow cooker set on high for one hour and then low for as long as it takes for the marrow to soften and the meat to fall away from the bones.  Last time it took 36 hours.  This is the original slow cooking. They will create their own juices over time (just make sure you check to make sure they don’t dry out – add water if you need to) but you can always put them into a large pot of water, bring to a boil and then simmer for hours.  Then once cool, remove all the bones, cut up the meat and set aside.  Then cut up your veggies (garlic, onion, celery, carrots) and add spices and 2-3 bay leaves to the pot.  If using a slow cooker you can now add water.  I put some of the bones back in with the vegetables and remove once the veggies are fully cooked.  Once the veggies are soft and the stock is tasting good I then add the meat and a bunch of cut-up kale and sometimes serve over tiny egg noodles or macaroni for added heartiness.  See? It’s so easy – just that everyone is in so much in a hurry now to have it…now.

A great pot of soup is nurturing and at this time of year especially there’s always some on hand in my house either in the fridge or freezer.  And it tastes like what your grandmother used to make.  Which is all the rage.

Nice to know grannies are trending

*The only difference between a stock and a broth is a stock uses bones, and a broth is the liquid the meat was cooked in.

**Oxtail: not only does it add more flavour but it also contains trace amounts of calcium, with 10 milligrams of calcium present in 100 grams of oxtail and is a very good source of iron.

Do you make soup from scratch or try to cut corners? – just wondering.

Food – back to basics

40 days and 40 nightsthat’s how much time I spent eating in restaurants while away over the holidays and beyond.

Maple Dijon Pork Chops seved over rice with side of crispy oven-baked kale. Photo: d. king
Maple Dijon Pork Chops served over rice with a side of crispy oven-baked kale.  Photo: d. king

That’s a lot of eating out, and more than I’m used to because I normally prefer to cook at home and eat out only on occasion.

A relatively small fridge in a hotel room can only hold so much.  It’s great for juice, coffee cream, breakfast stuff like yogurt and snacky items but since there was nothing to cook on I got to try out all sorts of restaurants.  So if anyone is going to Palm Springs or Las Vegas I have a whack load of recommendations.

What’s funny about all of this is that when I told my friends, I found out that most of them thought it was great.  Turns out they’d  prefer to eat out in restaurants rather than have to cook.  At first it was fun but then it felt a bit strange not having to do anything.  No shopping, no preparation, no cleanup, no nothing.  I started to miss it.   I ended up going to grocery stores, buying what I could that would be easy to assemble in a hotel room which was mostly salad items.   And picking up ready made stuff for picnics – which is another way of eating outside.

It was a good test.  I got to try a lot of good restaurants and miraculously ended up gaining only a few pounds which could have been a lot worse but I’m reversing the damage – I’m just about back to where I was.  Luckily I did a lot of walking, swimming and some running while away.

So when I got home 3 weeks ago I decided to cook all meals at home (except for when a friend took me out for a belated birthday celebration and vice versa).  I decided to stick with simple, wholesome feel-good, healthy (mostly) comfort meals.  A lot of steamed or oven roasted vegetables, fish, chicken, lasagna, soup and I brought my slow-cooker (crock-pot) out of hiding.  I’ve been making a whole lot of stuff in that.

Here’s a recipe which is easy to make, rich in flavour and simply delicious.

Slow Cooked Maple Dijon Pork Chops

Serves 2-4

Ingredients:

4  bone-in (preferably) pork chops

1 large yellow onion, chopped

6 tbsp pure maple syrup

4 tbsp dijon mustard

1/2 cup cider vinegar

1/2 tsp salt

1/4 tsp pepper

2 tbsp vegetable oil

Directions:

Heat up the oil in a large skillet over high heat. When hot, add the pork chops and sprinkle generously with salt and pepper. Sear both sides of chops over high heat (about 2 minutes per side) then transfer to your Crock Pot.

Lower the heat to medium low and add the onions. Cook until onions are just starting to soften then add the cider vinegar, maple syrup, mustard, salt and pepper. Cook for 2 more minutes and then pour sauce over chops in the slow cooker.

Cook on low for 6-7 hours. Serve chops drizzled generously with sauce.

Time:

active time ~ 10 minutes

total time ~ 7 hours

ENJOY!


Quinoa Stuffed Bell Peppers

Here is a fast, easy, healthy recipe that most people will enjoy as a side dish or something different to take to a potluck.  quionoa3When I’ve made these on occasion, people really seem to enjoy them (unless everyone is lying which can happen). For vegetarians, just omit the meat.  You can use black beans and corn to turn it into something more southwestern and melt cheese overtop.  Use your imagination – they’re pretty foolproof.

Ingredients:

4-6 large red (or variety of colors) bell peppers

1 Tbsp. olive oil

½ large white onion, diced

2 cloves garlic, finely minced or pressed

1 lb. ground turkey

1 tsp. red pepper flakes

1 Tbsp. fresh parsley, chopped

1 cup cooked tricolor quinoa

2 cups tomato and basil pasta sauce

Directions:

  • Cup the tops off the peppers and remove all seeds. Set aside.
  • Heat large saucepan on medium heat. Drizzle olive oil in the pan, toss in diced onions, cook until onions start to turn clear (about 1 minute).  Add garlic, and stir.  Let onions and garlic simmer for 30 seconds before adding ground turkey.  Season with salt and pepper to taste.  Sprinkle in red pepper flakes and half the parsley; stir occasionally.  Save remaining parsley for garnish.
  • Once turkey is no longer pink, turn off the heat and drain excess liquid. Add 1 cup cooled quinoa and 2 cups pasta sauce, stir to incorporate.
  • Stuff each pepper with the filling (add a bit of cheese to melt overtop if you want) then place peppers upright in a small baking dish filled with a little water. Cover with tinfoil and bake in 350 degree oven for about 5 minutes until peppers are  slightly soft.  Some people prefer using a microwave to steam the peppers covered in plastic for 5 minutes.
  • Either way, cautiously remove them and plate the peppers individually. Garnish with parsley.

Serves 4 – 6

A few health benefits for Bell Peppers, Ground Turkey & Quinoa:

Peppers: the highest amount of Vitamin C in a bell pepper is concentrated in the red variety. Red bell peppers contain several phytochemicals and carotenoids, particularly beta-carotene, which lavish you with antioxidant and anti-inflammatory benefits. The capsaicin in bell peppers has multiple health benefits. They contain plenty of vitamin C, which powers up your immune system and keeps skin youthful.

Turkey: when you compare ground turkey with its beef counterpart, they’re relatively even. But ground turkey comes in a fat-free version that could be the best option for your heart. It’s a food low in both sodium and saturated fat, making it a great choice in general—and especially solid for those watching their blood pressure or cholesterol. Turkey also packs a nutritional punch with a healthy dose of B-complex vitamins, which help regulate cholesterol levels and promote healthy blood circulation.  Just make sure the packaging specifies ground turkey breast and that it’s labled at least 90% lean. (If not, there’s probably dark meat and skin mixed in, adding unwanted calories and fat.)

Quinoa: in comparison to cereal grasses like wheat, quinoa is higher in fat content and can provide valuable amounts of heart-healthy fats like monounsaturated fat (in the form of oleic acid). Quinoa can also provide small amounts of the omega-3 fatty acid, alpha-linolenic acid (ALA). Given this higher fat content, researchers initially assumed that quinoa would be more susceptible to oxidation and resulting nutrient damage. However, recent studies have shown that quinoa does not get oxidized as rapidly as might be expected given its higher fat content. This finding is great news from a nutritional standpoint. The processes of boiling, simmering, and steaming quinoa do not appear to significantly compromise the quality of quinoa’s fatty acids, allowing us to enjoy its cooked texture and flavor while maintaining this nutrient benefit. Food scientists have speculated that it is the diverse array of antioxidants found in quinoa—including various members of the vitamin E family like alpha-, beta-, gamma- and delta-tocopherol as well as flavonoids like quercetin and kaempferol—that contribute to this oxidative protection.

Source: let’s eat – OC Family

Let me know if you like this recipe

Food – Sweet & Savoury

I find INSPIRATION everywhere – sometimes in the strangest places

cutting up the ginger & getting ready to make cake
chopping ginger & getting ready to make the cake with all ingredients in the background

These delicious recipes came to me just last week when I was lying in my dentist’s chair with headphones on looking up at the TV on the ceiling (anything to divert my attention away from the work at hand) watching the Food Network channel.  Can you think of a better way to spend an hour while having your teeth cleaned? The two recipes that I saw looked so appealing that I made them both on the same day to rave reviews.

The first recipe is sweet and perfect for guests coming over around or on Christmas day, and the second reminded me that I had not made lasagna in ages.  Both were excellent and I was told that the lasagna was the best ever.  I’ve never followed a recipe for lasagna before but this one looked too good not to follow…with a slight diversion as usual.

Gingerbread Jars with Cranberry Curd

You can use different sized jars - fun way to serve
You can use different sized jars – my version
Nancy's original
Nancy’s original – you can decorate as you like

Ingredients
Gingerbread:
1 stick (8 tablespoons) unsalted butter, melted, plus extra butter at room temperature for greasing the pan
1/4 cup orange juice
1/2 cup golden raisins
1 cup molasses
1 cup (8 ounces) sour cream
2 2/3 cups all-purpose flour, divided
1 1/2 teaspoons ground ginger
3/4 teaspoon baking soda
1 teaspoon ground cinnamon
1/4 teaspoon ground cloves
1 teaspoon kosher salt
1/3 cup crystallized ginger
Cranberry Curd:
1 1/2 cups sugar
1/4 cup cranberry juice
1/4 teaspoon kosher salt
6 large egg yolks
1 stick (8 tablespoons) unsalted butter, cut into pats
Sweetened whipped cream, for serving

Directions
Make the gingerbread: Preheat the oven to 350 degrees F. Grease an 8-by-8-inch cake pan with a little softened butter and line with parchment paper, letting any excess hang over the edges of the pan.

Place the orange juice and raisins in a measuring cup and set aside to soak. In a mixing bowl add the melted butter, molasses and sour cream, whisking until well combined. Add 1 2/3 cups of flour, the ginger, baking soday, cinnamon, cloves and salt and whisk together until combined. Drain the raisins, then add them to the batter along with the remaining 1 cup of flour and the crystallized ginger. Combine with a silicone spatula, then pour into the prepared pan and bake until a cake tester inserted into the center comes out clean, about 45 minutes. Remove the cake from the oven and set aside to cool completely before cutting the cake into 1-inch cubes.

While the cake bakes, make the cranberry curd: Into a saucepan set over medium heat, add the sugar, cranberry juice and salt and whisk until smooth. Once the sugar is dissolved, whisk in the egg yolks, then add the butter. Reduce the heat to low and cook, stirring constantly, until the cranberry curd thickens and reaches 170 degrees F on an instant-read thermometer. Remove from the heat and transfer the curd to a bowl to cool.

To assemble: Place a few pieces of the gingerbread cubes in a small jar, add 2 tablespoons of the cranberry curd on top of the gingerbread and top with *whipped cream.

*TIP: I added a little pure peppermint extract to the whipping cream. You can also make it a lot easier and just slice or cut the cake & drizzle the curd over it.

This Recipe courtesy of Nancy Fuller – Farmhouse Rules (the Food Network)

 Lasagna alla Besciamella20151211_195854Ingredients
Meat Ragu:
3 tablespoons extra-virgin olive oil
1 yellow onion, finely chopped
2 cloves garlic, pushed through a press
1 pound ground beef
2 links sweet Italian sausage, casings removed
2 links hot Italian sausage, casings removed
2 teaspoons kosher salt
1 teaspoon dried basil
1 teaspoon Italian seasoning
1 teaspoon dried oregano
Freshly ground black pepper
Three 26.5-ounce boxes strained tomatoes, such as Pomi
1 cup dry red wine

Besciamella:
3 cups whole milk
1 stick (8 tablespoons) unsalted butter
1/2 cup all-purpose flour
1/8 teaspoon ground nutmeg
Kosher salt and freshly ground white pepper

Lasagna:
1 pound no-cook lasagna noodles, such as Barilla
2 1/4 cups finely grated Parmigiano-Reggiano cheese
One 8-ounce package part-skim low-moisture shredded mozzarella

Directions
To make the meat ragu: Heat the oil in a Dutch oven over medium-low heat. Add the onion and garlic and saute until soft and fragrant, about 8 minutes. Add the ground beef, sausage, salt, basil, Italian seasoning, oregano and pepper to taste and increase the heat to high. Cook, breaking up the meat with a wooden spoon, until browned all over. Add the tomatoes. Pour some of the wine into the empty tomato boxes to rinse out the last bits of tomatoes and add to the pot, along with the remaining wine. Bring the mixture to a boil. Reduce the heat and simmer, partially covered, until the sauce thickens and the flavors come together, about 1 hour. Add a healthy amount of black pepper.

To make the besciamella: Heat the milk in a small saucepan over medium heat until just simmering, then turn off the heat. Meanwhile, melt the butter in a medium heavy-bottomed saucepan over medium-high heat. Add the flour to the butter and cook, whisking constantly, until the mixture thickens and then loosens again, about 2 minutes. Add the hot milk, whisking constantly. Bring to a boil. Add the nutmeg and salt and pepper to taste. Reduce the heat to low and continue to cook, whisking almost constantly, for 2 minutes. Remove from the heat and use immediately.

To make the lasagna: Preheat the oven to 350 degrees F.

Spread an even layer of the meat ragu over the bottom of a 9-by-13-inch baking dish. Arrange 3 lasagna noodles over the sauce lengthwise across the short side of the pan. Avoid overlapping or allowing them to touch the sides of the pan because they will expand as they cook. Press down slightly to let the sauce spread around them. Cover with one-quarter of the besciamella and sprinkle with one-third of the Parmigiano-Reggiano. Add another layer of ragu. Add 3 more noodles, arranging them in the opposite direction from the first layer and breaking 1 of the noodles in half if necessary to fit. Add one-quarter of the besciamella and half of the mozzarella. Make a third layer of ragu, noodles (alternating directions again), besciamella and one-third of the Parmigiano-Reggiano. Add another layer of ragu, then the remaining mozzarella, noodles (alternating the noodles again), besciamella and ragu.

Cover the pan with foil and bake until heated through, about 35 minutes. Remove the foil and continue baking until the top is brown and bubbling, about 20 minutes more. During the last 10 minutes of baking, scatter the remaining Parmigiano-Reggiano all over. Let the lasagna stand for 10 minutes before serving.

*TIP – instead of the besciamella (Béchamel) sauce I used old-fashioned Ricotta cheese which Valerie’s mother makes and prefers and I did not use any wine for this (surprised,are you?).

Adapted from “One Dish at a Time” by Valerie Bertinelli

Recipe courtesy of Valerie Bertinelli
SHOW: Valerie’s Home Cooking
EPISODE: Ho! Ho! Ho! Company’s Comin

p.s. I have a thing for wearing aprons while cooking and have a little collection going on.  The one I’m wearing in the photo was a gift from my sister & it came with matching pot holders from a little boutique in Vancouver called “Wishlist”.  I have a vintage “Kenzo” with daisies & pockets that a friend picked up in Japan, animal prints from Africa, original white chef aprons and one that says “Living in Zin” that was a gift from friends I visited Napa with.  They all have a story, they’re all very useful and I feel like I’m getting down to business when I put them on.

Do you wear aprons? 


Food: SLOW cooked COMFORT food

It’s that time.  I’m In the MOOD for COMFORT FOOD

Sweet 'n Spicy Chicken
SLOW COOKED Sweet ‘n Spicy Chicken 

But I didn’t really have a choice. When my freezer had a meltdown last week I had to do some quick thinking as to what would be the best ways to use up lots of chicken, ribs, pork and fish within a short time span.  I baked, steamed and grilled but I also put a few things in the slow cooker.  Here are two recipes I tried for the first time that turned out extremely well.  I forgot how easy & convenient it is to use my slow-cooker. The only thing is that I took it one tiny step further –  instead of throwing everything into the pot (which most people tend to do) I advise first browning the meat in another pot.  It only takes a few extra minutes, one extra pot to clean and it will give you so much extra flavour.  Trust me – it’s worthwhile!

Recipe #1: SWEET & SPICY CHICKEN (slightly adapted from a Martha Stewart Recipe)

You can serve it Moroccan style in a tagine over cous cous (or on the side) and add cilantro or green onion.
TIP: You can serve it Moroccan style in a tagine over cous cous (or cous cous on the side) and add cilantro or green onion for an exotic spin.

INGREDIENTS – serves 4

  • 2 teaspoons ground cumin
  • 1/2 teaspoon ground cinnamon
  • Coarse salt and ground pepper
  • 4 chicken leg quarters (2 1/2 pounds total)  *I used boneless chicken breasts
  • 1 tablespoon extra-virgin olive oil
  • 1 medium yellow onion, cut into 1/2-inch wedges (root end left intact)
  • 3 garlic cloves, minced
  • 3-inch piece peeled fresh ginger, sliced into rounds
  • 1 can (28 ounces) diced tomatoes
  • 1/2 cup raisins

DIRECTIONS

  1. In a large zip-top bag, combine cumin, cimmamon, 3/4 teaspoon salt, and 1/2 teaspoon pepper; add chicken and toss to coat. In a large skillet, heat oil over medium-high. Cook chicken, skin side down, until golden, about 4 minutes each side.
  2. In a 5-to-6-quart slow cooker, place onion, garlic, and ginger. Add chicken, skin side up, 20151202_123330then top with tomatoes and their liquid and raisins. Cover and cook on high until chicken is tender, 3 1/2 hours (or 6 hours on low).

    Leftovers are always better the very next day
    Leftovers are always better the very next day


Recipe #2:

MAPLE DIJON PORK CHOPS 

mapledijonpork1serves 2

INGREDIENTS

2-3 large bone-in pork chops *(I used boneless but next time I’ll use bone-in as I think they have more flavour)

1 large yellow onion, chopped

5 tbsp pure maple syrup

4 tbsp dijon mustard

½  cup cider vinegar

1/2 tsp course salt

1/4 tsp pepper

2 tbsp vegetable oil

DIRECTIONS

Heat up the oil in a large skillet over high heat. When hot, add the pork chops and sprinkle generously with salt and pepper. Sear both sides of chops over high heat (about 2 minutes per side) then transfer to your slow cooker.

Lower the heat to medium low and add the onions. Cook until onions are just starting to soften then add the cider vinegar, maple syrup, mustard, salt and pepper. Cook for 2 more minutes and then pour sauce over chops in the slow cooker.

Cook on low for 5-6 hours (but check after 3 hours – depending on your slow cooker they could cook faster). Serve chops drizzled generously with sauce.

Tip: Try serving it with a side of egg noodles to help soak up the juice. It’s delicious.   The only thing is that there was not enough – no leftovers to enjoy next day!

Source: adapted from eat.live.run.com

What kind of food do you take comfort in at this time of year?


Food – Sizzling Sukiyaki

SUKIYAKI is the perfect nutritious dish for cooler weather to share among close friends.
sukiyaki3sukiyaki4My friend Ryoko makes the most wonderful Sukiyaki.  Being from Japan it comes naturally to her, and I’m so glad that she showed me how to make it.  We sat at her counter while talking and chopping the veggies.  She explained that the meat you use is very important.  She gets it sliced thinly from a butcher and prefers rib eye – the thinner the better for fast results. You can’t buy readily cut meat for sukiyaki otherwise, and it’s almost impossible to slice it yourself.

You could cook it on the stove although an electric skillet is the simplest and best thing to use since all the ingredients are served at the table.  It’s actually quite easy to make if you chop and assemble everything beforehand. Just add what you like and noodles are optional – but since I love noodles I prefer adding them at the very end.

?

Noodles she uses
Type of noodles used for this dish

Add a little *dashi of this and a little **mirin and soy sauce to taste.  If you’re not used to using these condiments you can go to any Japanese grocery store and ask someone that works there.  They’ll know what you need.

Ryoko never uses a specific recipe but if you’ve never made it before I found an easy one online that you can adapt to suit your taste.

?

What you need:

Common ingredients include beef,tofu, negi (green onion), leafy vegetables, shiitake mushrooms and shirataki noodles. Have fun cooking and eating at-the-table!

Ingredients (serves 4):

  • 1 lb. thinly sliced beef (she buys paper-thin rib-eye. You must get the butcher to cut it for you otherwise it will be too thick.
  • 1 cube tofu
  • 1/2 head nappa cabbage
  • 2 carrots
  • 1 bunch green onions
  • 2 medium onions
  • 7-8 shiitake mushrooms
  • 7-8 white button mushrooms
  • 1 Tbsp. oil
  • 1 package frozen *udon noodles (optional)

Sukiyaki Sauce:

  • 1/3 cup soy sauce (I prefer low-sodium)
  • 3 Tbsp. sake (Japanese rice wine)
  • 3-5 Tbsp. sugar (to taste)
  • 3/4 cup water

Cut all ingredients into bite-sized pieces. Arrange all ingredients on a large plate for a beautiful display.

Mix ingredients for sukiyaki sauce in a separate bowl.

Add a little vegetable oil to an Electric Skillet, and set the temperature to high. Once the surface is hot, sauté some of the beef slices until brown. Add other ingredients.

Pour half the sukiyaki sauce in the pan, and close the lid. Simmer until the ingredients are cooked through.

Everybody should take as much as they’d like to eat. Keep adding more ingredients and sauce as they disappear from the pan. Feel free to add more or less sugar, soy sauce and water to adjust the flavor of the sauce.

If you can find frozen udon noodles in your supermarket, add it to the sauce to enjoy a whole new meal.

楽しみます= Tanoshimimasu = ENJOY!

*What is Dashi?

Dashi is a flavouring stock used in Japanese cuisine, giving that quintessential Japanese flavour to your favourite foods. It all starts with something called “umami”, which when translated from Japanese to English, “savoury” is probably the closest word. Umami was discovered as one of the five senses to accompany sweet, sour, bitter and salty and is a more friendly name for the taste of glutamates.

**What is Mirin?

Mirin is a common staple used in Japanese cooking. It’s a type of rice wine, similar to sake, but with a lower alcohol and higher sugar content.

Have you ever made it?

Photos: d. king

Source for recipe: http://www.zojirushi.com/

Food – slow cooked Mexican Mole

Aside from Tamales, Mole (MOH-lay) is one of my favourite Mexican dishes. 

my mole sauce. Plate brought back from a day trip from San Diego to Ensenada (pretty coastal city in Mexico, the third-largest in Baja California.)
my mole sauce on one of the plates I brought back from a day trip from San Diego to Ensenada (a pretty coastal city in Mexico, the third-largest in Baja California) for great Mexican seafood

Mole is Mexico’s national dish although many Mexican restaurants don’t even have it on their menu.  It may simply be a sauce but one that is not so simple to make. 

 NEVER say NEVER!  I said I’d never make it again but I did, just the other day.  I made the most delicious Mexican Mole with chicken in my slow cooker.  I have to brag about it because it was really as good as any I’ve had before.  Wow…what a statement to make.  I’m good with it though because it really was.  The only other time I made mole was when a Mexican friend came to my house and instructed me how to.  It was a lengthy process that I wasn’t prepared for with too many ingredients, too much assembling, washing, soaking, chopping, frying, blending, mess and cleanup involved.  When I told another Mexican friend that I recently made mole she was surprised.  She said, “hell, I just open up a can of  DOÑA MARÍA®  and serve it over chicken and riceToo much work to make it from scratch.” 

 but then;

I found a recipe that intrigued me because it involved making it in a slow cooker.  My slow cooker has made it out of the garage and occupies priority space on my countertop now as I’ve re-discovered some fantastic flavourful dishes to make in it.  Anyway, I adapted the original recipe slightly (see my notes, it helps to be resourceful) using only what I had in house.  I didn’t go out to pick up any ingredients as I had pretty much everything on hand including the chicken breasts and I felt lazy.  I was ready to attempt it again.  It was worth it. Here goes:

INGREDIENTS

  • 4 pounds boneless, skinless chicken thighs (about 12) *my notes: (I used a package of 8 skinless, boneless chicken breasts cut in half but gave one of them to my dog sans chipotle, so actually 7)
  • Coarse salt
  • 1 can (28 ounces) whole tomatoes
  • 1 medium yellow onion, roughly chopped *my notes (I used good quality dehydrated chopped onion instead which worked well when rubbed onto the chicken).
  • 2 dried ancho chiles, stemmed *my notes (didn’t have ancho – used extra chipotle chile in adobo sauce instead – you can find the cans in the exotic food section of almost any store and once you open it, it tends to keep a long time refrigerated).
  • 1 large chipotle chile in adobo sauce *my notes (see above – I used less than half a can in total).
  • 1/2 cup sliced almonds, toasted
  • 1/4 cup raisins

3 ounces bittersweet chocolate, finely chopped (1/2 cup)  *my notes (I only had unsweetened, semi-sweet and 70% so I used semi-sweet chocolate chips but just a bit less than ½ cup since they’re sweeter).  Later I added a small handful of the 70% (melted first in the microwave) to make the colour darker & add richness.  “I prefer my men, chocolate, and coffee to be rich.”  Ha, couldn’t resist saying that.

  • 3 garlic cloves, smashed and peeled *my notes (I used good quality minced garlic from California – also rubbed on the chicken).
  • 3 tablespoons extra-virgin olive oil
  • 3/4 teaspoon ground cumin
  • 1/2 teaspoon ground cinnamon
  • Fresh cilantro leaves, for serving *my notes (I used chopped green onion)

DIRECTIONS

  1. Recipe says to first season chicken with salt *My Notes (I rubbed coarse kosher salt, minced garlic, chopped dehydrated onion and a bit of *McCormick Cocoa Chili Blend “great new find” on the chicken pieces) and place in a 5-to-6-quart slow cooker.20150925_115629
  2. In a blender (or preferably food processor), puree tomatoes, onion, ancho and chipotle chiles, almonds, raisins, chocolate, garlic, oil, cumin, and cinnamon until smooth.mole2
  3. Add tomato mixture to slow cooker, cover, and cook on high until chicken is tender, 4 hours (or 8 hours on low). *my notes (I started 2 hours on high, and switched to low for 4 hours). I added extra dry garlic & onion sprinkles to the mix to make up for the lack of fresh.  This coming from someone who just finished using fresh garlic braids from Gilroy, the garlic capital of California.
  4. Serve chicken and sauce over rice, topped with cilantro. Tortillas optional.mole1

COOK’S NOTES

As you can see, i adapted the recipe quite a bit for what I had on hand – but it worked out fabulously.  be careful to use the *right chocolate though.  you can substitute semi-sweet for bittersweet but only if you must, never with unsweetened or milk chocolate. I served it over rice with tiny tortillas (warmed up in the oven) on the side.  You may want to try the original knowing that you can do either.

*Substituting Chocolate

The good news is this: bittersweet and semisweet are very similar. Bittersweet chocolate is often now labeled “dark chocolate” and clearly lists the percentage of chocolate. That percentage tells you how sweet the chocolate will be: chocolate labeled “70% chocolate” contains 30% sugar, “60% chocolate” contains 40% sugar, and so on.  Semisweet chocolate tends to be higher in sugar than bittersweet or dark chocolate, but there can be overlap.

The bottom line: if your recipe calls for bittersweet chocolate, you can use dark or semisweet, and when using semisweet, you can go just a little light on the sugar (for baking purposes that is).

Have you made Mole?

Original recipe: Martha Stewart

Dessert – Peach Crumble (the poor man’s pie)

If you saw my post yesterday then you saw the photo of the big barrel of peaches from the Okanagan – soon to be out of season.  They were the tastiest, juiciest I can ever remember having.  What to do with them all?20150831_181936Of course I gave some away but can’t possibly eat all the rest before they start to go bad. I decided to make peach crumbles instead of pies.  Why? You can cheat on not having to make pie crust which is more time consuming and finicky especially if you like using real butter instead of lard (as I prefer, per Martha Stewart). Also crumbles are lighter, you get to taste more of the ripe fruit which is in season this way and then you can eat twice as much (ha).  Top with vanilla or caramel ice cream for perfection.  If you want to add liquor (as some people like to) then add some rum or brandy to the filling.  I prefer it just as is maybe a shot of brandy on the side.  Peachy clean!

What they fail to tell you in many recipes:

You must first remove the skin.  The easiest way is by blanching.  First you need to cut an X into each peach with a knife as in the photo above. Have two pots ready.  One with boiling water, another with ice water.  Take one by one by slotted spoon into a pot of rapidly boiling water for about 15 seconds each.  20150831_182011With same spoon drop gently into another pot filled with ice water.  This cools it to make it easier to peel and also stops the cooking process. 20150831_182029See how easy it is? And to think I invested in a soft fruit skin peeler! 20150831_182105

INGREDIENTS

FOR THE FILLING

  • 2 pounds peaches or nectarines, cut into 1/2-inch wedges (6 cups)
    about 6 -7 large size peaches
    about 6 -7 large size peaches


  • 3/4 cup granulated sugar
  • 1 tablespoon lemon juice
  • 4 teaspoons cornstarch
  • 1/2 teaspoon coarse salt

FOR THE TOPPING

  • 6 tablespoons unsalted butter, room temperature
  • 1/4 cup light-brown sugar
  • 1 cup all-purpose flour (spooned and leveled)
  • 1/2 teaspoon coarse salt

DIRECTIONS

  1. Preheat oven to 375 degrees. Make the filling: Combine peaches, granulated sugar, lemon juice, cornstarch, and salt. Transfer to an 8-inch square baking dish or pyrex pie plate.
  2. Make the topping: In a large bowl, using a mixer, beat butter and brown sugar on medium until light and fluffy. Add flour and salt and, with your hands, mix until large pieces form. Scatter over filling.
  3. 20150831_141649Bake until center is bubbling, 40 to 50 minutes, tenting loosely with foil after 30 minutes. Let cool 20 minutes before serving.?  Square or Round?  I did both but prefer the round shape.  I think it tastes better.

COOK’S NOTES: the topping freezes well, so why not make a double batch and save half for another day?

CONFUSED between Crisps, Crumbles and Cobblers?  You’re not alone.

Inquiring minds need to know:

  • Crisps– Crisps have a bottom layer of fruit, but their topping is much more crunchy than cobblers. Instead of a dough-like pastry that rises, the crisp is topped with mixture of butter, sugar and flour that is mixed together until ‘crumbly’ and is briefly browned in the oven. Crisps might include oats or granola in their topping as well.
  • Crumbles– The crumble also begins with fruit at the bottom, but is topped with a different butter-flour-sugar mixture called a ‘streusel’. The three ingredients are mixed just until crumbly and then poured on top of the fruit. This dish is very similar to a crisp but the crumble originated in Britain whereas the crisp is seen as more American. Crisps are also more rich than crumbles with higher amounts of sugar, butter and flour.
  • Cobblers– Cobblers also have a bottom layer of fruit but are topped with biscuit dough. The result is a dense, rich dessert. Most popular cobbler ingredients include apples, peaches and cherries.peach crumble1

Call it a crisp or call it a crumble but it’s not a cobbler…and all I can call it is good!

Recipe: courtesy of Martha Stewart (maybe not her personally, but on her website)  Photos: d king

Blueberries for Breakfast – two berry good recipes

BC Blueberries are in season and aside from eating them as is I’ve been incorporating them into recipes like blueberry pancakes, loaves and muffins. My next door neighbour was nice enough to bring me some hand picked berries (that someone else other than she hand picked but it was still nice) so the least I could do was bake a blueberry cake and give her half.  Here are two recipes that are easy enough to make and trust me; Berrylicious!20150719_105900

BLUEBERRY BUTTERMILK PANCAKES FOR TWO                                                                              (or 3-4 people if you add an omelette and sausage/bacon):

1 cup all-purpose flour

1 egg

1 tsp. baking soda, a little salt,

¼ cup coconut powder (optional)

1 tsp. pure vanilla extract or pure vanilla bean paste

1 ripe mashed banana (optional)

1 cup of mixed fruit (blueberries + mango, blueberries + raspberries or just blueberries)

1 cup of buttermilk, shaken

Mix all together

Spray grill with coconut oil spray (or if you don’t have it, use butter)

As soon as the grill is hot drop in small batches – 3,4 at a time. You can tell it’s hot when you add a bit of water to grill and it makes a sizzling sound.

Fry gently turning once (about 1 ½ minutes per side when it just starts to bubble).  I sprinkle a bit of cinnamon on the up side before turning over – as in the photo)20150719_104820

Dust with icing sugar (always optional) when done.  Serve with pure maple syrup naturally.

Makes about 10 medium size pancakes

BLUEBERRY LEMON BREAKFAST CAKE

You can bake them in 1 regular size Pyrex loaf pan or 3 mini loaf pans like this.
You can bake them in 1 regular size Pyrex loaf pan or 3 mini loaf pans like these super cute ones

?

RECIPE:

1 ½ cups all-purpose flour

1 ½ tsp. baking powder

1 ½ tsp. baking soda

Pinch of salt

1 ¾  cups Blueberries (Stir 1 Tbsp. of flour to the berries so that they don’t all settle to the bottom on the pan).

¾ cup sugar

½ cup unsalted butter at room temperature

½ cup sour cream (14%)

1 tsp. vanilla extract

1 Tbsp. lemon zest

3 Tbsp. fresh lemon juice – approx. 1 large lemon)

In a small bowl add dry ingredients (flour, baking powder, soda & salt)

In a medium bowl cream butter and sugar, add eggs and vanilla extract & beat with an electric mixer

Then in three intervals add your dry ingedients to the wet mix adding 1/3 of the sour cream & 1/3 of the lemon juice – beat until smooth

Then fold in the blueberries and lemon zest.

Add a few fresh berries to the top of the pan

Bake at 350F until done – about 45 – 55 minutes (or until a toothpick inserted in centre comes out clean).

You can dust with icing sugar if you like – it always looks prettier.  They also freeze well so you can thaw them when the weather gets cold to remember the warmth when you made them.

ENJOY with a nice cup of coffee or tea!

Photos: d. king

Grill Talk – knowing how to dress them well & rub them the right way

will have them eating off your plates.

SALADS & RUBS are what you need all summer long…

User barbeque sauce over top of ribs, chicken, etc.
Use rub before slathering barbeque sauce over ribs, steak or chicken.

Here are two simple but super recipes to enjoy all year long but especially now.  The spices keep and if you have extra dressing you can always label it and freeze it for later.

THE RUBgrill1

This blend of spices is considered to be the Swiss Army Knife of seasonings.  Use it for all your summer grilling: steak, chicken, fish & veggies.  I recently used it for ribs.  It has a slightly exotic flavour.

In a medium bowl, stir together:

¼ cup brown sugar (be sure to break it up if hard)

1 tsp. ground cinnamon

1 Tbsp. each – ground ginger, black pepper, smoked paprika,

2 Tbsp. each kosher salt, ground coriander, ground cumin, garlic powder.

Store in an airtight container or a resealable plastic bag for up to 6 months.  Makes about 1 cup.

How much to use? It depends on how much you like but here are some general guidelines:

For 1 ½ lbs. steak , use 2 Tbsp;  1 lb. vegetables, use 1 Tbsp; chicken pieces, use ¼ cup; 1 lb. salmon fillets, use 3 Tbsp.

Traditional *Caesar Salad is so last century! Here’s a nice take on a Charred CAESAR SALAD that my guests rave about:grill3

Grill your Romaine!  Use Romaine hearts, halved lengthwise, on medium for about 4 minutes or until charred in spots, turning over halfway through.  Oil the grill first or drizzle olive oil on the lettuce beforehand. Serve immediately, drizzled with this dressing which also doubles as a dip by the way.  Sprinkle with sunflower seeds for something different instead of croutons.  Serves six.

THE DRESSNG: in a blender or food processor puree 4 oz. feta cheese, 2/3 cup extra virgin olive oil, 1/3 cup non-fat plain greek yogurt, 3 Tbsp. lemon juice, 1 clove garlic and a little salt and pepper to taste.

Transfer to medium bowl, stir in ¼ cup packed fresh dill, chopped.

YUM!

*Actually I still love the traditional ways of making things but it doesn’t hurt to spice it up & do something unexpected.

Let me know what you think.  I love feedback.