

Cauliflower; the Cruciferous Chameleon
In between going out to certain functions or get-togethers where we tend to not always eat the healthiest, at home I do my best healthwise by choosing organic as much as possible, phasing out red meat and keeping it simple, but always tasty. Rarely do I follow a recipe unless it’s to do with baking.
Here’s something I never thought I’d make – Cauliflower Steak! Are you kidding me? I heard about it, but only experienced eating it recently at a health food store for lunch, and it was surprisingly delicious, so I decided to try making it at home. I never even used to like cauliflower.
Of all the vegetables out there, cauliflower has probably been my least favourite. When assembled as part of a veggie/dip tray, I usually bypass it. I find the taste on its own very bland, but I know it’s good for me. It’s packed with antioxidants like sulforaphane (which help protect cells from damage caused by free radicals) and essential nutrients, including vitamins C, K, and B6, as well as folate, potassium, and magnesium. Who knew it was such a powerhouse? Certainly not me. It’s not even green coloured!
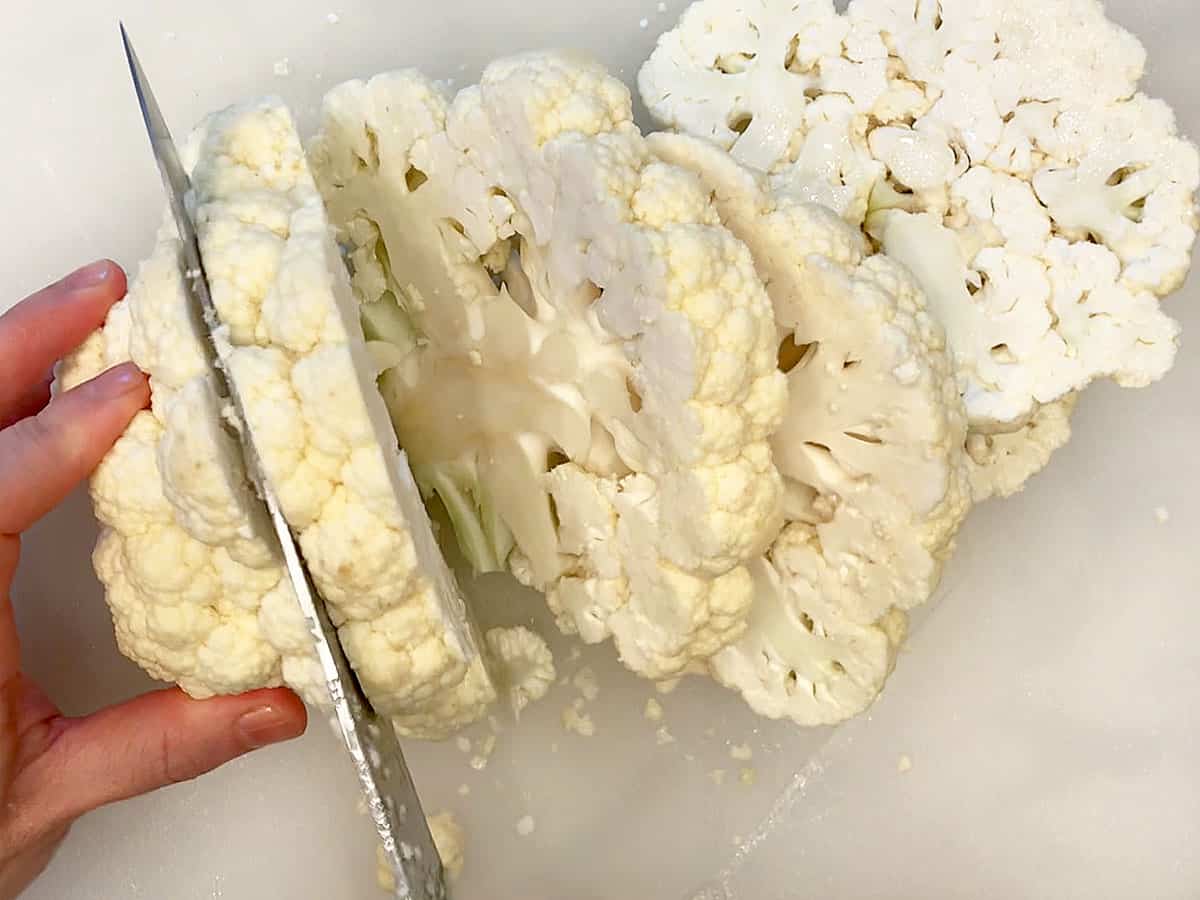
So off to Clarks Nutrition (I love this family-owned store) I go, and pick up a nice organic head of Cauliflower. Then located a site called healthyrecipesblogs.com (link to recipe below) and found out that there is not exactly a recipe per se, but more of variations on a theme, which I love. I followed the directions for cutting the cauliflower as such:
Wash the cauliflower heads, remove the outer leaves, and trim the very bottom of the core, keeping it intact. Slice each cauliflower head into ¾-inch-thick slices. It’s normal for some florets will fall off.
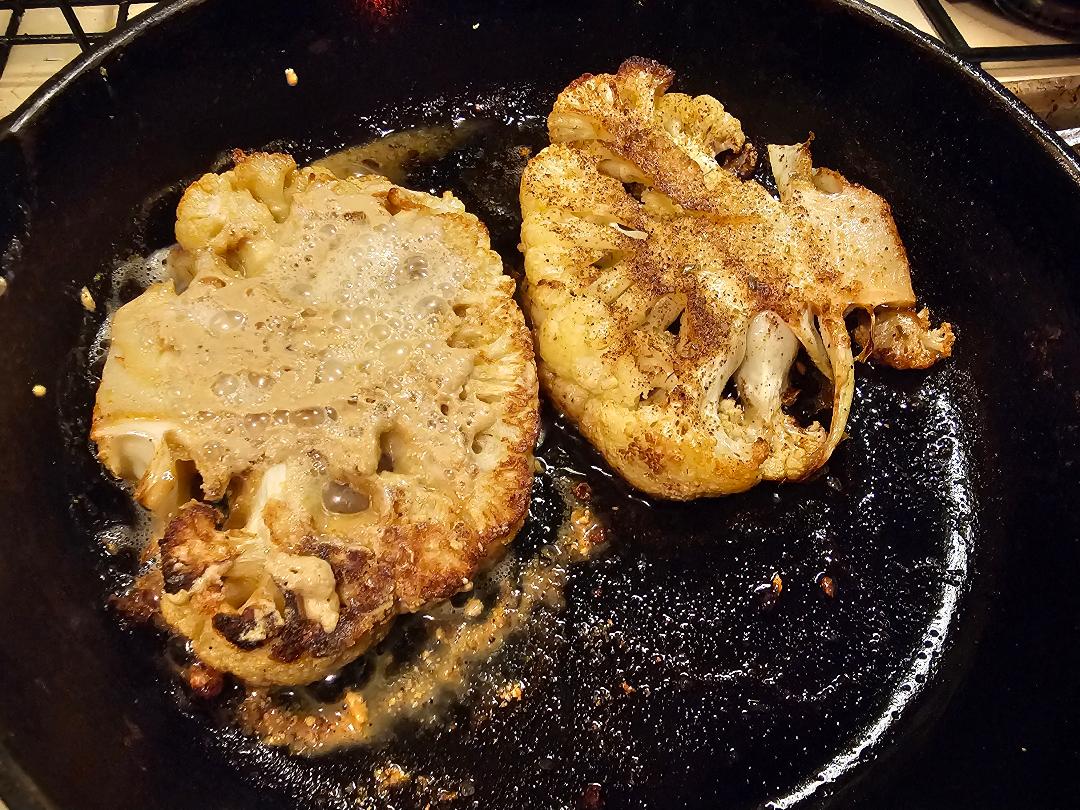
But wow; can it morph into so many different flavours when cooked. I didn’t want to try making it just one way; so I tried three variations and they were all delicious. You can season them any way you like so it’s fun experimenting. I did one with only olive oil + balsamic vinegar. The balsamic ends up caramelizing which is great. Another way was with fresh lemon juice + tahini. Another had smoked paprika as a main spice. I enjoyed all three ways.
Goes like this:
Preheat your oven to 425°F. Line a large, rimmed baking sheet with nonstick foil or high-heat-resistant parchment paper and spray it with olive oil. I prefer parchment paper.
Arrange the steaks in a single layer on the baking sheet. Scatter the florets (that have fallen off from cutting) around them. Drizzle some olive oil and sprinkle them with half the seasonings.
Bake the cauliflower slices for 15 minutes. Remove them from the oven, carefully flip them using two wide spatulas, add more oil, and sprinkle them with the remaining spices.
Return the cauliflower to the oven and bake it until browned and fork-tender, 10-15 more minutes. Serve immediately.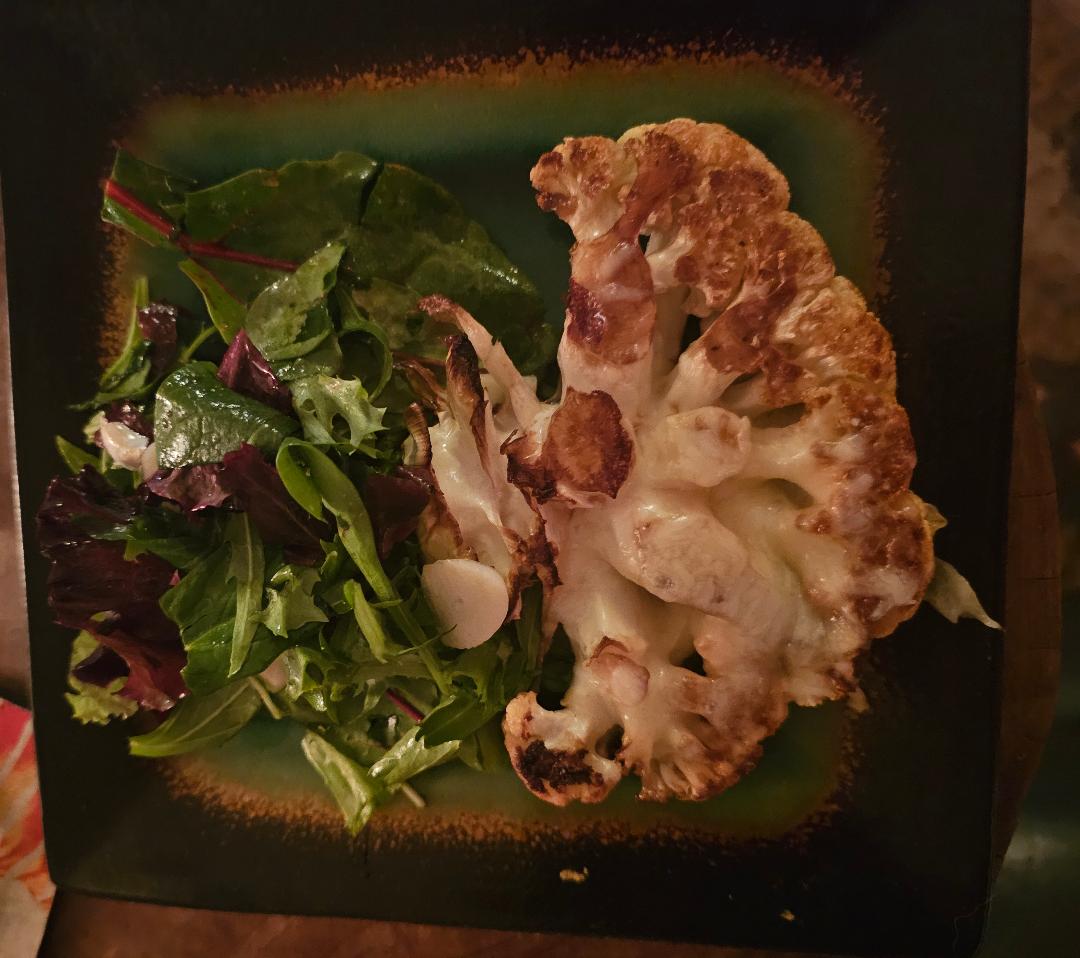
A nice side salad and dinner is served!
Have you tried it? Have a recipe you’d like to share?
https://healthyrecipesblogs.com/cauliflower-steaks/


You must be logged in to post a comment.