Love Thai Curry? Red, Green & Yellow curry pastes are the base for most of the dishes in Thai cooking and the Red version makes for excellent chicken, beef, vegetarian, fish and other seafood curry.
You’ll never buy packaged curry pastes again once you try this recipe. Homemade curry paste makes for tastier curries, and they’re much healthier too!
This paste is courtesy of Chef Sarnsern Gajaseni at the OrientalHotelin Bangkok. It’s enough for at least two dishes, each serving about four people. I’ve made double this amount and divided it up to freeze it, well labelled in separate containers. It freezes very well and you’ll be able to easily use it with a few extra added ingredients (see recipe) to create a delicious curry. If you like this one I’ll be posting the Green & Yellow versions which are slightly different but equally delicious.
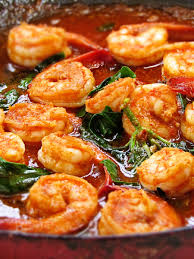
using shrimp
Makes about 10 Tablespoons
10 to 12 hot dried chillies (of the long cayenne variety). I use Thai red bird chillies.
5 garlic cloves, chopped
1 cup chopped shallots
1 Tbsp. fresh lemongrass that has been thinly sliced, crosswise. Fresh lemongrass stalks have a knot at the very bottom. Remove that before finely slicing, crosswise, and at a slight angle, starting at the bottom end and going up about 6 inches. It will not blend unless it has been sliced first.
3 thin slices peeled, fresh or frozen galangal (or ginger). Galangal is fairly tough and needs first to be cut, crosswise, into thin slices, and then chopped before being put into the blender.
1 thin slice of fresh kaffir lime rind or dried rind, first soaked in water for 30 minutes.
6-8 cilantro roots (usually bought from Indian grocers), washed well and coarsely chopped. If you cannot get them, use a small handful of the leaves for the required aroma.
Fresh ground whitepepper
¼ tsp. shrimp paste or use either 2 anchovies from a can, chopped or a bit of anchovy paste.
½ tsp. ground cumin
½ tsp. ground coriander
2 Tbsp. bright red paprika
*most of these ingredients I buy from “South ChinaSeas trading company” at Granville Island Market including the shrimp paste and palm sugar (for recipe).
How to:
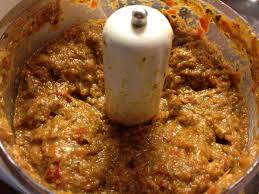
Soak the chillies in 5 Tbsp. of hot water for 1-2 hours (or put them in microwave for 2 minutes and then let them sit for about 30 minutes). Put the chillies together with their soaking liquid, into the blender, along with all the remaining ingredients in the order listed. Blend, pushing down with a rubber spatula as many times as necessary, until you have a smooth paste. What you do not use immediately should be refrigerated or frozen.
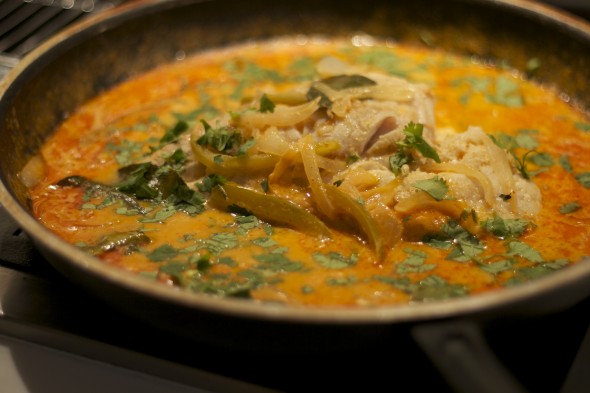
Fish in Red Curry Sauce
I used fillet of halibut for this one but you can use a variety of firm white fish or even shrimp. The fillets should be cut into roughly 3-inch pieces. Serve with plain aromatic jasmine rice which will be really nice to soak up the sauce.
14-ounce can of coconut milk, left undisturbed for 3 hours of more
3 Tbsp. peanut oil (if not use corn)
5 Tbsp. Red Curry Paste (which I hope you made but if not you can always buy it).
1 Tbsp. Fish sauce (there is no substitute but vegetarians will need to omit this ingredient).
1 tsp. thick tamarind paste (if not substitute with lemon juice). Tamarind paste can be found usually at an Indian market.
1 tsp. palm sugar (if not use brown sugar).
1 pound firm white fish
4 fresh kaffir lime leaves (if not use 1 tsp. julienned lemon rind)
20 fresh sweet Thai basil leaves (if not use regular basil leaves)
Carefully open the can of coconut milk without disturbing it too much and remove 4 Tbsp. of the thick cream that will have accumulated at the top. Stir the remaining contents of the can well and set aside.
Pour the oil and the coconut cream into a large, non-stick, lidded pan or well-seasoned wok and set over medium-high heat. When the oil is hot, put in the curry paste. Stir and fry until the oil separates and the paste is lightly browned. Reduce the heat to low and add the fish sauce, tamarind paste, sugar and ¾ cup of water. Stir and taste for a balance of seasonings. Cover and simmer on a very low heat for 5 minutes. Stir in the reserved coconut milk. Lightly dust the fish pieces with salt and then slid them into the sauce in a single layer. Bring to a simmer, spoon the sauce over the fish pieces, cover, and simmer very gently until they just cook through.
Just before serving, either tear up the lime leaves or else remove the central vein and cut them into fine strips, and scatter these and the basil leaves over the top of the fish.
**I have a flavorful recipe for a vegetable curry
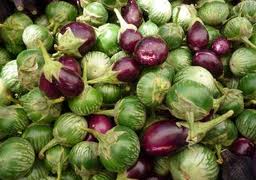
thai eggplants
using 4 Thai eggplant, 1 medium chopped onion, 1 cup of bamboo shoots, 6 ounces French cut green beans + 1 red pepper cut into strips. You make it much the same way: Heat 1 Tbsp. of oil in a large wok or fry pan and then cook 2 Tbsp. of red curry paste for 4 minutes over a medium heat, stirring. Then add 2 ½ cups of coconut milk, bring to a boil and simmer, uncovered for 5 minutes. Add the chopped eggplants, bamboo shoots, and 6 lime leaves and simmer for 5 minutes. Add the green beans & red pepper and cook for additional 5 minutes or until all vegetables are tender. Add ½ cup basil leaves, 2 Tbsp. fish sauce (if using), 1 Tbsp. lime juice and 2 tsp. palm or brown sugar. Drizzle with coconut milk, garnish with thai basil and sliced red chilli. Serve with rice.
but you can substitute using Japanese eggplant
“from curries to kebabas – recipes from the Indian spice trail” – everything in this enticing cookbook is outstanding. Madhur Jaffrey even traces the origins of curry, explaining how the ingredients & techniques were brought to new lands. It’s unusual for me to make so many recipes from one book but each one turned out better than expected – and it took some of the mystery out of these exotic dishes.
ITALIAN food is all about ingredients. It’s not fussy and it’s not fancy – Wolfgang Puck.
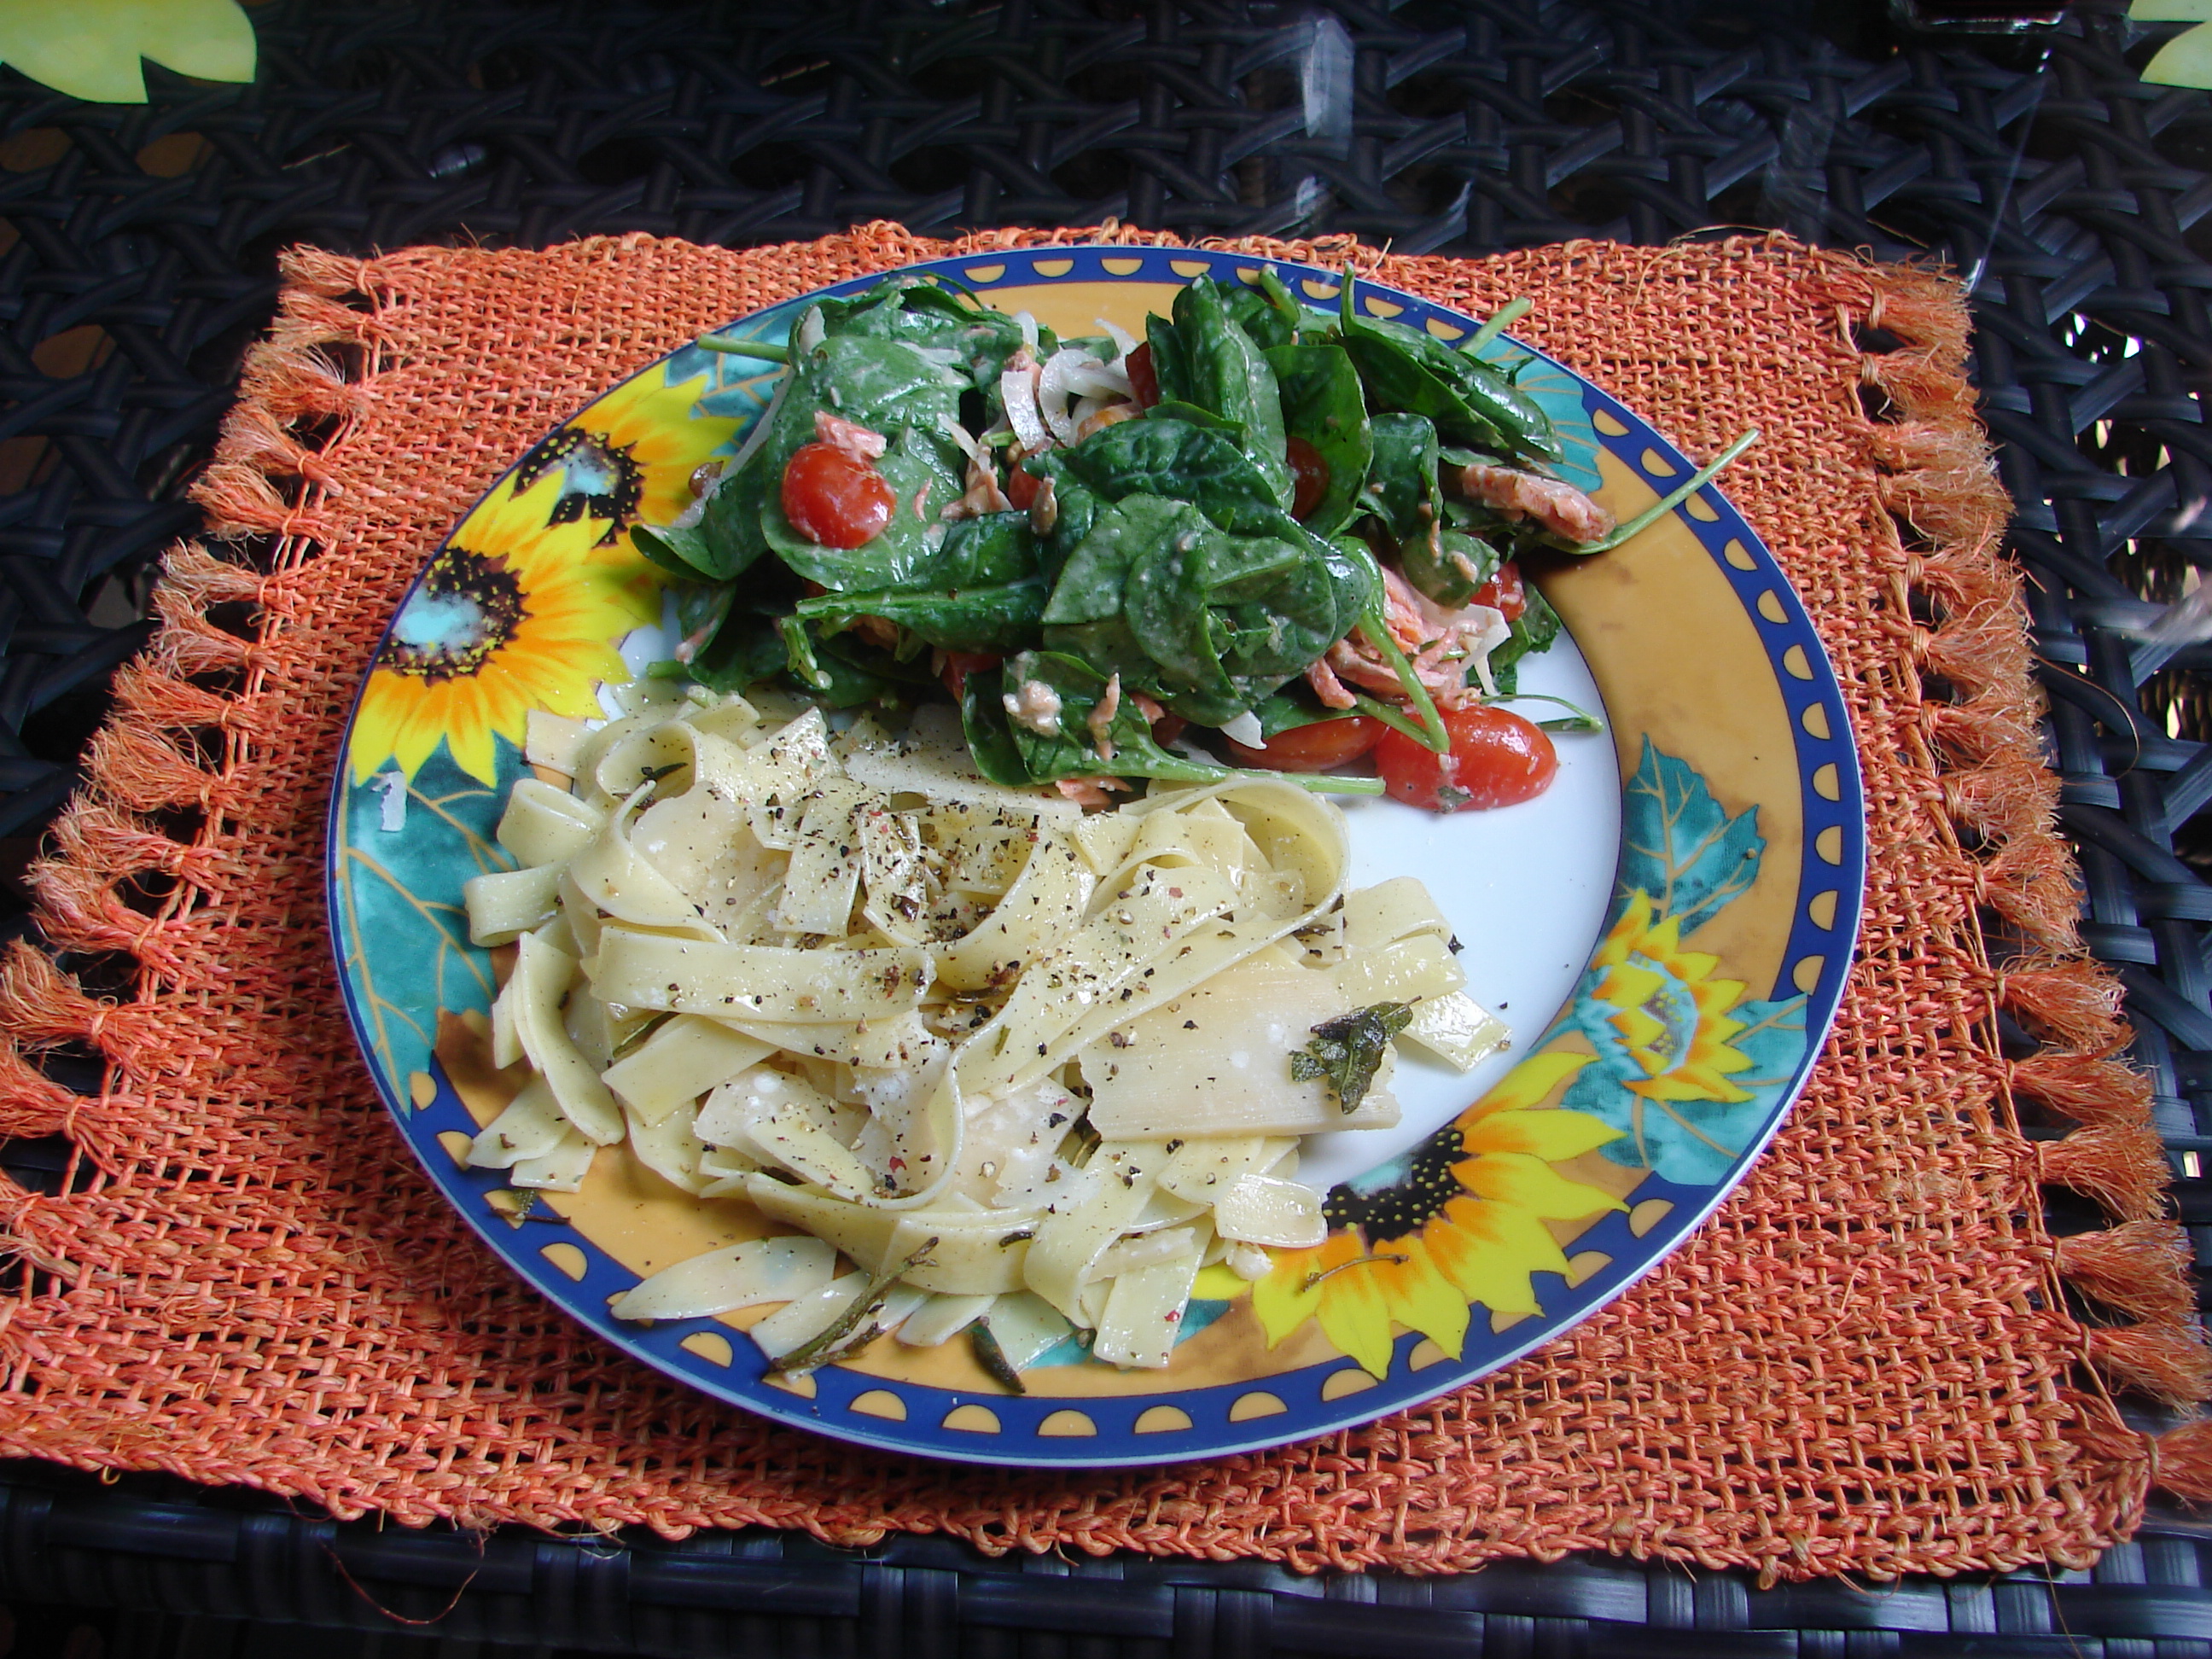
with spinach salad & leftover grilled salmon
Those words were never truer than in this recipe, which is really not even a recipe – which is in itself molto italiano!
I first tasted this very simple dish when a friend made it for us in Tuscany. She made it using fresh gnocchi and freshly crumbled gorgonzola and it tasted divine. Of course any type of fresh pasta & cheese would be amazing in Tuscany. Since then I’ve tried making it the same way and slightly different versions too. I can tell you that none is as good as the original in Tuscany but you can experiment and come up with something almost as good.
Basically all you do is toast the sage leaves in butter until crisp. Fresh is best but if you don’t have that, then buy it in the package from the herb section of your grocery store. I use either the whole package or a big handful of fresh herbs. Use a generous amount of butter – about half a stick. Coat the pasta (try gnocchi or orechiette – something with ridges to coat each piece) right in the pan with the sauce and then crumble either the freshest gorgonzola cheese you can find overtop or roughly grated best quality parmesan cheese which will melt right in. S+P to taste and some red chilli pepper if you like it slightly picante. Serve with a side salad & crusty bread.
TIP: Pasta like this makes a great side for chicken and fish dishes as well.
A tavola non si invecchia – Italian proverb.
Which means: At the table with good friends and family you do not become old.
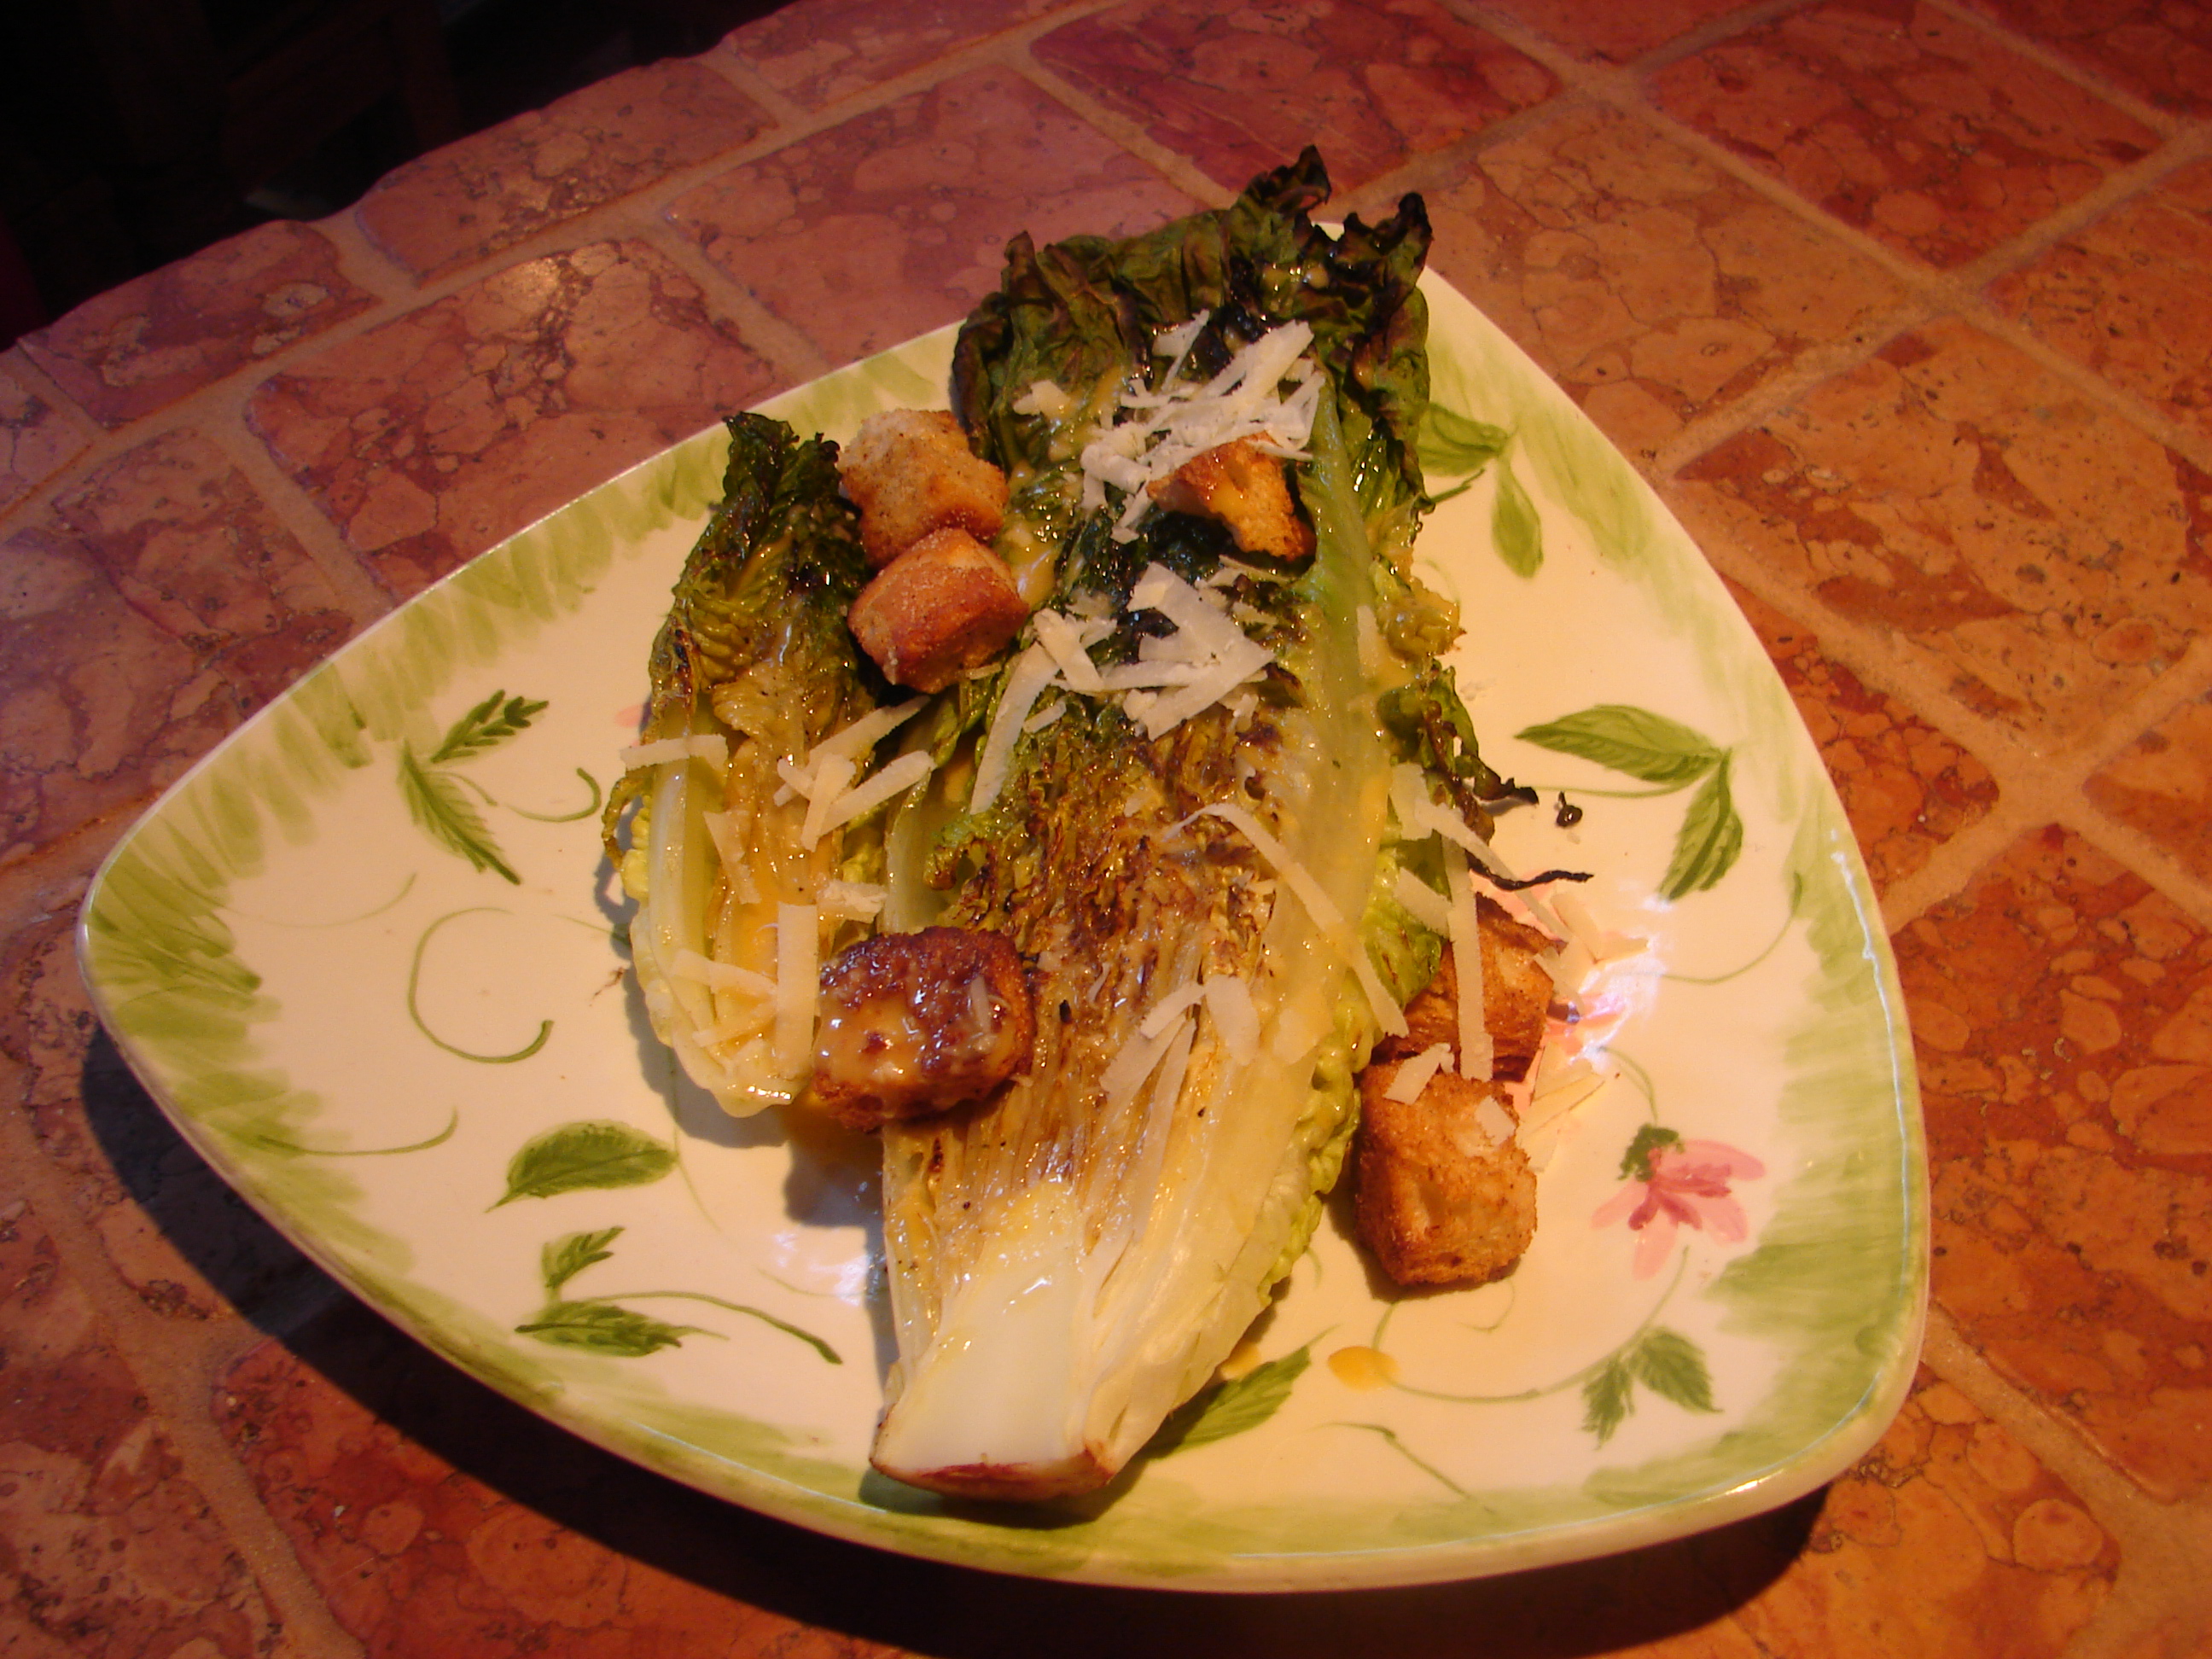
Ceasar salad has always been a favorite of mine. I’ve done the same dressing (slightly tweaked) for years and put it on my blog a while back – see LINK at bottom.
Then I came across this one on yahoo & decided to try it. The main difference was not only the way the romaine was served, but using two whole (not just the yolk) eggs that were first coddled & the dressing made, non traditionally in a blender.
First the hearts of romaine were cut in half along the length but the bottom was not torn from the base (do not trim). Season the leaves with salt & pepper and drizzle with some olive oil then place cut side down on the grill until done. This will bring your salad to the next level – believe me. You can try this dressing or use the other one. Both are good with this simple and delicious way of preparing the salad – especially for Summer.
Caesar Dressing:
Coddling 2 eggs: rinse and put in boiling water for one minute. Let sit for a few minutes and put them in the blender. **coddling is done to reduce or minimize the risk of bacterial contamination when using raw eggs.
Add: red wine vinegar, grainy mustard, balsamic, Dijon mustard and blend. Add lemon, garlic, anchovy, parmesan, pinch of salt. Put in blender & slowly add olive oil. TIP: I also put a bit of tabasco, worcestershire & caper juice in this one.
For Croutons: Take crusty bread & pour some olive oil over top. S+P. Spread on baking sheet in 350 degree oven until crisp.
Top grilled lettuce with dressing & croutons, sliced fresh tomato (optional), top with parmesan cheese & enjoy! And do give me your feedback.
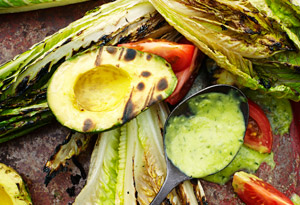
Green Goddess Dressing – a lovely, creamy dressing
photo – Marcus Nillson
Dressing:
1 ripe Hass avocado, pitted and peeled
1 Tbsp. chopped basil
1 Tbsp. chopped parsley
2 tsp. chopped tarragon
1 tsp. chopped garlic
3 Tbsp. lemon juice
1 tsp. kosher salt
Ground black pepper
1/3 cup extra-virgin olive oil
To make dressing: In a food processor fitted with a metal blade, combine avocado, basil, parsley, tarragon, garlic, lemon juice, salt, and pepper and process until very smooth, scraping down sides. With the motor running, add olive oil. Add enough cold water to make dressing pourable, about 3/4 cup. Refrigerate until ready to serve. For the salad with grilled romaine you can add chopped tomatoes, onion, avocado, etc. You can even grill those too if you like.
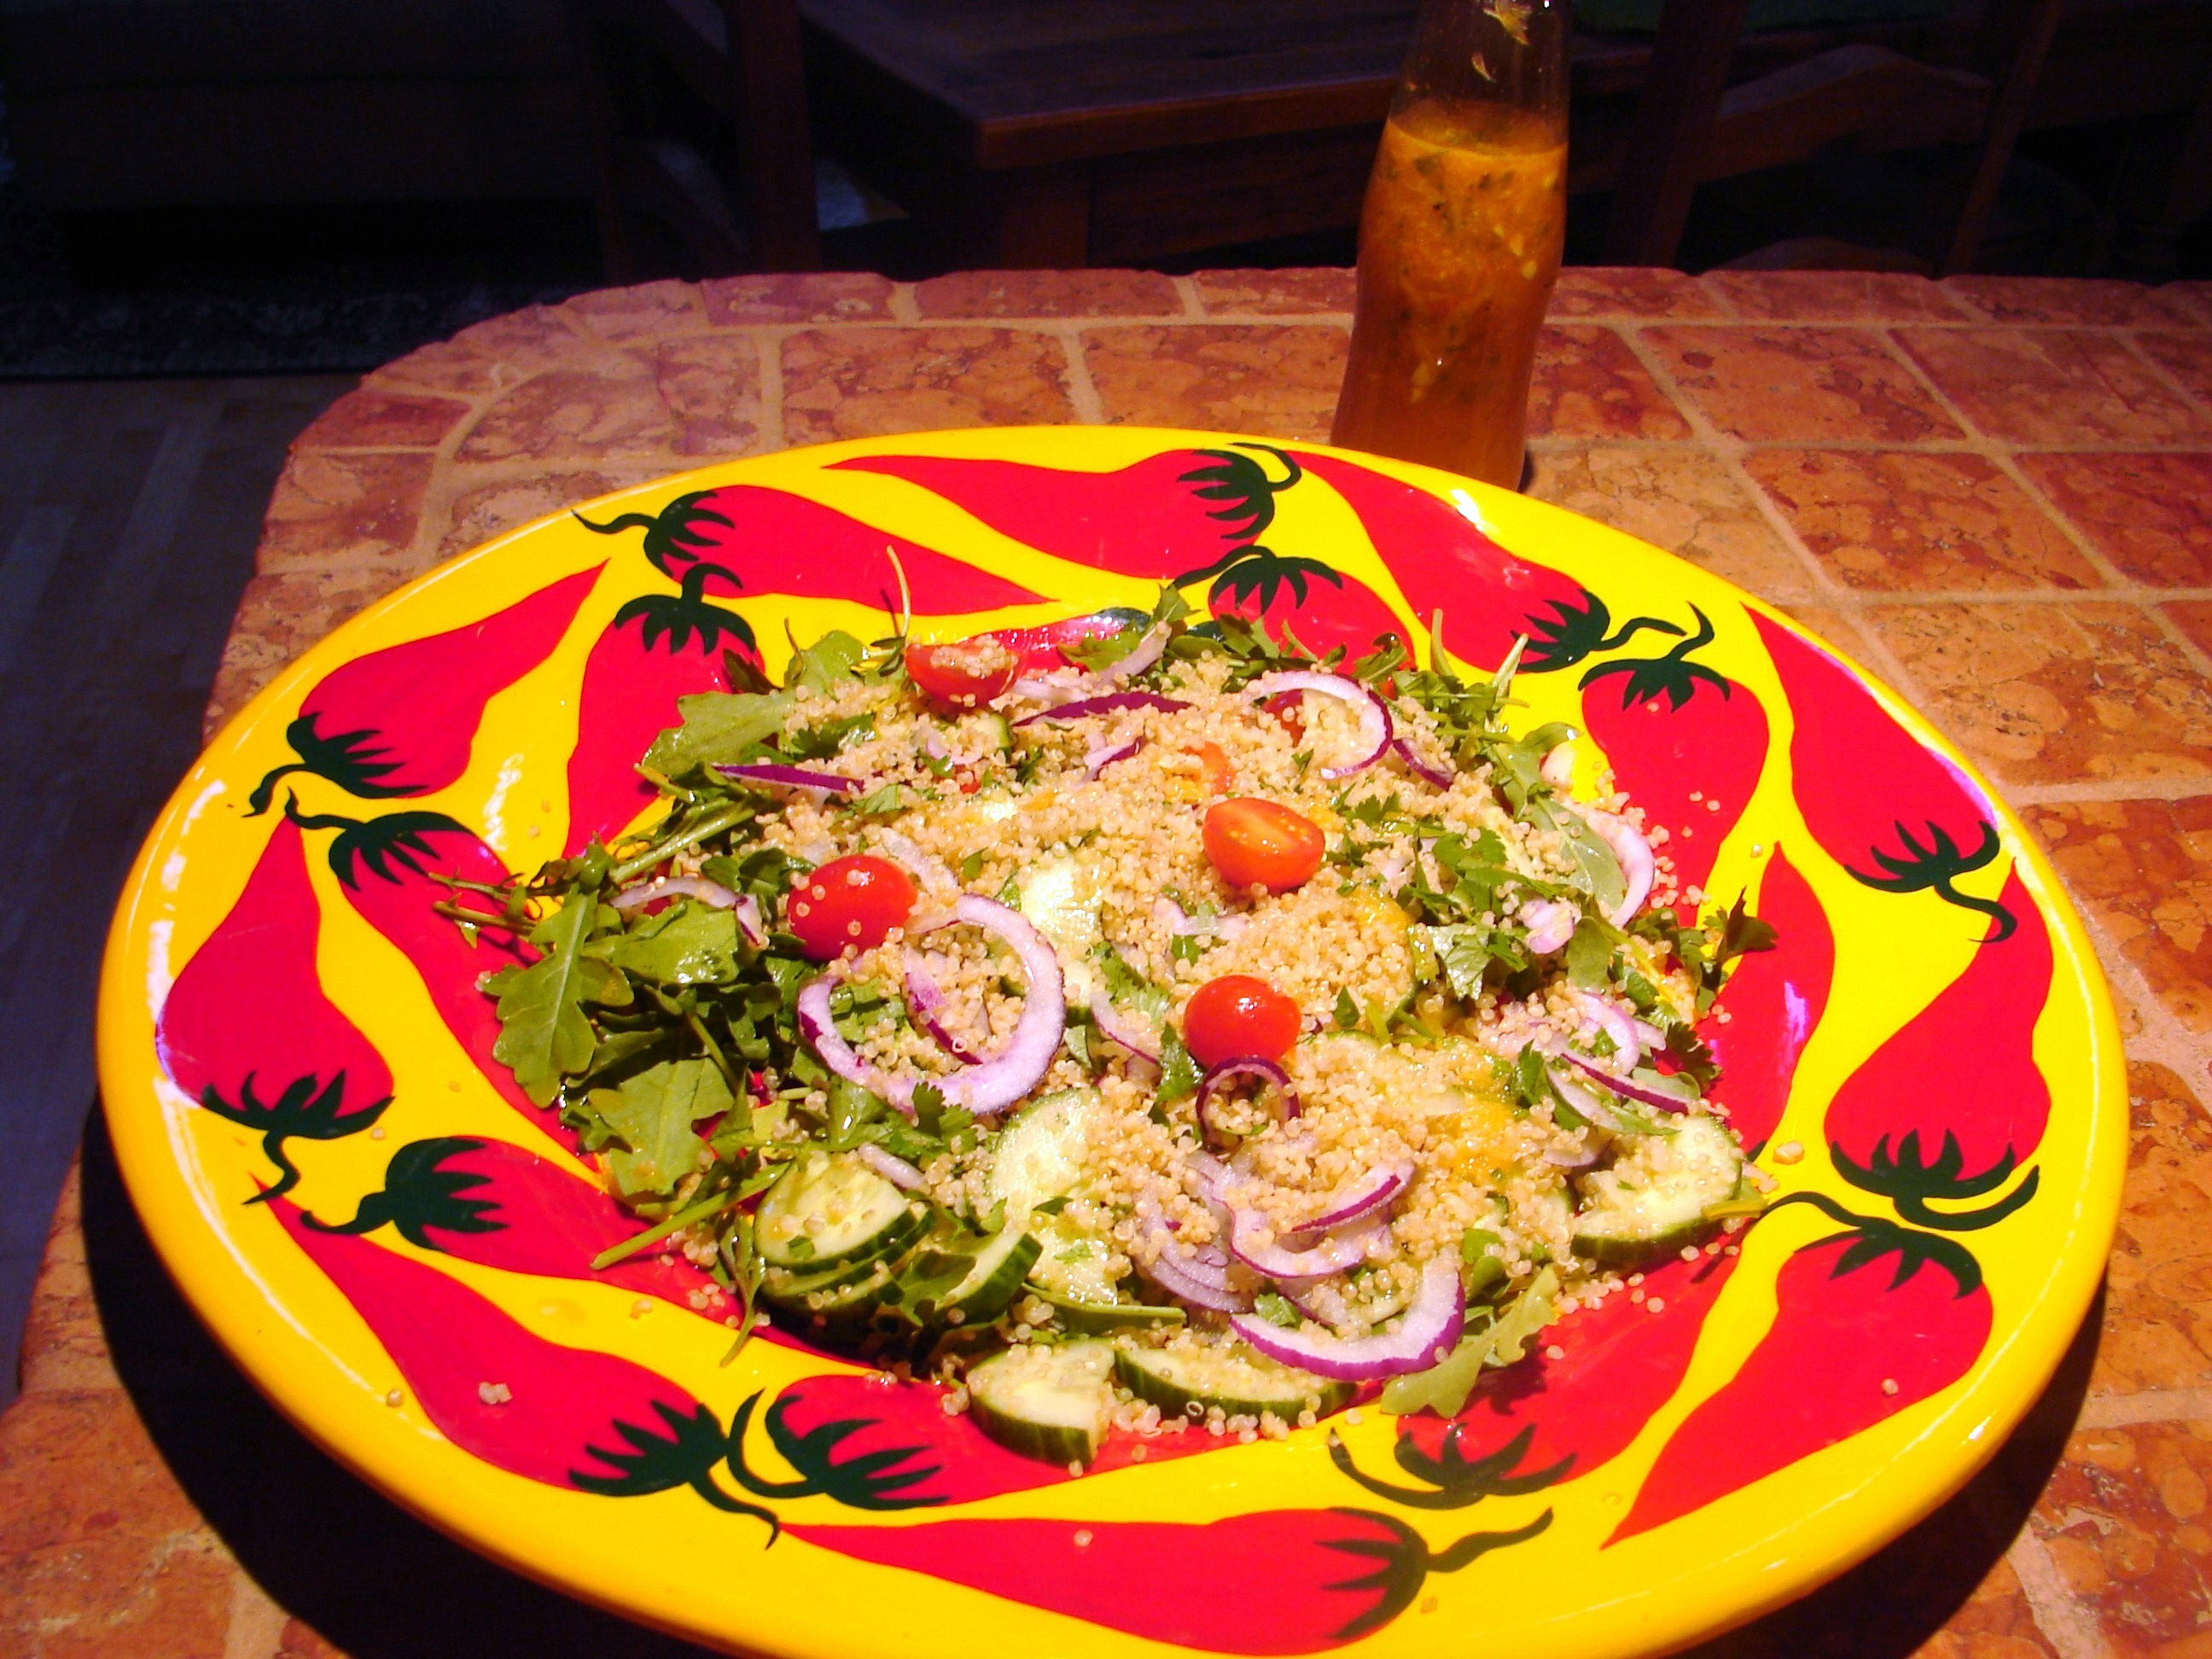
Have you ever used quinoa in a salad? If not, try this one. The combination of crunchy, soft, sweet & tart works really well here. This is a healthy AND delicious summer salad. It has a fresh flavor and the dressing has a sweet/sharp taste.
First rinse & drain 1 cup of quinoa. In a medium pot, bring 2 cups of water *(I prefer using chicken or veggie broth for added flavor), the quinoa, 1 tsp. extra virgin olive oil & a pinch of kosher salt to a boil. Cook like rice (ratio is 2-1) – reduce heat to low, cover and simmer until liquid is absorbed and quinoa is tender, about 15 to 20 minutes. Uncover, fluff with a fork, transfer to a plate or bowl, and set aside to let cool.
In a large bowl toss together – arugula, halved cherry tomatoes, ½ english cucumber, halved lengthwise and sliced, ½ small red onion, very thinly sliced & 1 diced mango. Add a bit of the dressing (1/4 cup or more).
Spoon quinoa over arugula salad, drizzle with a bit more dressing & sprinkle with chopped cilantro. Serve. Add more dressing as desired.
*TIP – for quinoa broth I use 2 cups of water and add 2 tsp. of organic “better than bouillon” reduced sodium chicken base or concentrated vegetable base. Either will give it loads of flavor. Available at whole foods or your local health food store.
Spicy Citrus Dressing
¾ freshly squeezed orange juice (from 2 or 3 oranges)
3 Tbsp. extra-virgin olive oil
3 Tbsp. freshly squeezed lemon juice (from 1 lemon)
1 ½ Tbsp. freshly squeezed lime juice (from 1 lime)
1 tsp. honey
1 tsp. red wine vinegar
1 clove of garlic, very finely chopped
1 small jalapeño, seeded & very finely chopped (if you don’t have jalapeño you can use a little cayenne)
½ tsp. ancho chile powder (optional)
½ tsp. kosher salt
freshly ground black pepper
In a medium bowl, whisk together all ingredients until well combined. Makes about 1 ¼ cups. Pour into a glass container & shake. You’ll have enough dressing leftover for another salad. You can also use it as a marinade for chicken or fish.
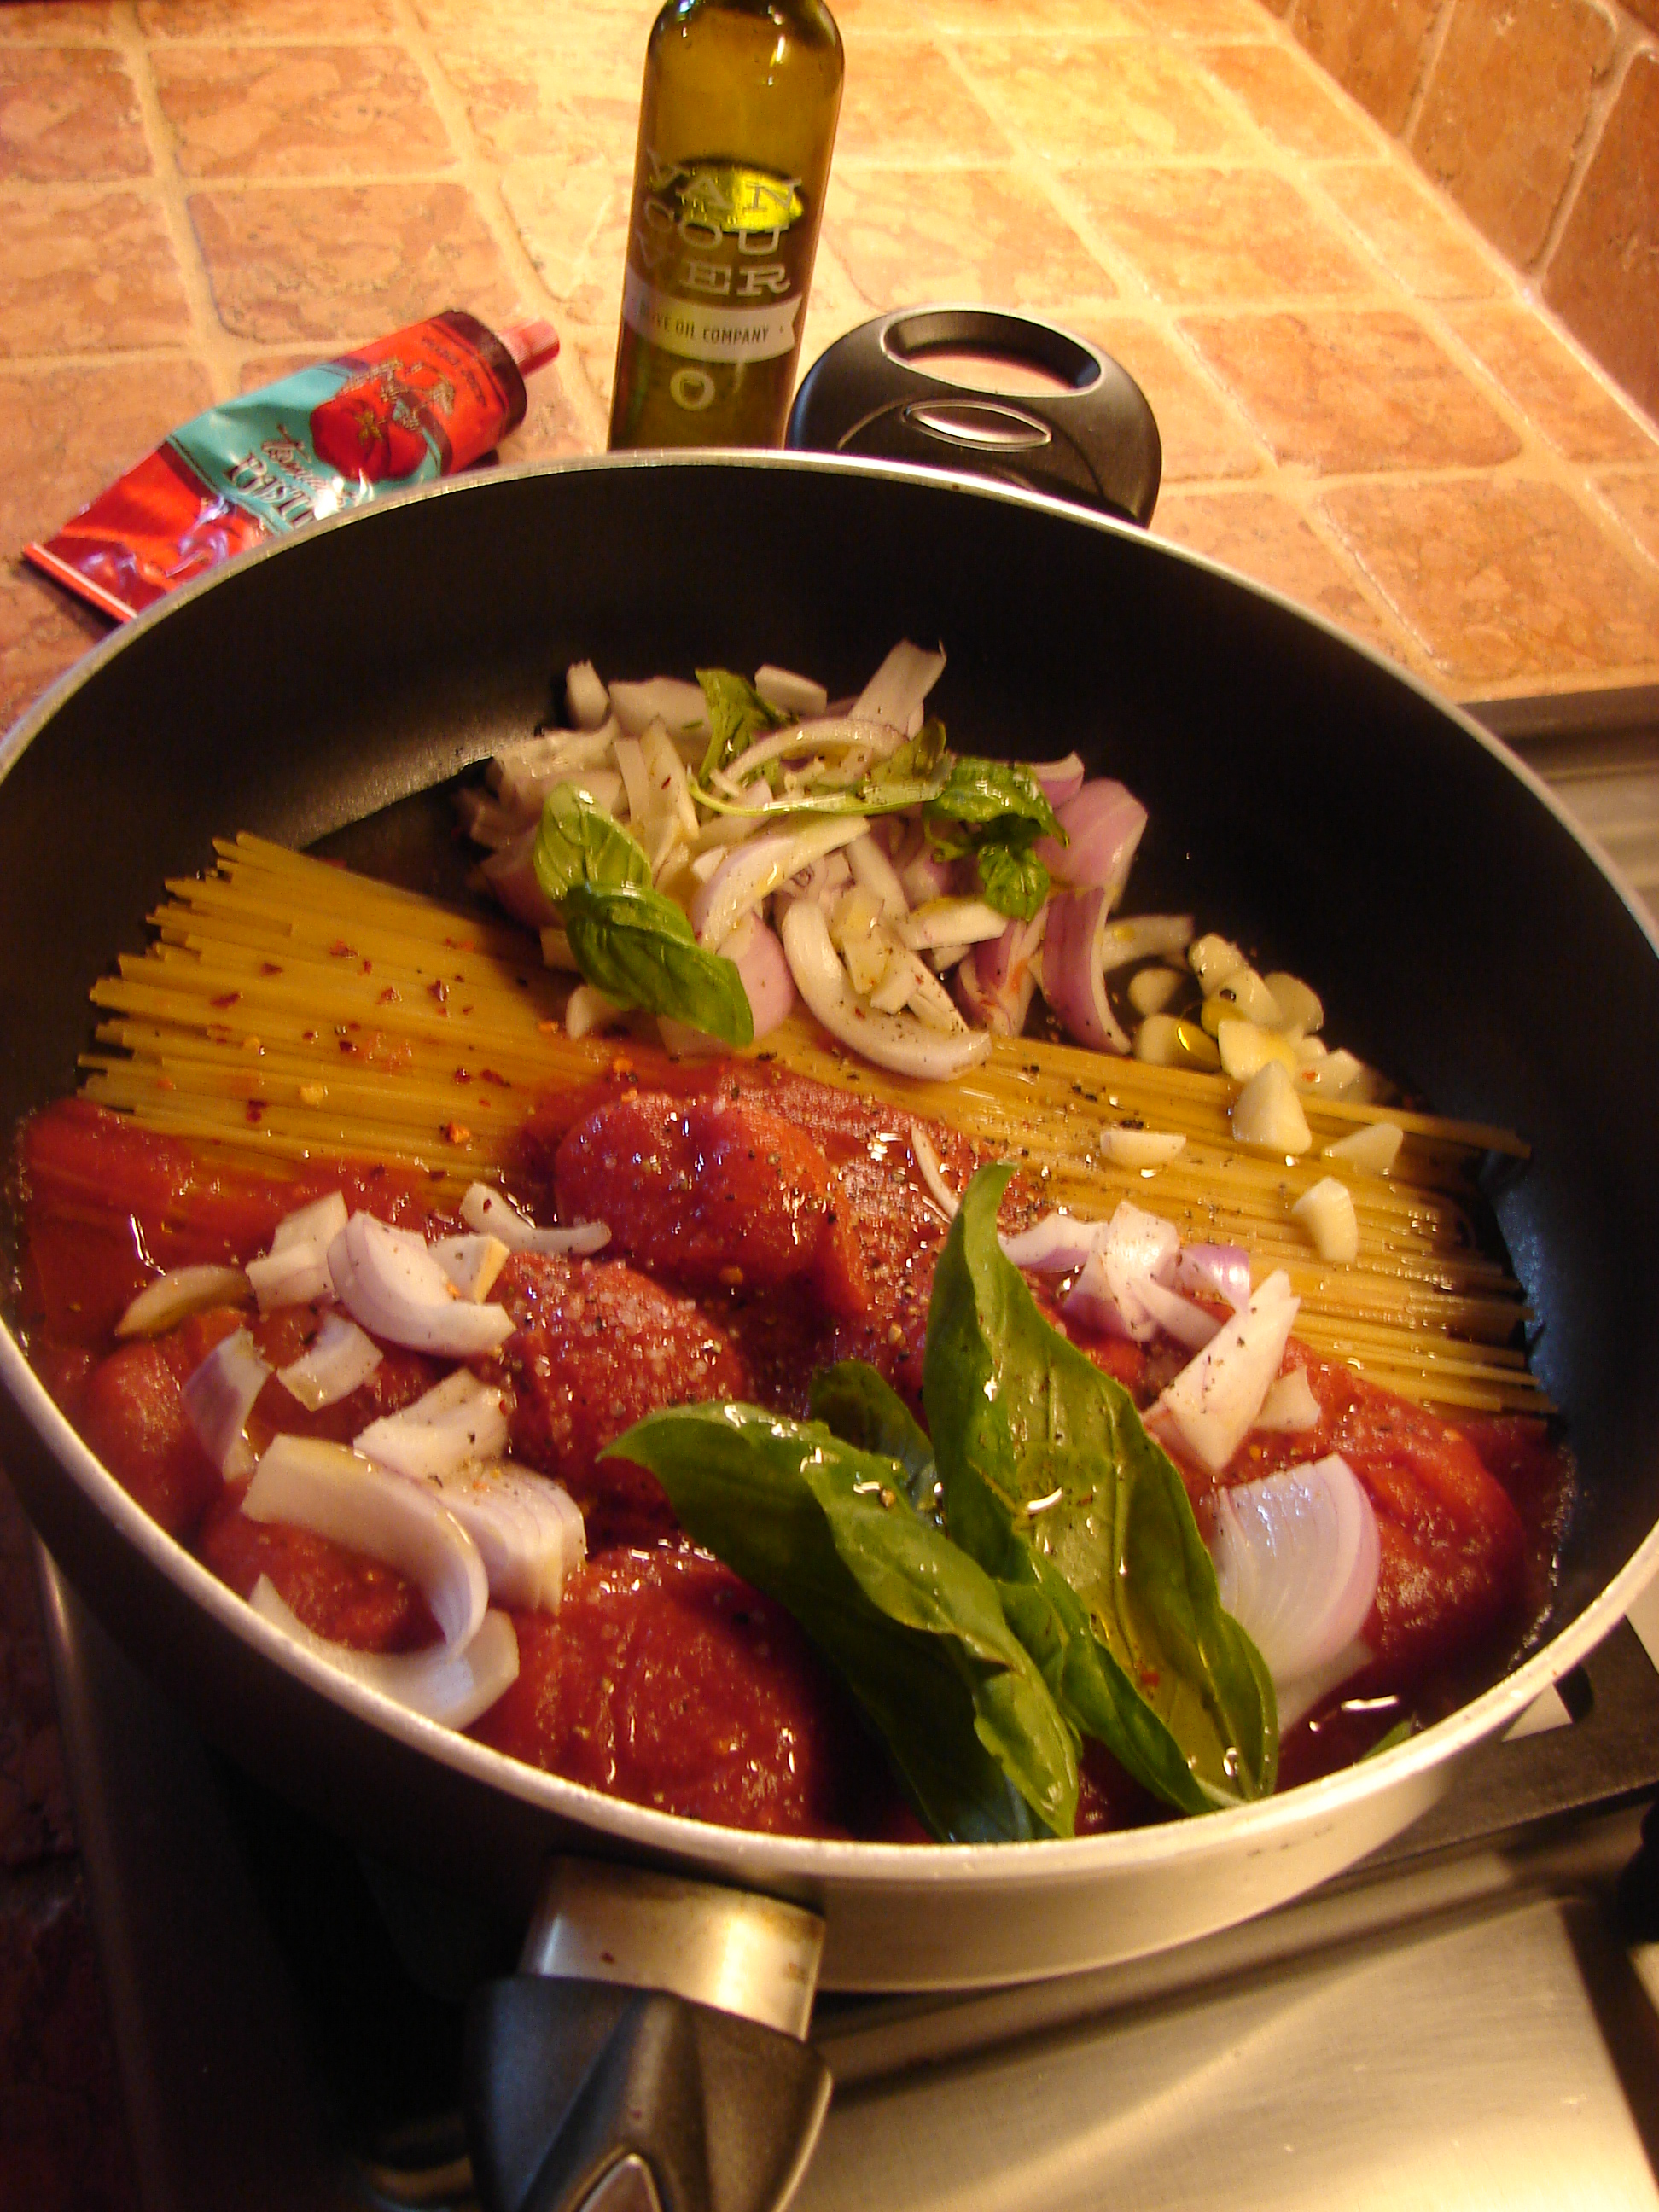
Here’s something you might not have thought of before but not only does it work – it works surprisingly WELL. One-Pan Pasta! (not to be confused with first cooking the spaghetti & tossing it in a pan of already made sauce a la Sopranos. Are you kidding? No need to over work yourself.
At the Start
There’s a tiny restaurant in the Puglia region of Italy where the chef places dried pasta in a skillet with water, tomatoes, onion, garlic, herbs and a glug of extra virgin olive oil.
Then he cooks everything together and it has become their house dish ever since.
I had to try it out myself because it seemed way too simple and I wasn’t sure how everything would turn out. So…
After laying out enough linguine for two people in a skillet, I added about 1 ½ cups of water – enough to just cover the pasta since there was no actual recipe. I added the above ingredients but instead of putting in fresh tomatoes I just used a can of peeled plum tomatoes with the juice. Also a bit of tomato paste as I thought there was a bit too much water at first, a sprinkling of hot pepper flakes & a squeeze of lemon.
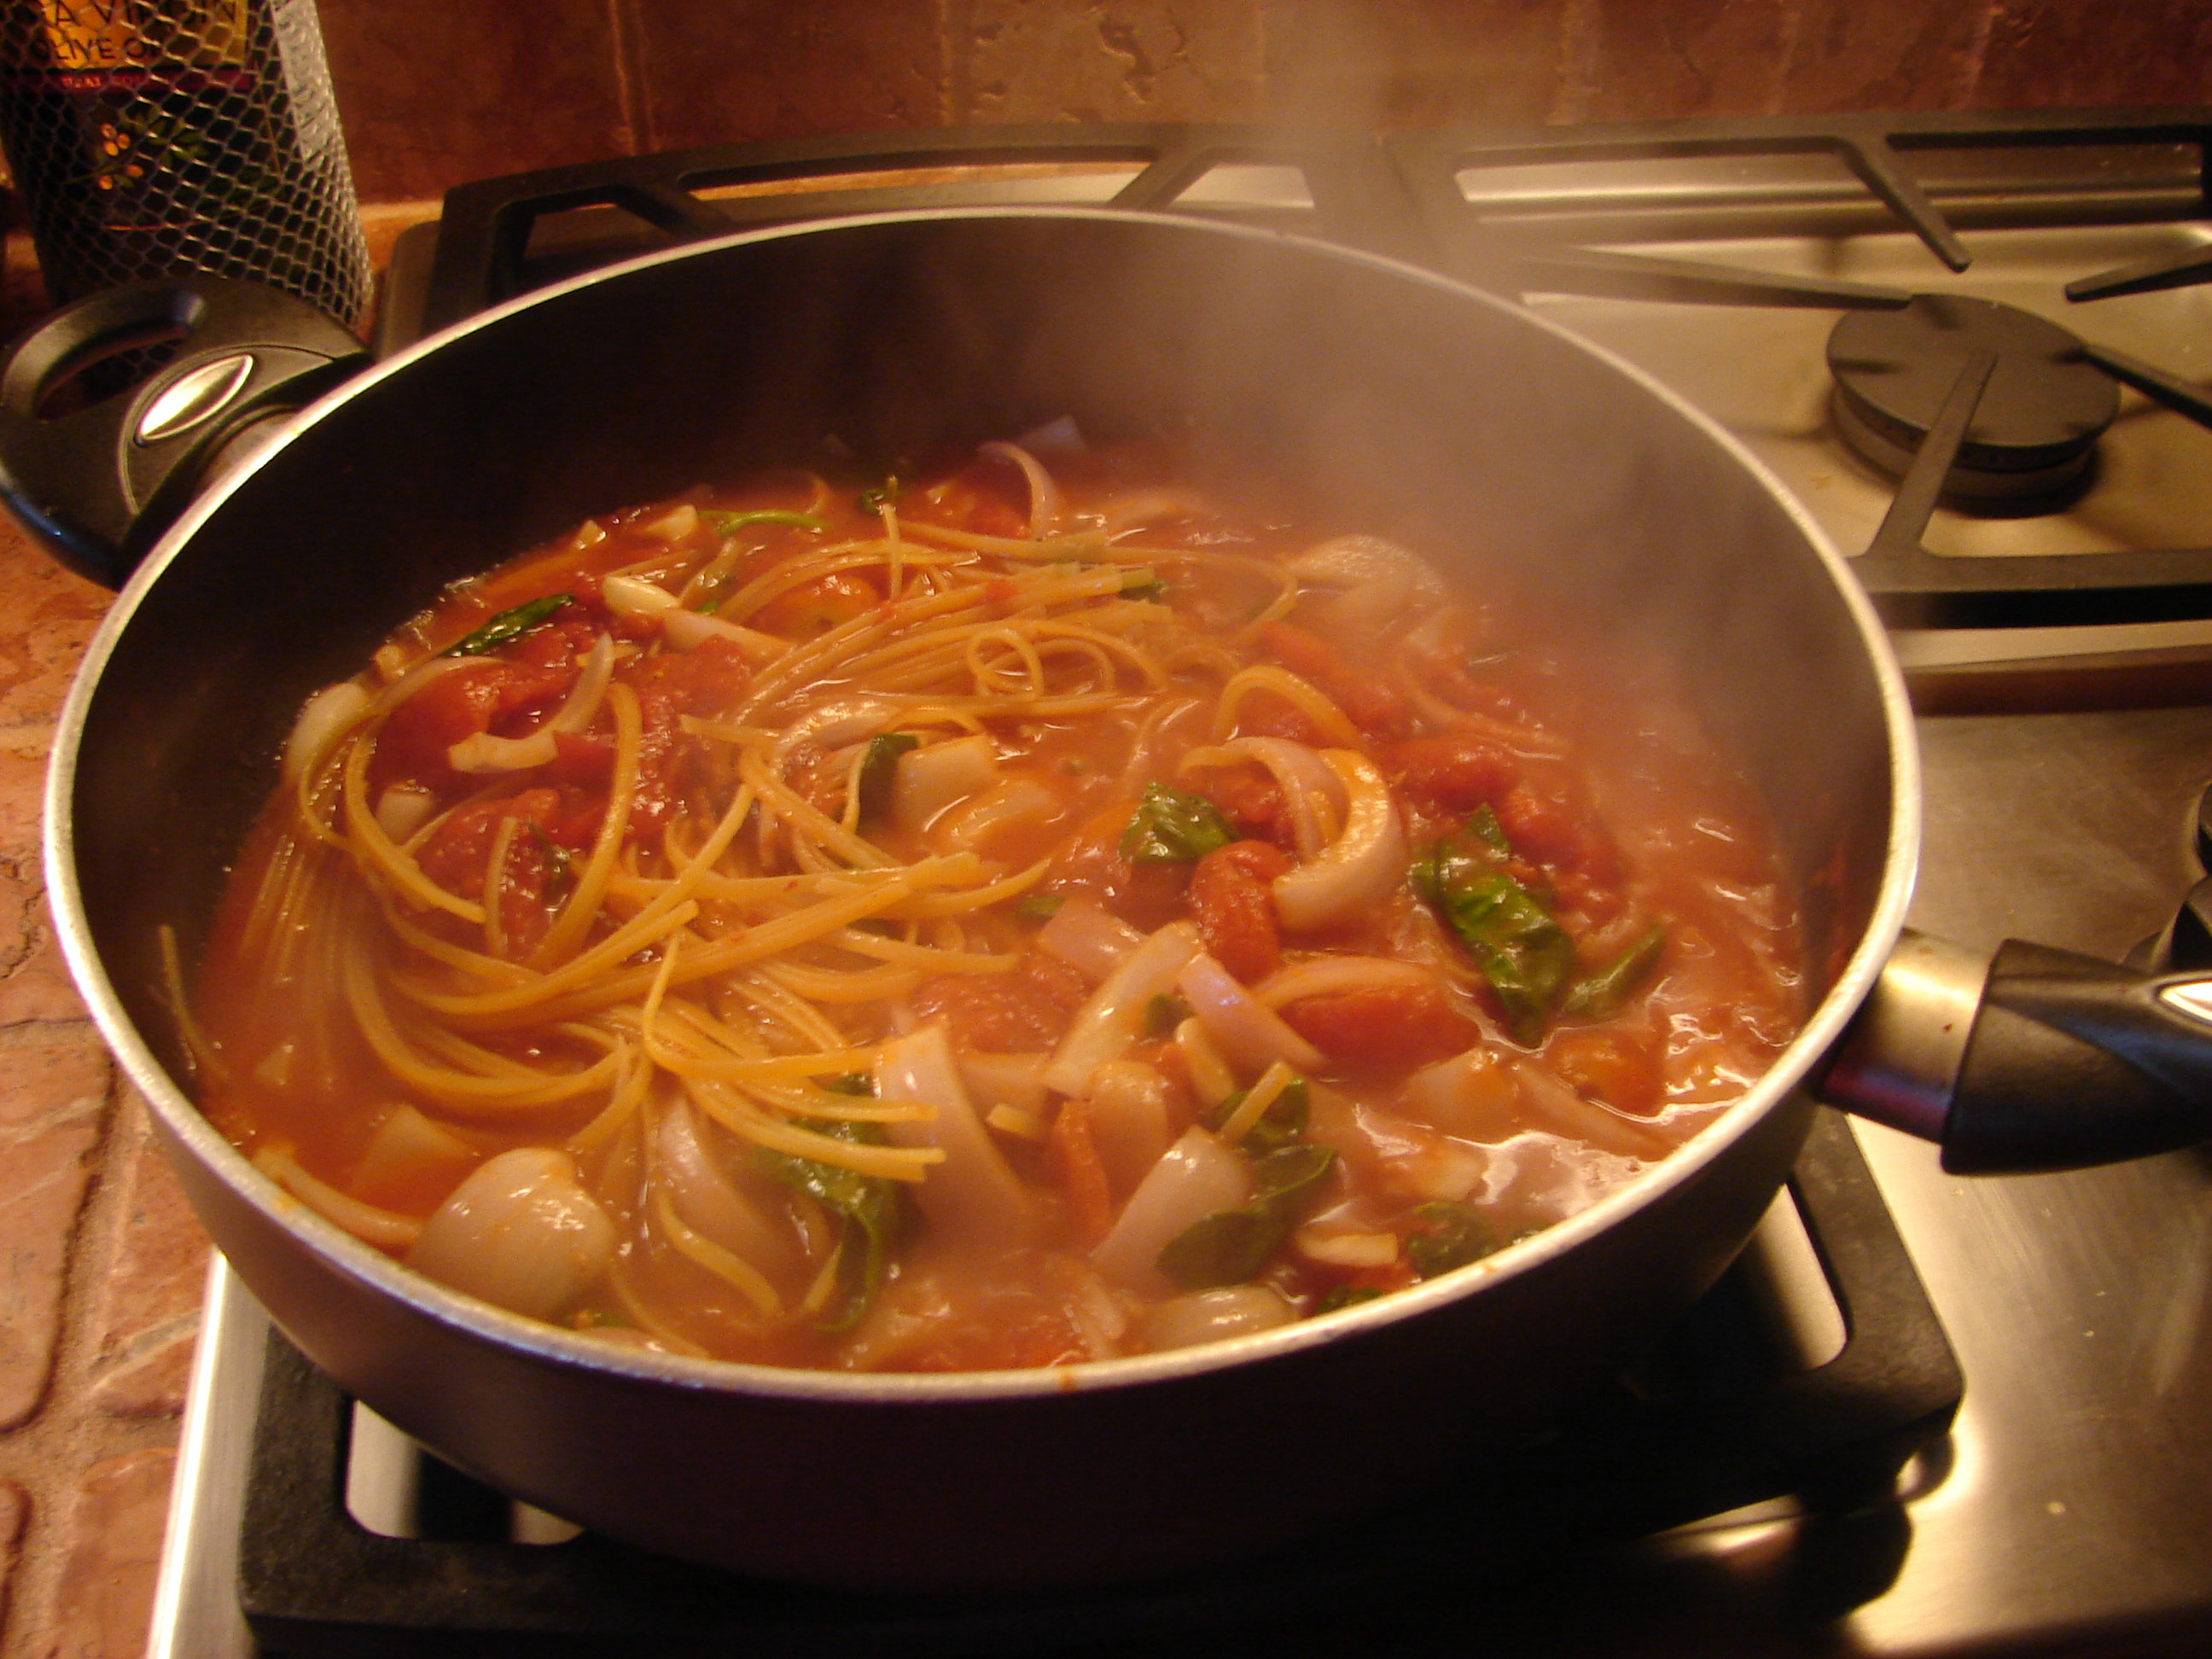
Almost Ready
Once the water had boiled away we were left with perfectly al dente pasta in a creamy sauce that coated every strand & tasted like something you would find in a restaurant in the tiny village of Puglia.
This is the perfect glamping dish, or for times when you don’t have too much time or just for those that love pasta (like me) and are always looking for new ways to cook it.
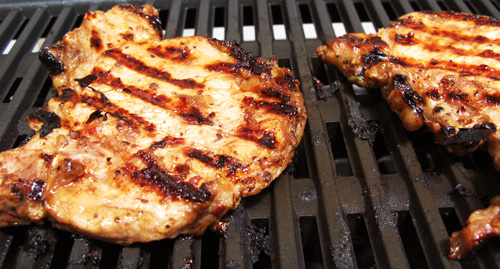
CUBAN CUISINE contains African, Spanish, Italian and Caribbean elements. The Cubans don’t follow any rules when cooking – the mixture of all possible tastes, smells and colors usually help to create little works of art. Cuba does not have a great reputation for their food – at least for tourists. I’ve been to Havana and found this to be true. Their rum however is second to none and if you stick with drinking mojitos all day long you may not even mind how bad the food tastes. The truth is if you’re lucky enough to be invited into a local home for a home cooked meal or go to one of the handful of local insider restaurants which happen to not be in the very touristy areas, you will be pleasantly surprised. Together with the wonderful herbs and spices from the region – for example, chilli, oregano, onions, garlic, parsley, saffron, basil, etc. – there are no limits to the varied dishes. Here is a simple and delicious marinade.
2 Tbsp. (30 ml) each frozen orange juice concentrate (somewhat defrosted), ketchup and molasses. (I used spicy ketchup from the Mcilhenny Co. brand that makes Tobasco).
1 tsp (5 ml) each ground cumin and dried oregano leaves
¼ tsp (1 ml.) cayenne pepper
2 garlic cloves, minced
1 lime
1 Tbsp (15 ml) Extra-Virgin Olive Oil
4 centre-cut pork loin chops, each about ½ inch (1 cm) thickl
¼ cup (50 ml) coarsely chopped cilantro
In a bowl, stir concentrate with ketchup, molasses, dried seasonings and garlic.
Squeeze in juice from lime, then stir in oil.
Pour three-quarters of the marinade over chops and turn to evenly coat. Cover and let marinate in the fridge for at least one hour but best overnight. Turn occasionally.
Refrigerate reserved marinade in a separate container.
Preheat barbeque, then adjust to medium heat. Remove chops from marinade and discard marinade. Place on grill. Close lid and grill, about 12 to 15 minutes, turning once.
Brush with reserved marinade during the last five minutes of cooking time. Remove to platter and sprinkle with cilantro.
Per Serving: 237 calories
Sides: I served this with cooked quinoa (in a vegetable broth) which was then mixed into a pan with caramelized onions, shallots, red pepper, green beans & cuban black beans.
Sweet yellow corn on the cob with cilantro/chili/lime butter & sea salt.
No wonder top chefsswear by this staple – it retains heat and cooks food evenly. Plus, it can last a lifetime if you treat it properly (see 10 reasons to own one below).
Steak & Frites
Or mashed, boiled or baked.
This casual, simple and tasty meal adapted from a restaurant in Chicago calls for Flat Iron Steak but I’ve used it on other cuts like rib-eye and T-bone. Let steak reach room temperature prior to cooking so the center won’t be cold. After cooking, wait about five minutes before slicing to keep juices in. Serves 4. Pair with a hearty Shiraz or Cabernet – either will go well with this peppery steak.
3 Tbsp. olive oil, divided
1 tsp. each black pepper, smoked paprika, crushed fennel seeds and kosher salt.
4 flat iron (top chuck) steaks, about 1 ½ lb.
2 Tbsp. unsalted butter
Combine 1 Tbsp. olive oil with the seasonings. Spread paste over both sides of steak. Let sit 20 minutes. Heat remaining olive oil and butter in large skillet over medium-high heat. Cook steak 10-12 minutes, turning once or until instant-read thermometer registers 140F for medium-rare. Slice & pour sauce over top.
Crispy Salt and Vinegar Potatoes
Use Yukon Gold and slice as thinly as possible. Sprinkle with some sea salt & olive oil.
Spread on a cookie sheet and bake at 375F until cooked through and crispy – about ½ hour. Toss with some malt vinegar and chopped chives. Tip: Cook them as closely to serving time as possible so they don’t get soggy.
10 Reasons to Own a Cast Iron Skillet
1) Made of Iron. This thing is sturdy. You can drop it and it won’t be damaged. You don’t have to worry about scratching it or discolouring it (it’s black already you see). It’s possible that it can rust, but you can easily clean it. Cast iron skillets will take any and all abuse and still last forever. In fact, your skillet will probably outlast even you.
2) It Can Take The Heat. Most cookware comes with heat warnings. Even most stainless steel cookware isn’t supposed to go over 450/500 degrees in an oven. Cast iron? I mean… yea… eventually it’ll melt. But seriously you can cook on an open campfire with this thing. Try that with a non-stick pan. Oh wait. Don’t. I don’t want any lawsuits.
3) It’s Non-stick. Speaking of non-stick, cast iron skillets are non-stick if you season them correctly. Season your skillet by wiping it down with a thin layer of canola oil and then baking it in a 250 degree oven for about 90 minutes. Let it cool and wipe it down and this will be as good as any non-stick pan out there. Go ahead. Try a fried egg on it.
4) It’s a Grill. For the city folk, having a yard is not always an option. But because you can get a cast iron skillet really hot, it can effectively be used as a grill. For example, I cooked this steak in my cast iron and it was just as good as if it’d been cooked on a grill. Perfectly medium rare with a really nice crust.
5) It’s Economical. I think some people are actually turned off by cast iron because they think it’s cheap as in low quality. But the reality is that they just happen to be cheap to make which makes them economical, but not cheap. If you pay more than $40 for one, you are getting super-screwed. Not to mention that a lot of people sell perfectly good cast iron skillets at yard sales just because they don’t know how to season them.
6) It’s Versatile. You can make hundreds of completely delicious things in this one pan.
7) Save on Soap. Once your skillet is seasoned, it actually hurts it to wash it with soap. The soap will break up the tiny oil molecules that are embedded on the pan and make it not-so-non stick. It’s also possible that the next thing you cook it will have a slightly soapy taste to it! So save on the soap. If you need to scrub your cast iron pan, use salt!
8) It’s Vitamin Rich. This is a stretch, but since it’s made out of iron, a little bit of mineral iron does get transferred over during cooking.
9) Heat Distribution. This is maybe one of the most important reasons you should own one of these guys. People spend thousands on pots that evenly distribute heat. A cook’s nightmare is a pan with a really bad hot spot on it so half of your food is burned and the other half raw. Cast iron does such an amazing job of evenly distributing heat that you’ll never have this problem.
10) It’s Sexy. Call me crazy but I find these things kinda hot. There’s something rustic about them. Like a guy with a great beard. When you see someone working with a big heavy pan, it’s a turn on. Or at least… that’s what I tell myself.
The best way to care for your cast-iron pan
The trick to keeping cast iron in good shape: seasoning, a process that protects the metal from moisture (which can turn it rusty) and creates a non-stick surface. Lightly coat the bottom of your skillet with vegetable oil, heat over a medium flame, then dry with paper towels while the pan is still hot. The toast temp will help the porous metal absorb some of the oil. Each time you use and season the pan, you will be reinforcing the non-stick surface. When it comes to cleaning, steer clear of dish-washing soap, which can strip the coating. Instead, just wipe down the pan with paper towels before it cools. To loosen stuck-on-food or remove rust stains, heat the pan, cover the inside with oil and use a handful of coarse kosher salt, then scrub with an old dish towel. Give it a quick rinse with hot water, and dry immediately.
kind of crazy
Want something different for the person who has everything? Buy them a cast-iron pan in the shape of their home state (obviously USA customers only). You heard right.
Made-to-order cast-iron skillet at FeLion Studios, from $150/state – felionstudios.com
This first time I made this Tex-Mexspice rub I used it on chicken drumsticks which were barbequed but it would be good on pork as well. It tasted delicious and not overly spicy. At first I didn’t know exactly what to expect but the mix of cocoa powder and ground coffee beans together in one recipe was enough to make me want to try it out. After all what is better than coffee & chocolate with chicken?
But seriously I think you should try it. Makes 2 cups of spice blend mix.
½ cup chili powder
¼ cup paprika
1 Tbsp. ground cumin
1 tsp. garlic powder
1 tsp. red pepper flakes
2 tsp. salt
2 tsp. dried oregano
½ cup Cocoa powder (Try Trader Joe’s unsweetened or Fry’s)
1 Tbsp. ground coffee beans
Combine all ingredients in medium bowl; blend well. Place in airtight container which can be stored in a cool dry place for up to 4 months.
That make preparing a meal and your life so much easier.
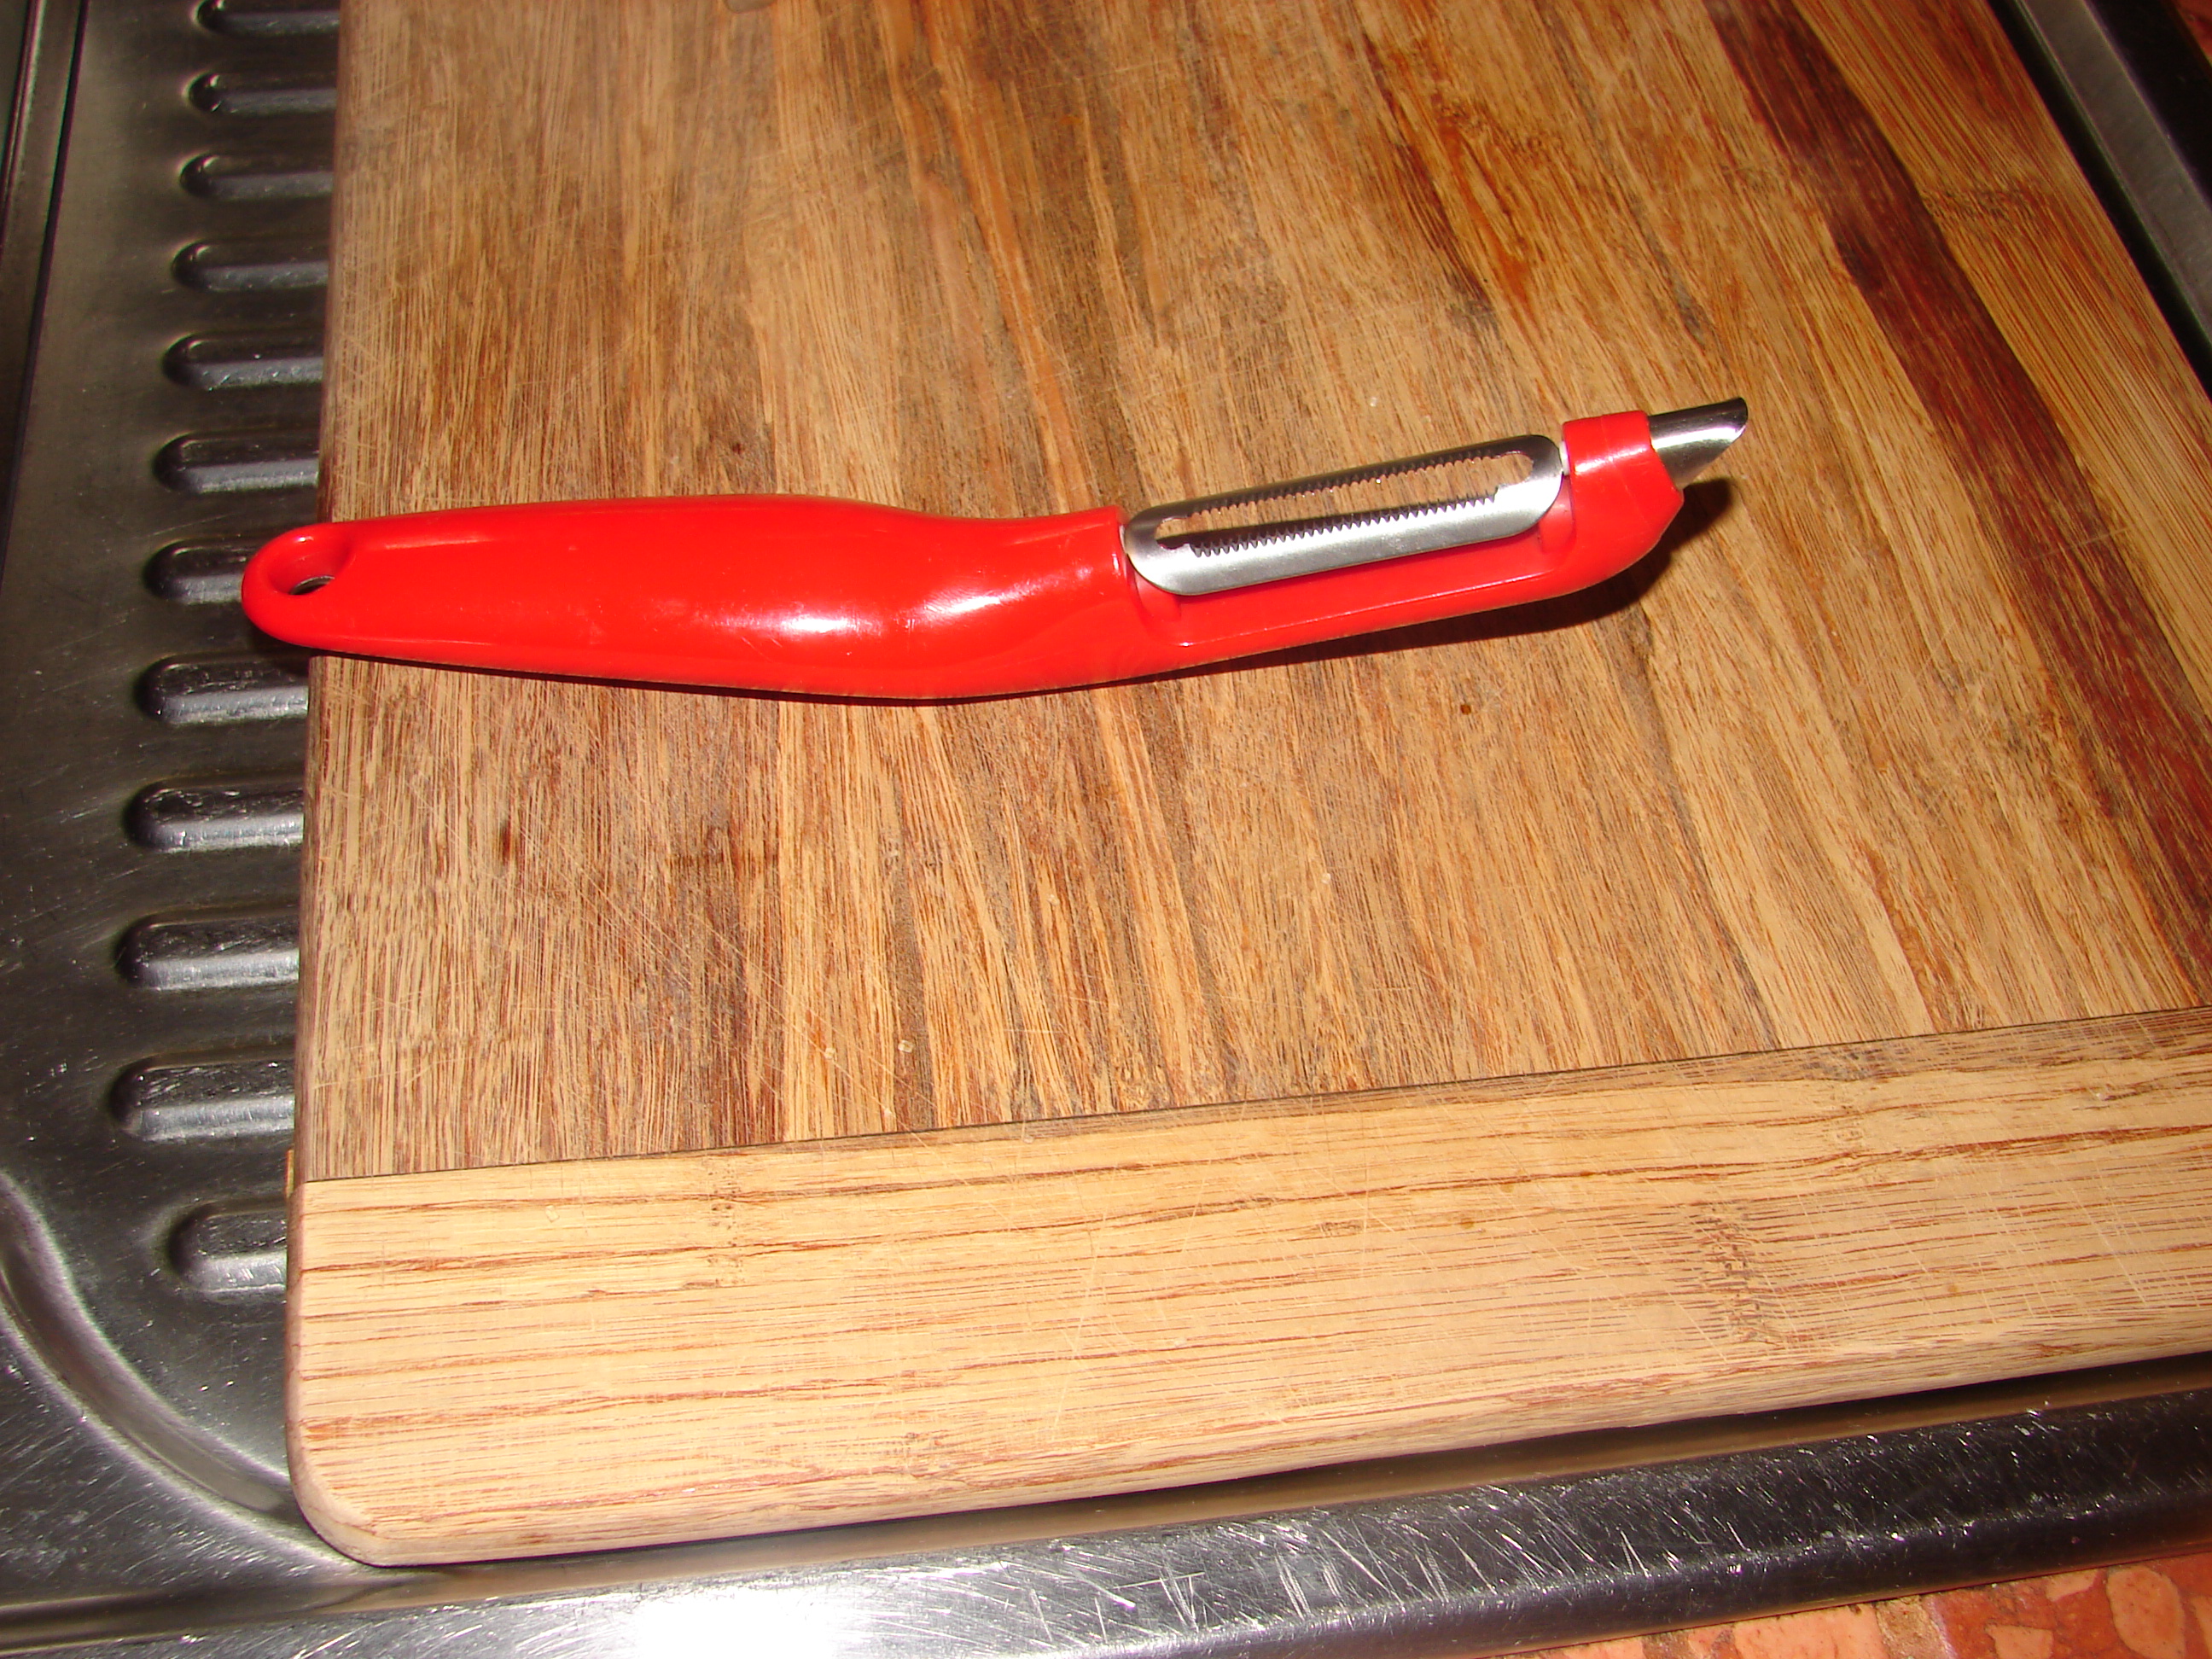
I don’t know about you but I like to simplify things in the kitchen as much as possible. These are my latest favorite kitchen tools. A whisk, a zester and a fruit/veggie peeler extraordinaire.
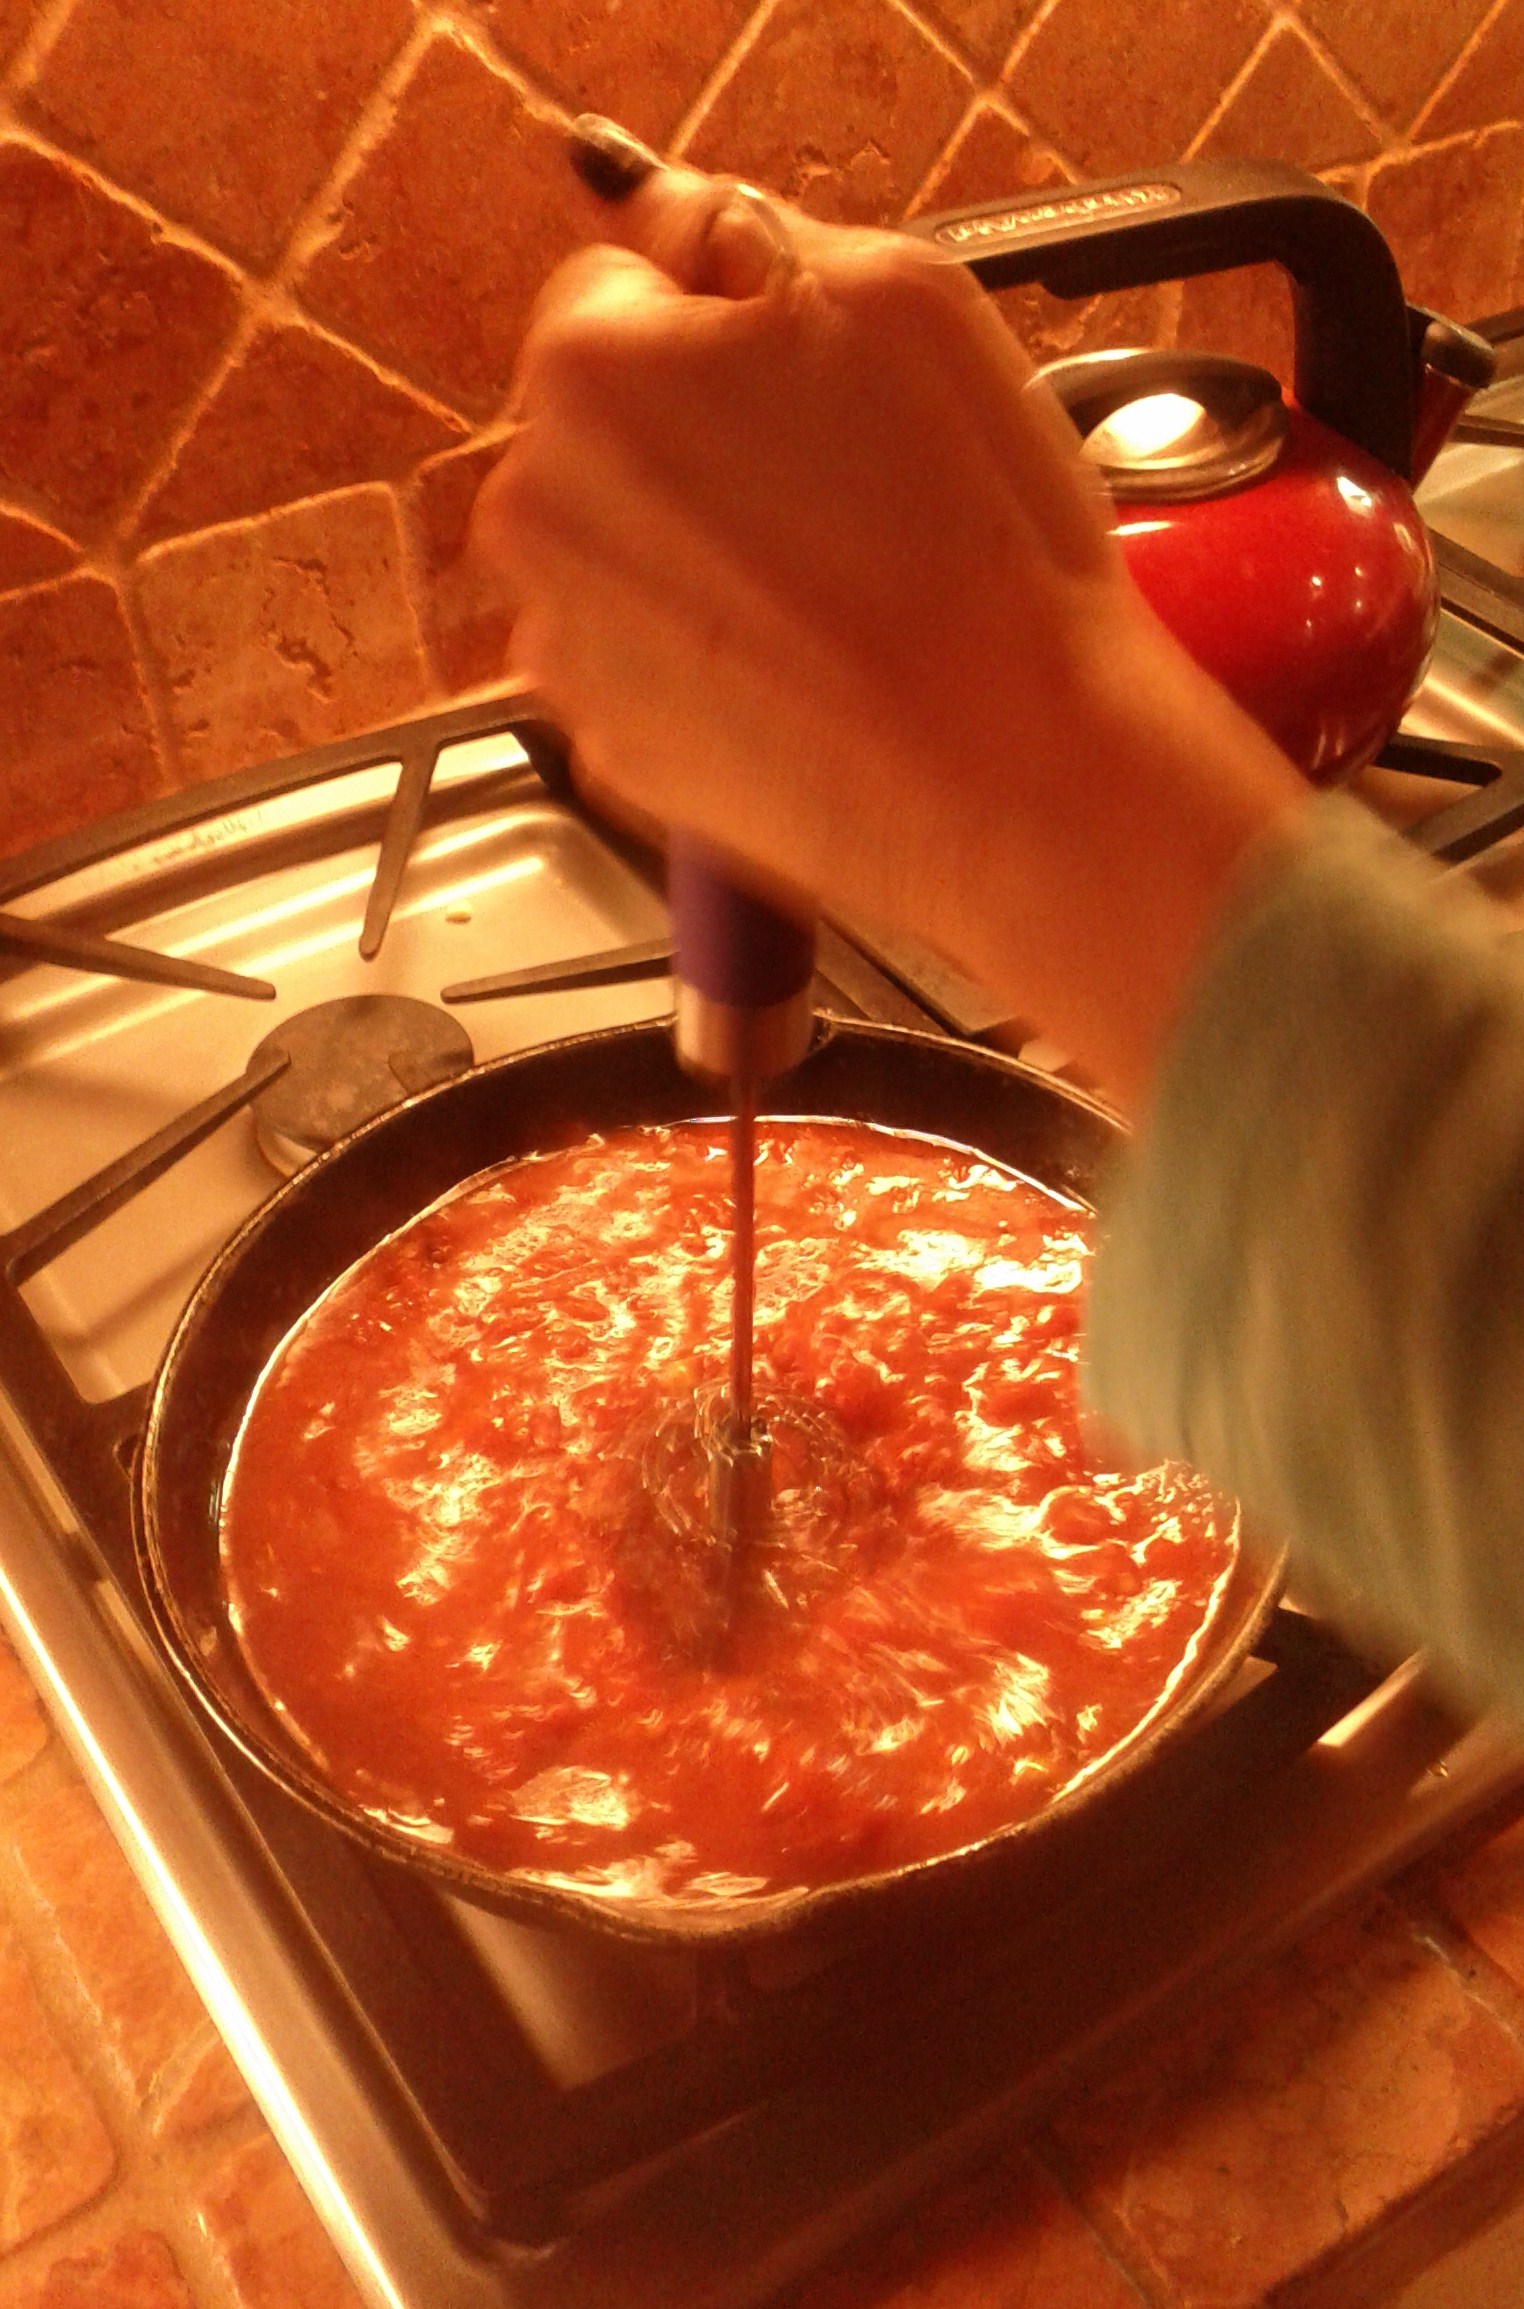
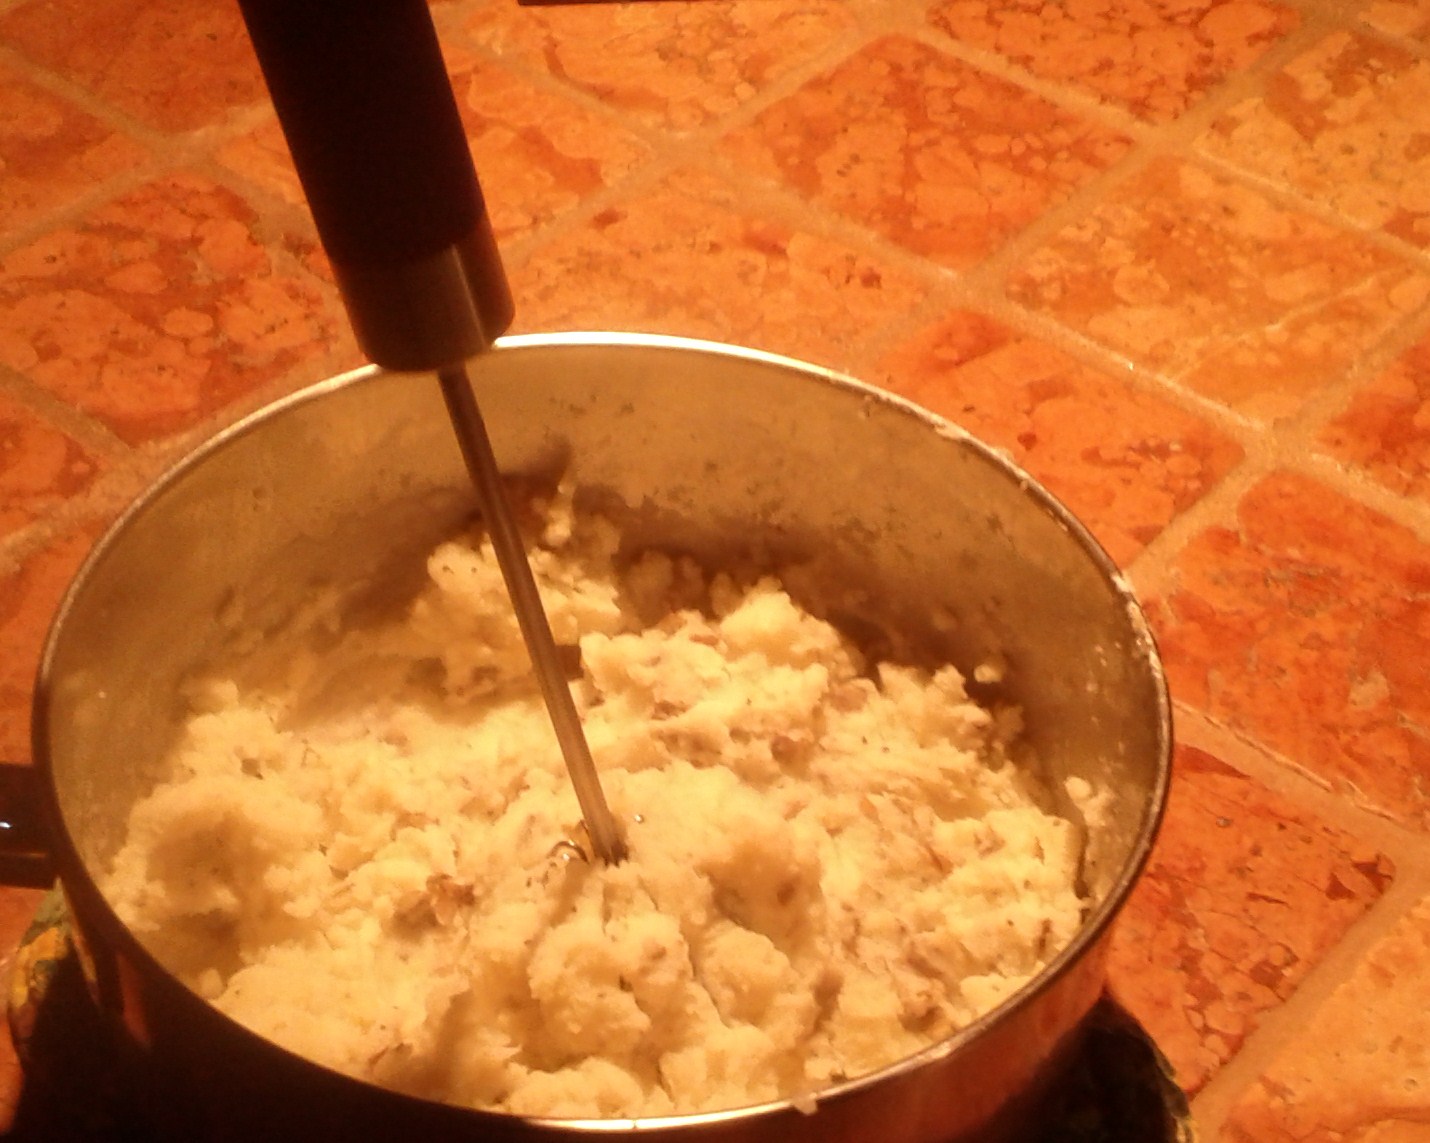
A friend gave me this Pogo whisk and I love it. Before this I was mashing potatoes with an electric mixer which is kind of messy. This works just as well and you only have to push down on the handle – it does the work for you. I also use it for smoothing sauces, soups & frothing milk for making lattes. Genius.
spaghetti sauce or soupsmashed potatoesfroth for lattesfruit and vegetable peeler especially good for soft skin fruit.The best lemon & lime zester. The bottom part contains the zest – no mess.
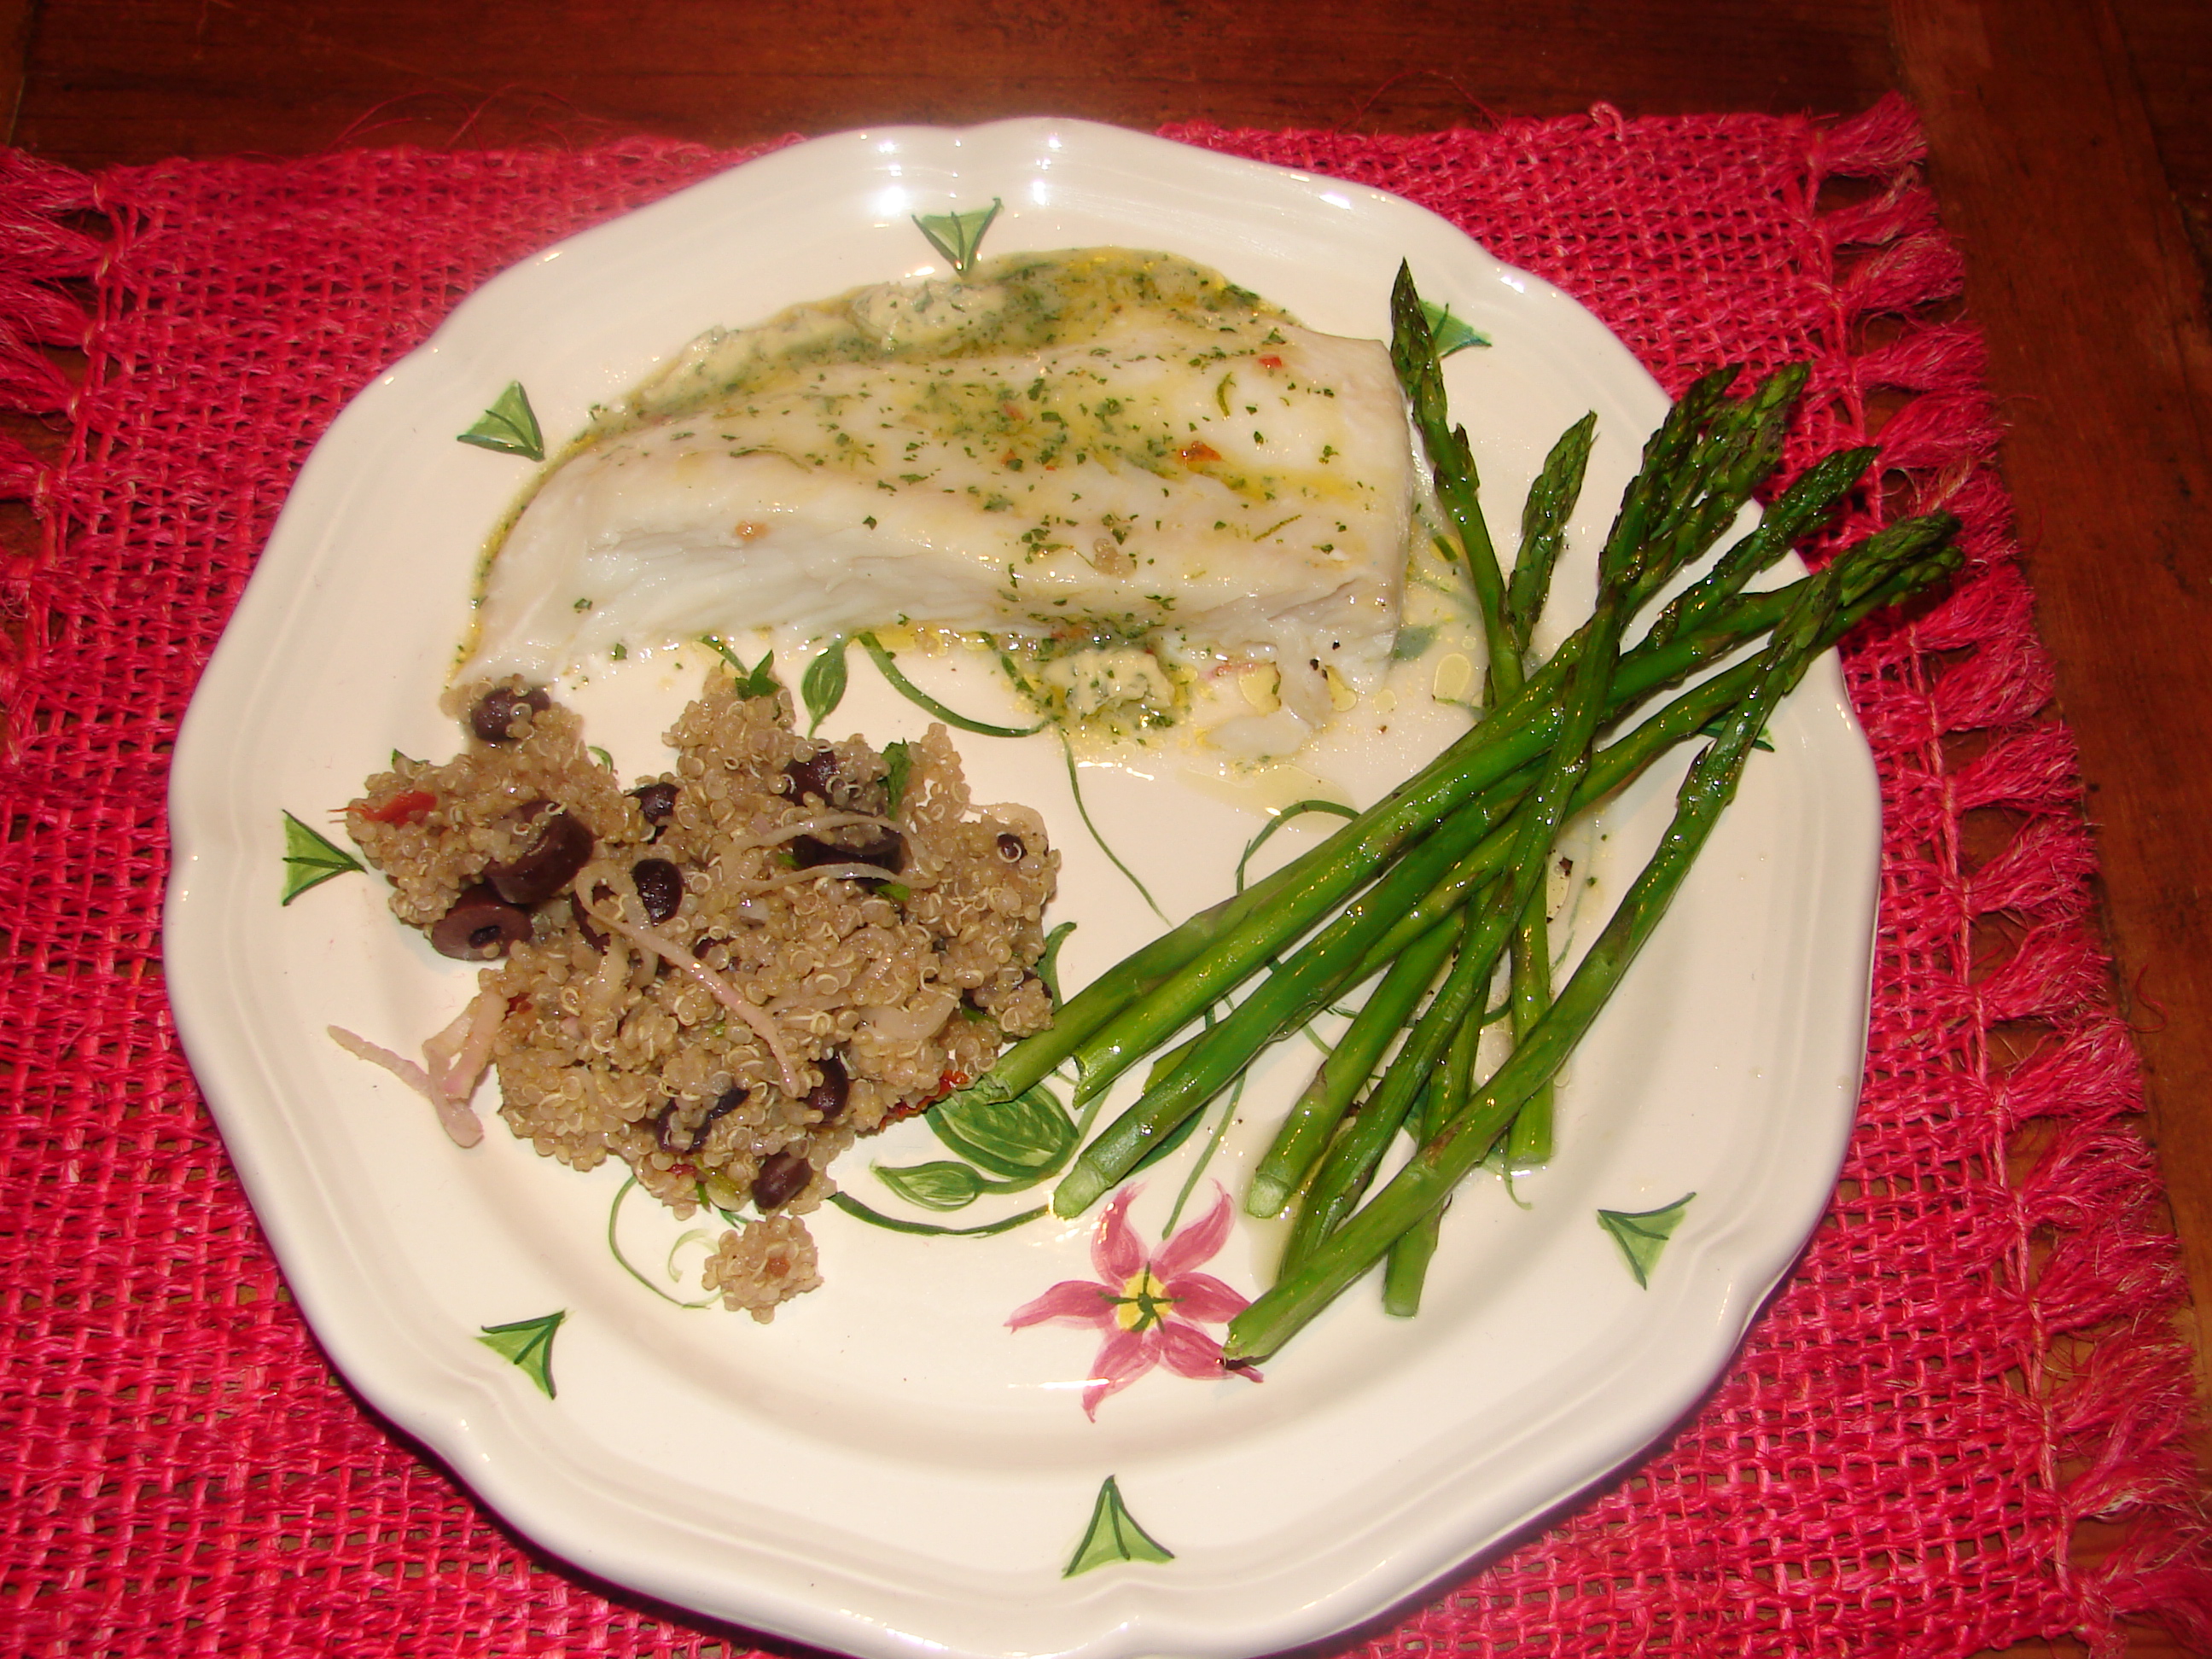
This recipeis so simple yet so incredible. I ended up freezing the butter I did not end up using for next time – you can adjust the quantity. If you can’t find halibut then use another type of solid white fish similar to halibut which is light and mild with a slightly sweet flavour. Serves 4.
4 halibut fillets
1 tsp kosher salt
8 Tbsp. unsalted butter, softened
2 Tbsp. fresh cilantro, chopped
2 Tbsp. sweet chile sauce (I use Thai)
1 Tbsp. fresh limejuice
zest from 1 lime
Set the oven temperature to 375
In a small food processor combine butter, sweet chilli sauce, cilantro, lime juice and lime zest. Set aside.
Season the halibuts with salt.
Place on a baking sheet (like Pyrex) and bake until done – approx. 15 minutes or until fish is opaque and starts to flake. You can also grill this.
Remove the halibut from the oven (or grill) and serve with the clilanto-sweet chilli-lime butter generously dolloped over top. It will melt in to form a rich flavorful sauce. Serve with sides like rice and asparagus or green beans. In Photo: Quinoa cooked with black beans, shallots & red pepper and Asparagus drizzled with vinaigrette of olive, white truffle oil & champagne vinegar (from last week’s recipe).
A perfect wine pairing – crisp Chardonnay.
Halibut is in season normally from April to November. It’s a great source of protein and vitamin B3. It is also high in omega-3 fatty acids. It lends itself easily to different sauces.
How to know if fish is fresh:
1)Look them in the eye if you can. Clear, bright eyes are signs of the freshest fish; the eyes of a less fresh fish will be dull of greying.
2)If the fish still has its skin on it, check it for shine and brightness. A fresh fish should look metallic and clean. Dull or discolored scales could be a sign of a less fresh one.
3)It should not smell fishy. An overwhelmingly strong smell is a sign that the fish is past its prime.
4)If the fish is in fillets, press your finger gently against the flesh. The indentation should disappear quickly as the fish springs back into form. A lasting indentation could mean the fish is no longer good.
5)The flesh of the fish should be moist and not spongy. Fish that is yellowing or discolored is past its best before date.


You must be logged in to post a comment.