Simply Satisfying in BLACK or WHITE – Truffle Oil

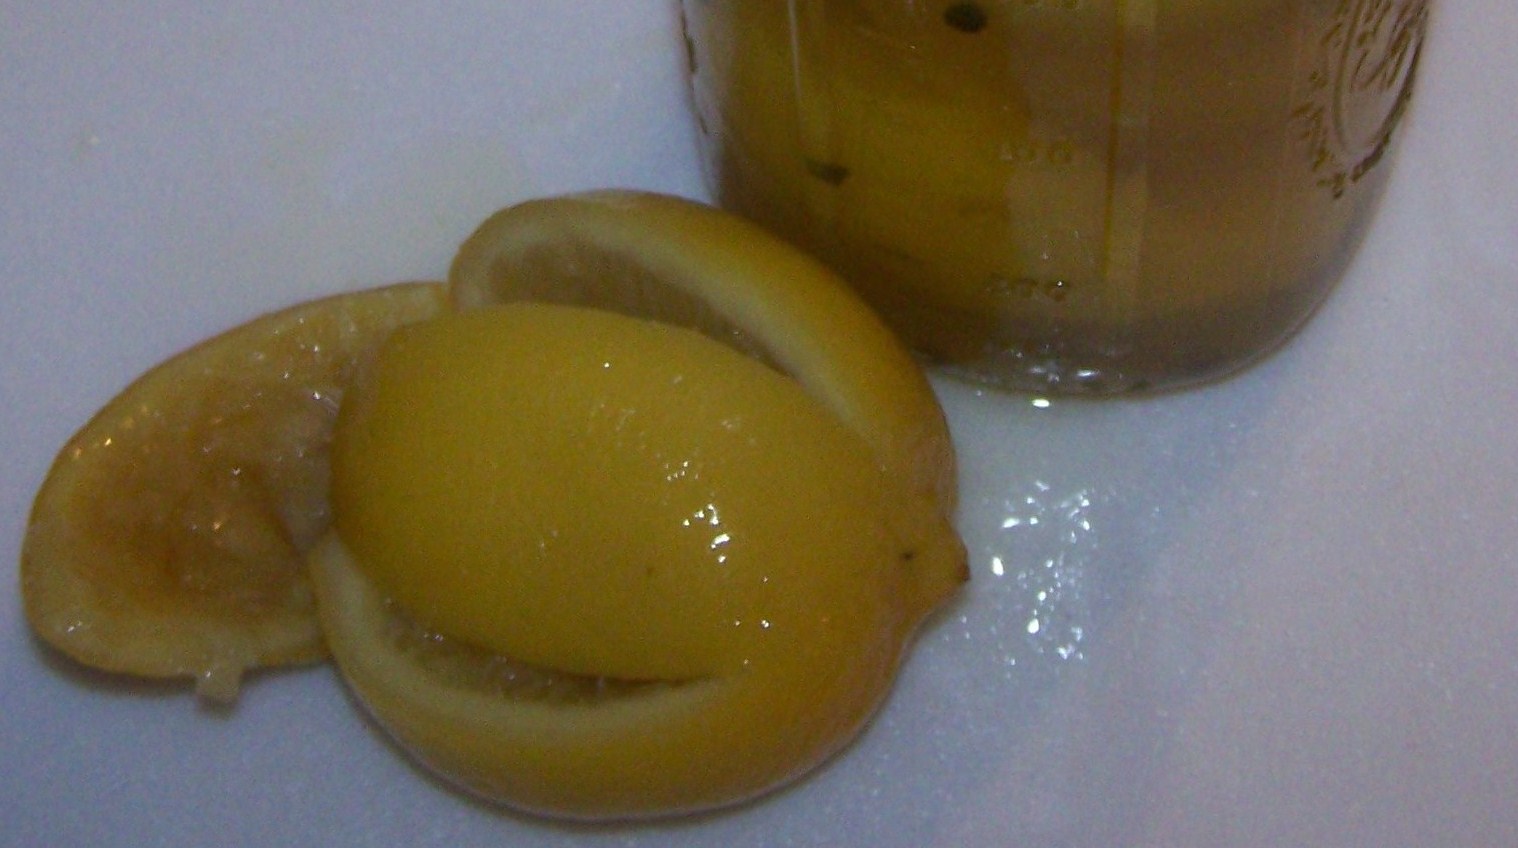
RECIPE below.  Truffles are a type of subterranean (it sounds alien like) mushroom.  Truffles are difficult to find and very expensive as a result!  Therefore the oil seems like a less expensive option.  I prefer white because it’s not as strong as the black version.

About $25.00
I like this from Alba -approx. $25.00

Truffle oil is a finishing oil not a cooking oil. Truffle oil is created when truffles are soaked (infused) in olive oil & used to enhance foods by adding it after preparation.  Before commercial truffle oil was introduced in the 1980s, chefs in Italy and France traditionally made their own by steeping tiny bits of fresh truffles in high-quality olive oil.  You can buy a truffle oil for as little as $12 but the best ones will run you a bit more.  Prices vary.

Things I’ve grown to love about truffle oil:

First off that it reminds me of something else I really love – truffles (I mean the chocolate variety especially laden with alcohol).  I love the word truffle – it sounds fluffy.

A little goes a LONG way.  One bottle will last months.

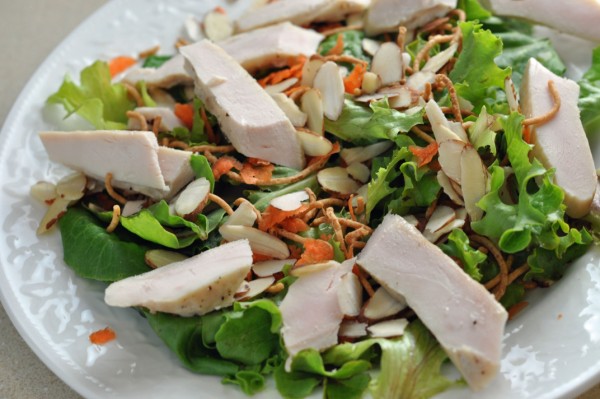
How putting a little on your veggie sandwich or eggs brings on a whole new flavor.

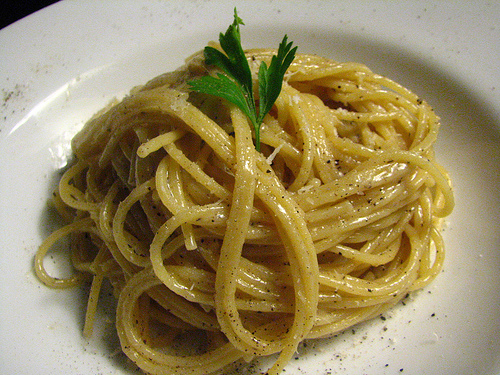
How topping your pasta with the oil makes it just perfect.

How topping your grilled steak with it makes it “just what the doctor ordered” (minus the fat).

How topping your pork chop or roast makes it ideal as you can then use less mushrooms which are wonderful with pork.  I think you get the picture!

The ingredients to make the truffle oils are cold-pressed and not chemically treated. This means smaller batches of truffle oils are made, and the oils are rarely processed by heat.

I have one tiny dislike about them – the fact that they use pigs to sniff them out – it sounds dirty.  A hunter will use a staff to force the pig to back off, once the pig has located a truffle. Can you imagine doing all that work and not getting a piece of the action? They use dogs too because dogs apparently love truffles. I think they should reward the animal used with at least one truffle treat – I would give them more before saying “that’s enough now, we need to make oil.”

Cost: White truffles cost from about $1000 to over $2000 a pound, and black truffles cost from $300 to over $600 a pound. This is approximately what the better eateries have to pay to get them. Don’t expect to be seeing them in the produce department of your neighborhood grocery store anytime soon…or ever.

Truffle Trivia: Let the dogs do the trick. In Italy, truffle dogs are trained in several steps. First, the dog is taught to retrieve a rubber ball. Next, a small bit of smelly Gorgonzola cheese is substituted for the rubber ball. After the dog has learned to retrieve the cheese, the cheese is hidden, forcing the dog to sniff it out for a reward of food. Finally, a small truffle is substituted for the cheese. The dog is trained to fetch, then dig up the truffle.

What about you? How do you use truffle oil?  Do you prefer black or white?

Asparagus with White Truffle Oil Vinaigrette

Ingredients:

  • 2 pounds asparagus

For the White Truffle Oil Vinaigrette:

  • 2 Tablespoons White Truffle Oil
  • 1.5 Tablespoons Extra Virgin Olive Oil
  • 1 Tablespoon  Champagne Vinegar
  • 1/4 teaspoon freshly squeezed lemon juice
  • 1/2 teaspoon (preferably Fleur de Sel or Maldon) Organic Sea Salt
  • Ground Black Pepper

Combine ingredients in a bowl and whisk.  Gently steam asparagus until just cooked through. Plate and drizzle with the vinaigrette. Adjust salt and freshly ground pepper to taste.  Serves 6-8.

Simply Satisfying – Cacio e pepe with lemon

You don’t have to be Italian to cook like one – although it helps!cacio

Once again when “glamping” we try to keep it simple for obvious reasons while coming up with restaurant quality dishes as often as possible.  This is one of them.

Don’t you love the elegant name of this dish – which is simply a glorified sounding Italian staple synomymous with Pecorino Romano –  but Pecorino clumps when cooked.  Add it at the end, instead, which also makes the most of its sharp flavor.  Lemon adds spunk – that is, acidity and freshness.  Before assembling please see note at bottom for the distinct differences when using Pecorino and Parmesan.  I guarantee you will love this.

 Recipe:

8 ounces thick spaghetti or linguine

½ stick unsalted butter, cut into 4 pieces, softened or at room temperature

2 ounces Grana Padano or Parmigiana Reggiano cheese grated (1 cup)

2 tsp. freshly cracked pepper (use a mortar and pestle or the coarsest setting on a grinder), plus more for garnish.  Pepper flakes for finish (optional)

¾ ounce Pecorino Romano cheese, grated (1/4 cup)

1 small lemon (preferably Meyer)

High quality extra-virgin olive oil, for drizzling

 1)      The first thing is to undercook the pasta (al dente).  Bring a large pot of generously salted water to a boil.  Add pasta and cook until very al dente – about 2 minutes less than called for in package instructions.  Reserve 1 cup pasta water before draining.

 2)      The key to a lush, silky sauce: Transfer pasta to a 12-inch skillet (preferably non-stick).  Add butter and ¼ cup pasta water.  Bring to a simmer over medium-high heat.  The heat helps the starch in the water meld with the fat from the butter, which prevents the Parmesan cheese from becoming stringy in the finished dish.

 3)      Parmesan (either GP or PR): Reduce heat to low, and mix in whichever grated parmesan you chose with the cracked pepper.  I use Parmigiano Reggiano in all my pasta dishes as a personal preference.  Both are softer than Pecorino Romano.  It will melt into the butter water, creating a sauce as the pasta finishes cooking.

 4)      Toss and Simmer with tongs to thoroughly coat it with the sauce.  Keep everything at a gentle simmer just until the cheese melts and sauce thickens slightly, about 1 minute.

 5)      Pecorino and Zest: Remove from heat, then stir in the Pecorino Romano.  Always add Pecorino off direct heat: it clumps when cooked.  Zest lemon over the pasta to catch any extra.  Any type will do but a Meyer is particularly nice in this dish.  It’s sweeter in flavor and aroma, with back notes of orange and lime.

 6)      Finishing Touches: If pasta looks dry, toss it with a bit more pasta water until it has a glossy coating.  Divide between 2 warm (preferably) bowls.  Drizzle each with oil and lemon juice and garnish with more cracked pepper & red pepper flakes. Top with fresh basil leaves or flat-leaf parsley for added presentation.  Serve immediately.

And know that sometimes the dishes with the least ingredients are also sometimes the most satisfying.

Parm vs Pecorino – these hard cheeses enhance nearly everything, making them both winners in the kitchen.  Knowing their differences will make you a smarter shopper and a better cook.

 Try to buy the block verses “already grated” unless you’re in a super hurry.  Grated is more convenient so if you must then buy it from the refrigerated section.  The blocks are more versatile as you can also shave it into salads.  It can keep for several months wrapped in parchment and plastic.  Bonus: when the cheese is gone, Parmesan’s rind can be used simmered into soups to add rich flavor.

 Parmesan                           vs                  Pecorino Romano

 Made from Cow’s Milk                             Sheep’s Milk

 Rich, Nutty, Salty                                       Sharp, Earthy, Robust

 Pricey but worth the splurge                    A bit more budget friendly

Parmesan: domestic varieties are available but classic Parmigiano-Reggiano is  made only in a certain region of Italy.  A stamped rind lets you know it’s the real deal.

Pecorino: Feeling fancy?  Go for Locatelli  brand *Pecorino Romano, a famously delicious pick imported from Italy. *Use this strong cheese sparingly.   To use in place of Parmesan use less than the recipe calls for.

glamping” is a glamorized version of regular camping – camping with flair (plus I don’t like to sleep in a tent).  But you can make this any old time.

Simply Satisfying – Fish Chowder

fish chowderThis recipe came about while on a camping trip to Canada’s East Coast including Newfoundland.  The East Coast is known for its fresh local seafood and  particularly chowder.  It started off as a seafood only trip as we were sampling the best all over the Maritimes.  Scallops & Clams in Digby, Lobster in P.E.I. & Nova Scotia and chowders everywhere.

I wanted to make a chowder with some nice fresh Cod we bought from a local fishing boat in Newfoundland but keep it simple and still have the consistency and flavor of a hearty meal.  We camp in a Eurovan not a tent and have two stove top burners.  You have to be somewhat creative. So while this is cheating with adding the can of prepared soup, don’t laugh because you’ll find it pretty close to an original without a whole lot of work.  It only takes about 10 minutes.  This serves two for a meal (along with fresh bread) or four as an appetizer.  Looks like the real deal and tastes very close – well we thought so.

Instructions:

Put a 10 oz (284 ml) can of condensed cream of potato soup (I used Campbell’s) into a medium size pot.  Heat gently.

Add ¾ cup (175 ml) of milk (whole or skim) & stir until smooth.

Add 1 chopped celery stalk

Two diced plum tomatoes

Pinches of Tarragon or Oregano (I used both)

*You can add 1 Tbsp. of butter and a little dry white wine (optional)

Simmer, covered for about 5 minutes or longer depending on how crisp you like the celery.

Then add 1 lb. (500g) fresh cod, halibut or any white fish fillets (or a combo of) that tend not to fall apart, cut into chunks.  Cook until done – about 5 minutes uncovered.  Garnish with Tarragon leaves.  Season to taste.  Hope you enjoy this condensed (pun intended) version of the real thing.

This is a *glamping tested recipe.                                                                                            When we do not stay in hotels with spas we *glamp on occasion which is camping with flair.

Moroccan Preserved Lemons

Last week I promised this very simple (only 3 ingredients) recipe which you can add to Moroccan chicken, spicy lamb, seafood dishes or just use the juice in salad dressings.preserved lem - Copy

Lemons loose their sharpness when preserved in salt.  The unique flavour and silken texture that develops when you use this technique is a characteristic of North Africa,  especially Moroccan cooking.  Yet the lemons also make a novel addition to non-Moroccan dishes.  You will find that these lemons are easy to prepare and thin-skinned lemons yield the most juice.

Traditionally, only the peel of the preserved fruit is used, but I usually include the flesh as well and you can eat the whole thing.  Once the jar has been opened, the fruit will keep for up to 1 year unrefrigerated (don’t worry if a lacy white film appears on top of the jar or on the lemons, as it is quite harmless – simply rinse it off); a layer of olive oil floated on the surface will help to preserve freshness.  When it comes time to use one of these lemons just rinse & chop it.

Ingredients

7 Tablespoons coarse salt  (you use 1 Tbsp of salt per lemon)

7 plump, juicy lemons, preferably thin-skinned

Boiling Water

Put 1 tsp. coarse salt in the bottom of a clean, dry jar.  Holding a lemon over a plate to catch the juice, cut lengthwise 4 times as if about to quarter it, but do not cut quite through – leave the pieces joined.  Ease out any seeds.

Pack 1 Tbsp. salt into the cuts, then close them up around the salt and put the lemon in the jar.  Repeat with 5 more lemons, packing them tightly and pressing each layer down to expel any air before adding the next layer, until the jar is full.

Squeeze another lemon and pour the juice over the rest of the lemons.  Sprinkle with more coarse salt and finally pour in boiling water to cover the lemons.

Close the jar tightly and keep in a warm place for 3 to 4 weeks before using.

Give me your feedback after you try them because I’m sure you’ll LOVE them.

SALTS:  There is no difference between kosher salt and rough sea salt.  Many cooks prefer to use kosher salt because its larger rough size crystals is simply more convenient and practical for certain kinds of food preparation such as this one.

The only differences between kosher salt and nearly every other sort of salt lie in the shape and size of its crystals, not its chemical makeup. Almost all salt has an identical chemistry. Some are smoked, or have trace elements of minerals that change their taste or color, but any differences between “kosher” and “sea” salt, provided the shapes of their crystals are the same, are purely in the labeling.  In general Kosher salt and flakier, more delicate salts that melt nicely on the tongue, tend to be used as finishing salts, adding the last crunchy, salty touch to a dish. Table salt is used more for seasoning a dish while still in process.

*Recipe taken from Sensational Preserves by Hilaire Walden (250 recipes for jams, jellies, chutneys and sauces).  This has been my guide book for making jams, hot pepper sauces & mustards.  It’s an exceptionally useful book in both my opinion and that of the Daily Mail, UK.

Simply Satisfying – Oriental Chicken Salad with Crispy Noodles

For a colorful presentation, serve the salad in red cabbage leaves.  Serves six.applebeesorientalsalad

Ingredients

  • 1 1/2 pounds skinless boneless chicken breasts, well trimmed.  Grill chicken until done and shred (or cut up into bite size pieces if preferred).  You can even use leftover roasted chicken.
  • 4 ounces snow peas
  •  1 small package of coleslaw mix (if you don’t feel like shredding cabbage plus it usually comes with grated carrots which are always nice).
  •  sliced mushrooms
  • 1 bunch chopped green onions
  • 1/2 cup sunflower seeds (or less)
  • crispy chow mein style noodles
  • 1/2 cup slivered almonds
  • toasted sesame seeds

Dressing:

  • 1/3 cup rice wine vinegar
  • 1/4 cup chopped fresh cilantro
  • 1/4 cup low-sodium soy sauce
  • 3 tablespoons minced fresh ginger
  • 4 large garlic cloves, minced
  • 1 teaspoon minced jalapeño chili (with seeds)
  • 1 teaspoon toasted sesame seed oil
  • 1 tsp. dijon mustard
  • a little brown sugar
  • (if you want a creamy sauce you can use about 1/4 cup of mayonnaise and less soy)

Preparation

Combine vinegar, cilantro, soy sauce, ginger, garlic, chili, dijon, sesame oil and sugar in medium bowl and mix.

Place grilled (or cooked) chicken, coleslaw mix, snow peas, mushrooms, and green onions in large bowl. Pour dressing over and toss to combine.(Can be made 6 hours ahead. Cover; chill.)

Just before serving toss in the sunflower seeds, slivered almonds and crispy noodles.  Then sprinkle toasted sesame seeds over each plating.  Enjoy.

Simply Satisfying – Fiesta Salad

Sunday for lunch I ordered a deliciously tasting salad from the *Taos Cantina in Sedona, AZ.  Sedona has to be one of the most picturesque cities in the world.

Fiesta Salad
Fiesta Salad

It’s a take on traditional taco salad but without the taco shell. It came with ranch/chipotle dressing on the side and sour cream.  I would omit the sour cream (extra calories) and mix a litehouse ranch with chipotle (sparingly to taste) from the can.

What a pleasant presentation for guests especially in the summer.  Underneath the surrounding mix of chopped tomatoes, chopped cucumber, black beans, corn kernels, queso blanco (mild Mexican white cheese – but you can probably substitute with Mozarella) there was a nice array of organic spring mixed lettuces which you can’t see until you mix it all up.  On top in the middle was some guacamole and a few tortillas.  I would suggest chopped avocado and cilantro in place of the guacamole and lime slices on the side…and a Corona extra.  I’m ready for another FIESTA!

*We sat outdoors surrounded by majestic red rock mountains (or monoliths) on all sides. Sedona  is known as a spiritual place abundant in spas and retreats but it is also a tourist destination with many touristy shops.  Great place to bike & hike.

Taos Cantina - Sedona
Taos Cantina – in Sedona with a backdrop of spectacular scenery.

Simply Satisfying – The Best Caesar Salad

Caesar salad has always been one of my all time favorite salads but I could never get the dressing quite right…..until I ordered it once in an Italian restaurant in Niagara Falls of all places.  The waiter came to our table with this wooden stand and placed a huge wooden bowl on top and then started mixing from scratch right in front of us.  He looked so professional doing so that I tried to memorize his every ingredient with the correct proportions.   I don’t believe anything is left out, in fact I added another two ingredients.

Wood bowl from Durban, S.A.

Start with fresh ground pepper right in the bowl (preferably wooden) that you’ll be serving from.

Purists will tell you that Caesar Salad has to be made with fresh anchovies but I admit to using about 1 inch of Anchovy paste instead.  A good quality one works as a nice replacement.

Crushed or finely chopped garlic (a couple cloves…or more)

About 1 tsp. of dried mustard like Keen’s

1 egg yolk

a few drops of Worcestershire sauce and Red Wine Vinegar.

Mix well.

Then:

Whisk in the juice of ½ fresh lemon.  Add anywhere from ¼ to  ½ cup of olive oil bit by bit – whisking slowly in with the rest.  It depends on how thick you like the dressing.  More often than not I end up using about 1/3 of a cup.  Finally mix in ¼ cup freshly grated parmesan cheese.

Toss in enough  romaine lettuce for the dressing, tearing it with your hands.  Add more parmesan & pepper if you like once plated.  Also bacon bits and croutons if desired.

NOTE:  Since then I was at another restaurant where the waiter added some capers and a splash of Tabasco.  You can add that before the lemon if you want – it’s a great addition.

For tasty croutons just cut up some bread into little squares and add it to a hot skillet with a bit of olive oil and Italian spices until they start to get crispy.  You can also freeze them for later use.

**p.s.  I thought yesterday was Wednesday so I posted something on design.  Normally I post a recipe on Tuesday. Might have suffered a bit of heat stroke in Palm Springs. Does anyone really care? Do you bloggers follow some kind of format or just post haphazardly?

Simply Satisfying – put the lime in the coconut and mix it all up….

Sablefish (black cod) with Lime and Coconutblackcod

Why not try making this dish for a special Valentines day dinner?

This recipe was originally inspired by “pescado con coco” – fish with tomato, garlic and coconut from the Dominican Republic.

 I’ve made this on several occasions and if you love Black Cod otherwise known as Sablefish (one of my favorites) and the best replacement for Chilean Sea Bass which has been endangered for some time now, then this recipe is sure to be a hit.

Recipe:

1 ¼ pound skinless black cod fillet

4 tsp. fresh lime juice, divided

1 Tbsp. olive oil

1 ½ cups chopped leek (white and pale green parts only; about 1 large)

2 garlic cloves, minced

½ cup canned unsweetened coconut milk

1 tsp. (packed) grated lime peel

1/3 cup chopped cilantro (and a sprig or two for garnish)

 Preheat oven to 350 F.  Sprinkle fish with salt and pepper, place in 11x7x2 inch glass baking dish.  Drizzle with 1 ½ teaspoons of lime juice.  Heat oil in large skillet over medium heat.  Add leek and garlic; sauté 7 minutes.  Add coconut milk and remaining lime juice; boil until thick, about 4 minutes.  Stir in lime peel.

Spoon sauce over fish.  Bake until fish is just opaque in center, about 20 minutes or until there is no resistance when pierced with a fork.  Transfer to platter.  Whisk juices in baking dish.  Spoon around fish; top with cilantro.  Makes 4 servings.

ENJOY with jasmine rice and a green veggie like string beans or asparagus.

Simple & Satisfying – Salad with Endive, Pear & Crumbled Stilton

Organic Greens, Endive and Pear Salad with Crumbled Stilton

I was recently taken out for dinner to La Cigale French Bistro where a friend ordered a starter of endive salad with walnuts and crumbled blue cheese that tasted divine.  Unfortunately for this friend three of us dove into his plate & attacked the salad….then decided to order one for ourselves.endive_pear_salad

Did not ask for the recipe but I do know that….

Cioppino’s Mediterranean Grill has had a very similar salad on the menu since it opened in 1999.

My birthday dinner there a few years back was very memorable and owner/chef Pino Posterero made a visit to our table to check on our meal.  He says the secret to the success of this salad is in the vinaigrette which is simple to make, yet has a complex flavour.

Recipe:

120g (4 oz) Organic Salad Greens (including watercress or arugula)

16 leaves of Belgian Endive

1 ripe Bosc pear, skin on, cored and thinly sliced (ideally)

60 ml (2 oz) lemon shallot honey vinaigrette (see recipe blow)

Crumbled Stilton (preferably) or blue cheese (about 2-3 oz) or 80g.

Crumbled walnuts (this is not part of original recipe) but I think it would be a nice addition.

In a mixing bowl, combine salad greens, Belgian endive and pear.  Add vinaigrette and toss lightly.  To serve, divide the salad among four plates and sprinkle Stilton (& optional walnuts) on top.

Lemon Shallot Honey Vinaigrette

 150 ml (1/4 cup) fresh lemon juice

90 ml (5 ½ Tbsp) honey

50 ml (3 Tbsp) white wine vinegar

50 ml (3 Tbsp) Dijon mustard

50 g (2 oz) chopped shallots

80 ml (6 Tbsp) extra-virgin olive oil

pinch of sea salt, pepper

In a mixing bowl, combine lemon juice, honey, white wine vinegar, Dijon mustard and shallots.  Whisk in olive oil gradually until well emulsified.  Season with salt and pepper.

It will keep refrigerated in an airtight container or glass jar for up to one week.

Makes 500 ml.  Makes 4 servings.  This would make a beautiful side to fish, pasta or almost any dish.