This delightful dish that’s very similar to quiche comes courtesy of our friend Ruth. She brought it over for a Grammy party and everyone raved about how amazing it tasted so it was only right to ask her to share the recipe. She said she didn’t have one (don’t you hate it when people say that?) but thankfully she wrote down the steps:
For the Pastry:
To make one 9” pie crust:
1 cup of *pastry flour (either whole wheat or white)
½ tsp. salt
1/3 cup butter
3 Tbsp. cold water
Directions: Cut cold butter into small cubes. Then with a knife cut cold butter into sifted flour/salt mix. Add water until you have a workable dough.
Roll out and line pie plate. Place in freezer until the filling is ready. Doing this helps to make the crust flaky.
For Filling:
1 ½ cup finely chopped onions or combo of onion & mushrooms – sauté onions until caramelized. Ruth sautés the onions and mushrooms separately.
½ cup of grated sharp cheese like Cheddar or Gruyère
Mix milk (both wet & dry), eggs, salt, thyme, nutritional yeast and oil in blender.
Layer onion (then mushroom if using), then cheese in pie plate.
Pour blended mixture over top.
Bake at 375F for 10 minutes then turn oven temperature to 350F. Bake an additional 15-30 minutes until brown. Check with a toothpick inserted in the middle to make sure it’s not too wet.
Enjoy!
*make sure it’s pastry flour & not all-purpose
**There are two basic kinds of powdered milks, instant and non-instant or “regular”. They are processed a little differently so the end results are not the same. The texture is also different. Some instant powdered milks look flaky but the non-instant is definitely “powdery”. Non-instant milk is denser and more concentrated. Maybe not as easy to find as regular.
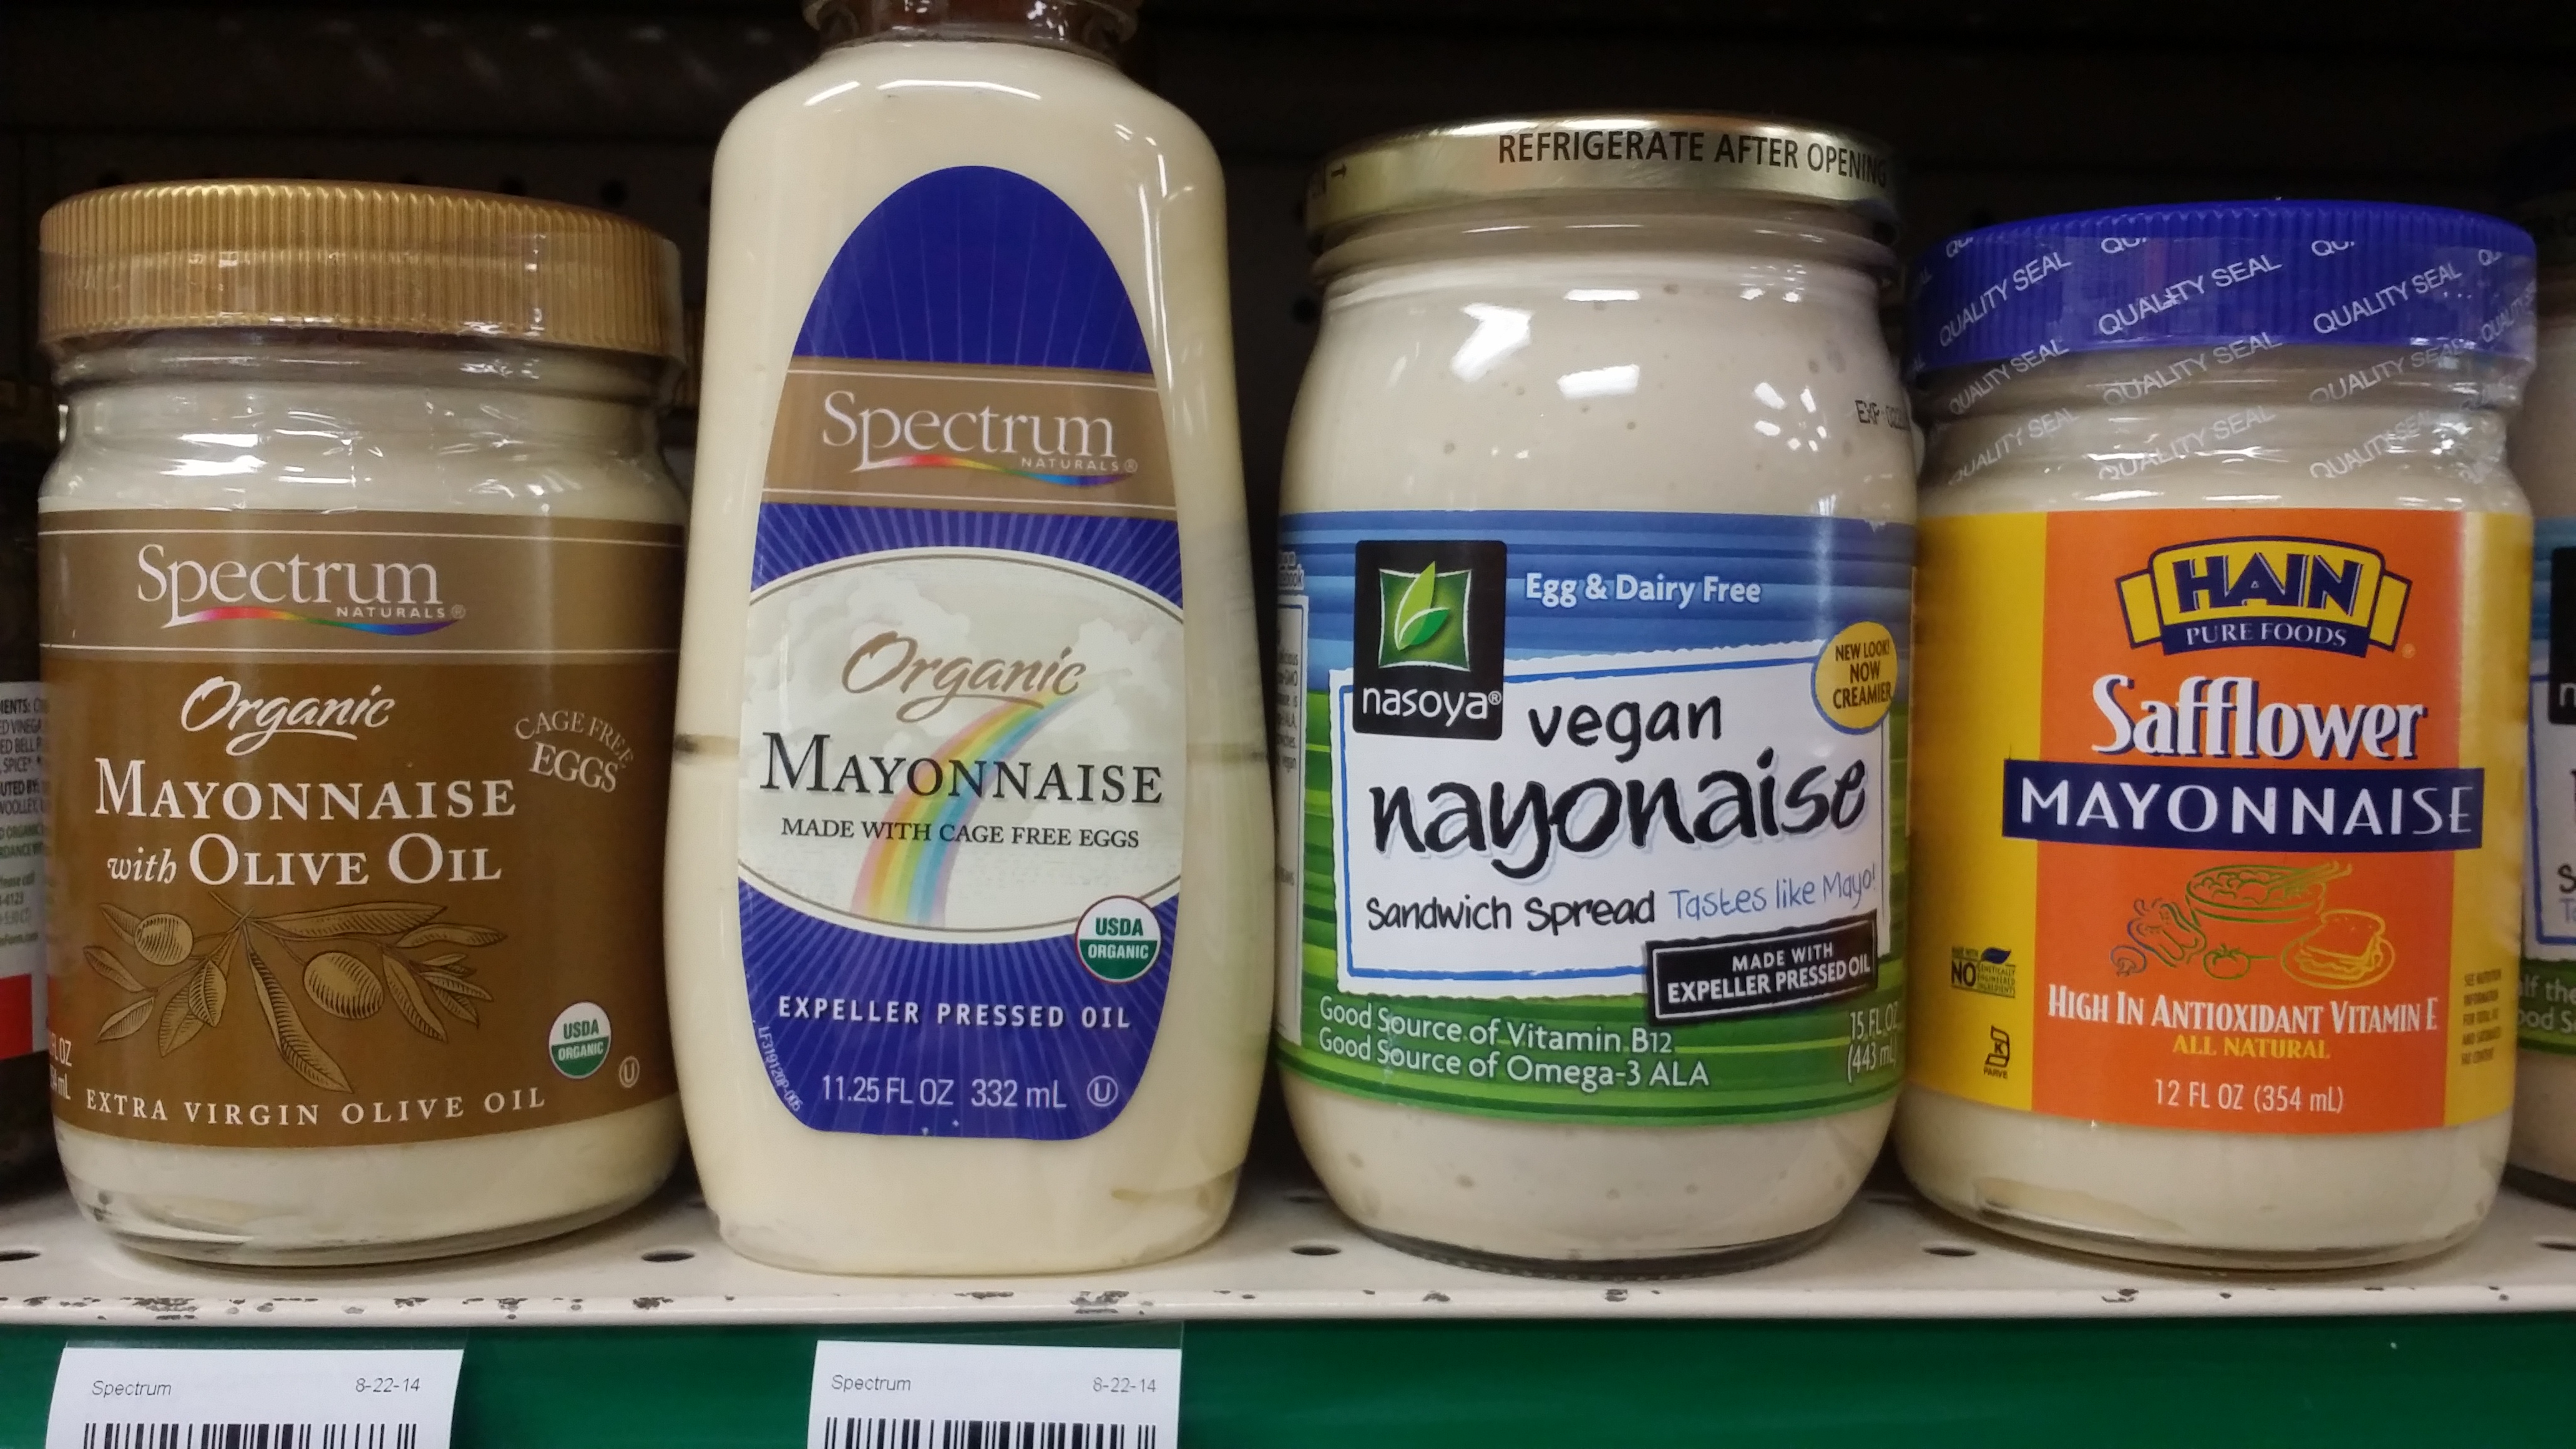
This post came about after I was out looking to buy an ordinary sandwich condiment – known to compliment everything from tuna to egg salad sandwiches. It was difficult to find a low-fat healthy mayonnaise. By now I’m way more careful about reading labels. You may have some idea that mayonnaise is not exactly a healthy condiment, but you may not be aware of just how high in fat and other harmful dietary elements it really is. Every single mayo jar I came across including ½ the calories (in fact specifically half the calories) contained high fat. Which made me question how many people actually pay attention to what they use in countless recipes. I mean you can make a sandwich without mayonnaise but honestly the stuff really does add to the overall taste. So if I can make my own mustard then I can certainly make my own mayonnaise. It’s very easy and a whole bunch healthier. Have a look at two DIY recipes.
1) Healthy Mayonnaise Recipe
Please note: it is very important that all the ingredients are at room temperature for this recipe. Having ingredients that are too hot or too cold can cause the mayo to separate or not emulsify. Any oils can be used for this, though I prefer coconut, olive, walnut or other healthy oils.
Ingredients
4 egg yolks at room temperature
1 TBSP lemon juice or apple cider vinegar
1 Tsp regular or Dijon mustard (or ½ tsp dried mustard)
Salt and pepper
⅔ cup olive oil
⅔ cup coconut oil (warm) or other healthy oil (macadamia works well)
Instructions
Put egg yolks into blender or bowl and whisk/blend until smooth
Add lemon juice or vinegar, mustard and spices and blend until mixed
SLOWLY add oil while blending or whisking at low speed, starting with olive oil. Start with a drop at a time until it starts to emulsify and then keep adding slowly until all oil is incorporated.
Store in fridge up to 1 week.
Author: Wellness Mama
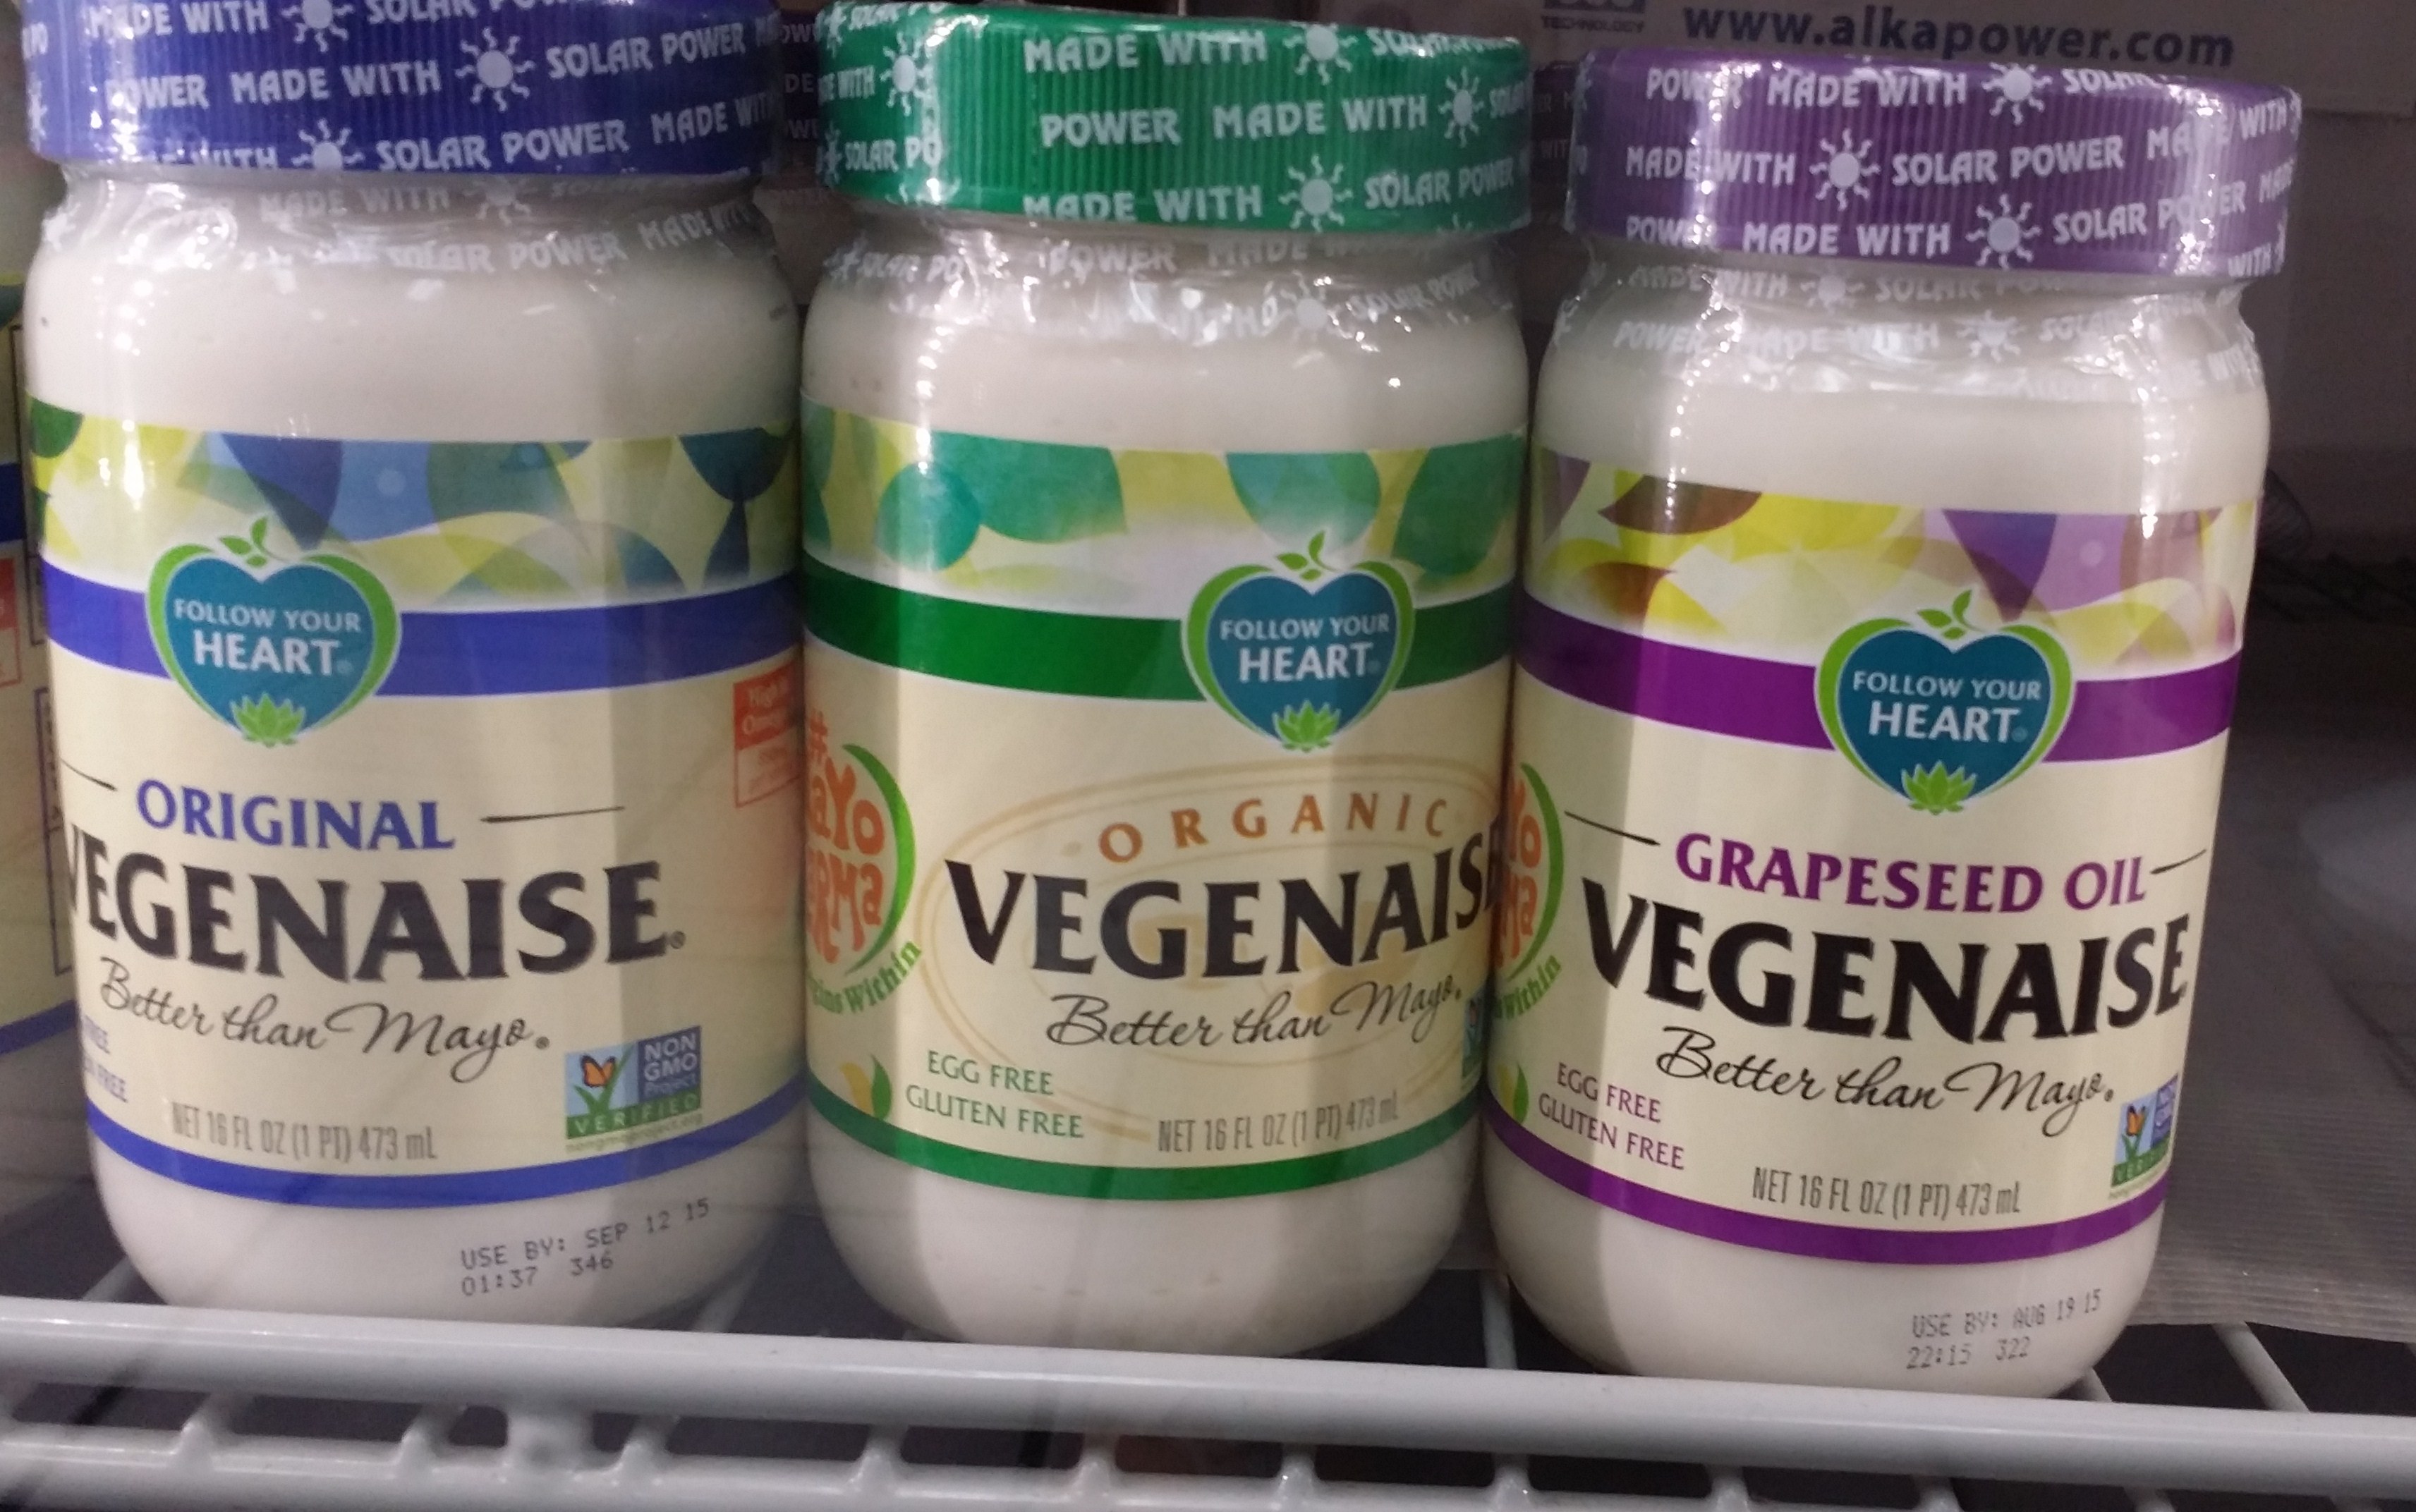
This is a good organic store-bought veggie mayo – from health food stores.
2) Best Homemade Mayo
ingredients
2 whole pastured eggs
1 tbsp. apple cider vinegar
3/4 tsp. salt
2 tsp. prepared mustard
2 cups light olive oil (not a vegetable blend)
instructions
Blend eggs, vinegar, salt, and mustard in food processor. While machine is running, slowly add oil, VERY SLOWLY!! Continue until all of the oil has been added and the eggs and oil have formed an emulsion or Mayonnaise. Taste for salt and adjust if needed.
Store in refrigerator for up to 2 weeks.
NOTE: Be sure to use eggs from a healthy, trusted source. Most people worry about raw eggs, but there is no need to worry if you purchase pastured (NOT pasteurized) eggs from a local farmer whose chickens freely roam, eat off of the land and are well-cared for. There are MANY more cases of salmonella from processed, cooked foods than from using pastured, raw eggs. Just a thought.
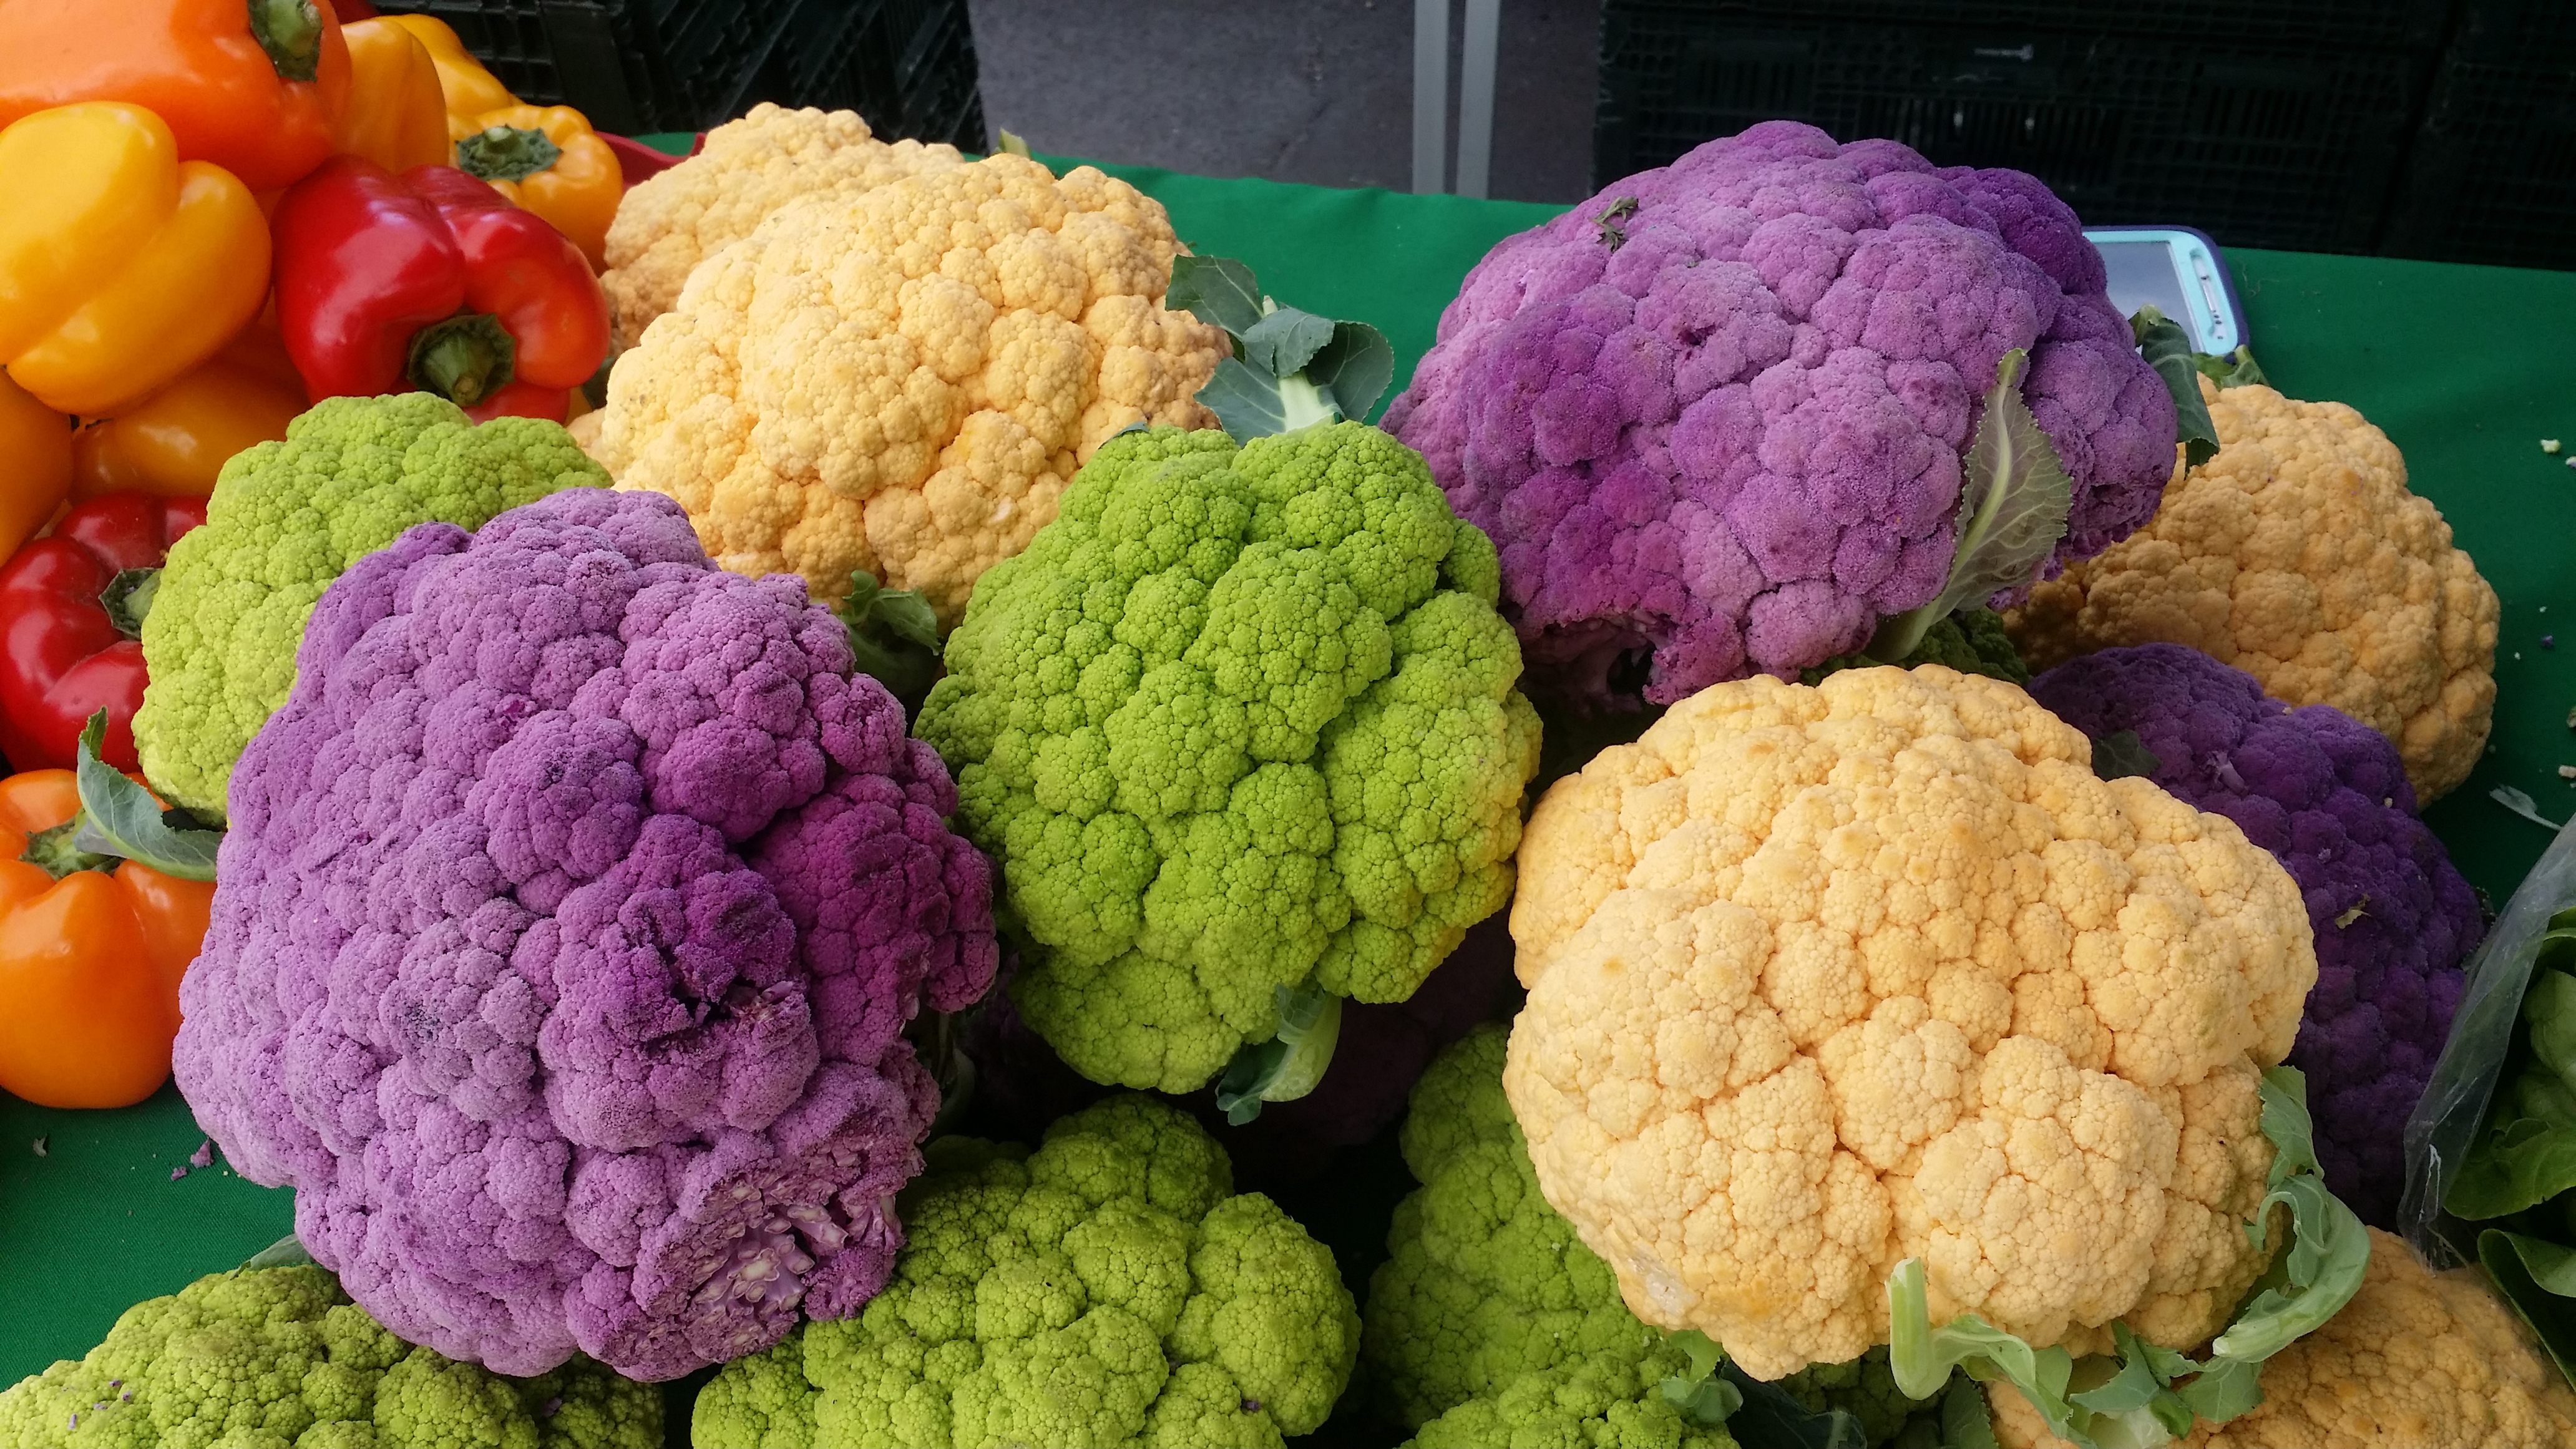
Everything you see at the farmers markets is fresh, locally grown and organic.
Natural coloured cauliflower. I like purple.
Last Saturday we visited the farmersmarket in Palm Springs. It’s small compared to most I’ve seen, but what it lacks in size it makes up for with prize produce and products. I mentioned how large the size of the grapefruit, oranges and lemons are but we came home with a bag of the tiniest Hass avocados I’ve ever seen (just as good but with a much smaller pit), Barhi Dates, Smoked Gouda, baby heirloom tomatoes, Oatmeal honey bread (no preservatives of course) Avocado oil with lime (Mexican dinner coming up), a delicious Avocado body lotion with jasmine and a fruit I’ve never heard of before.
waiting to ripen
It’s just so nice walking around in the open air on a nice day and looking okay, sampling all the good stuff. Everything is slightly more expensive than shopping the local grocery store, but considering the quality and work involved it is quite worth it, not to mention healthier. Maybe I won’t buy every single item there but for a whole lot of things it makes shopping & cooking a much more pleasurable experience. AND you are helping to support the farmers.
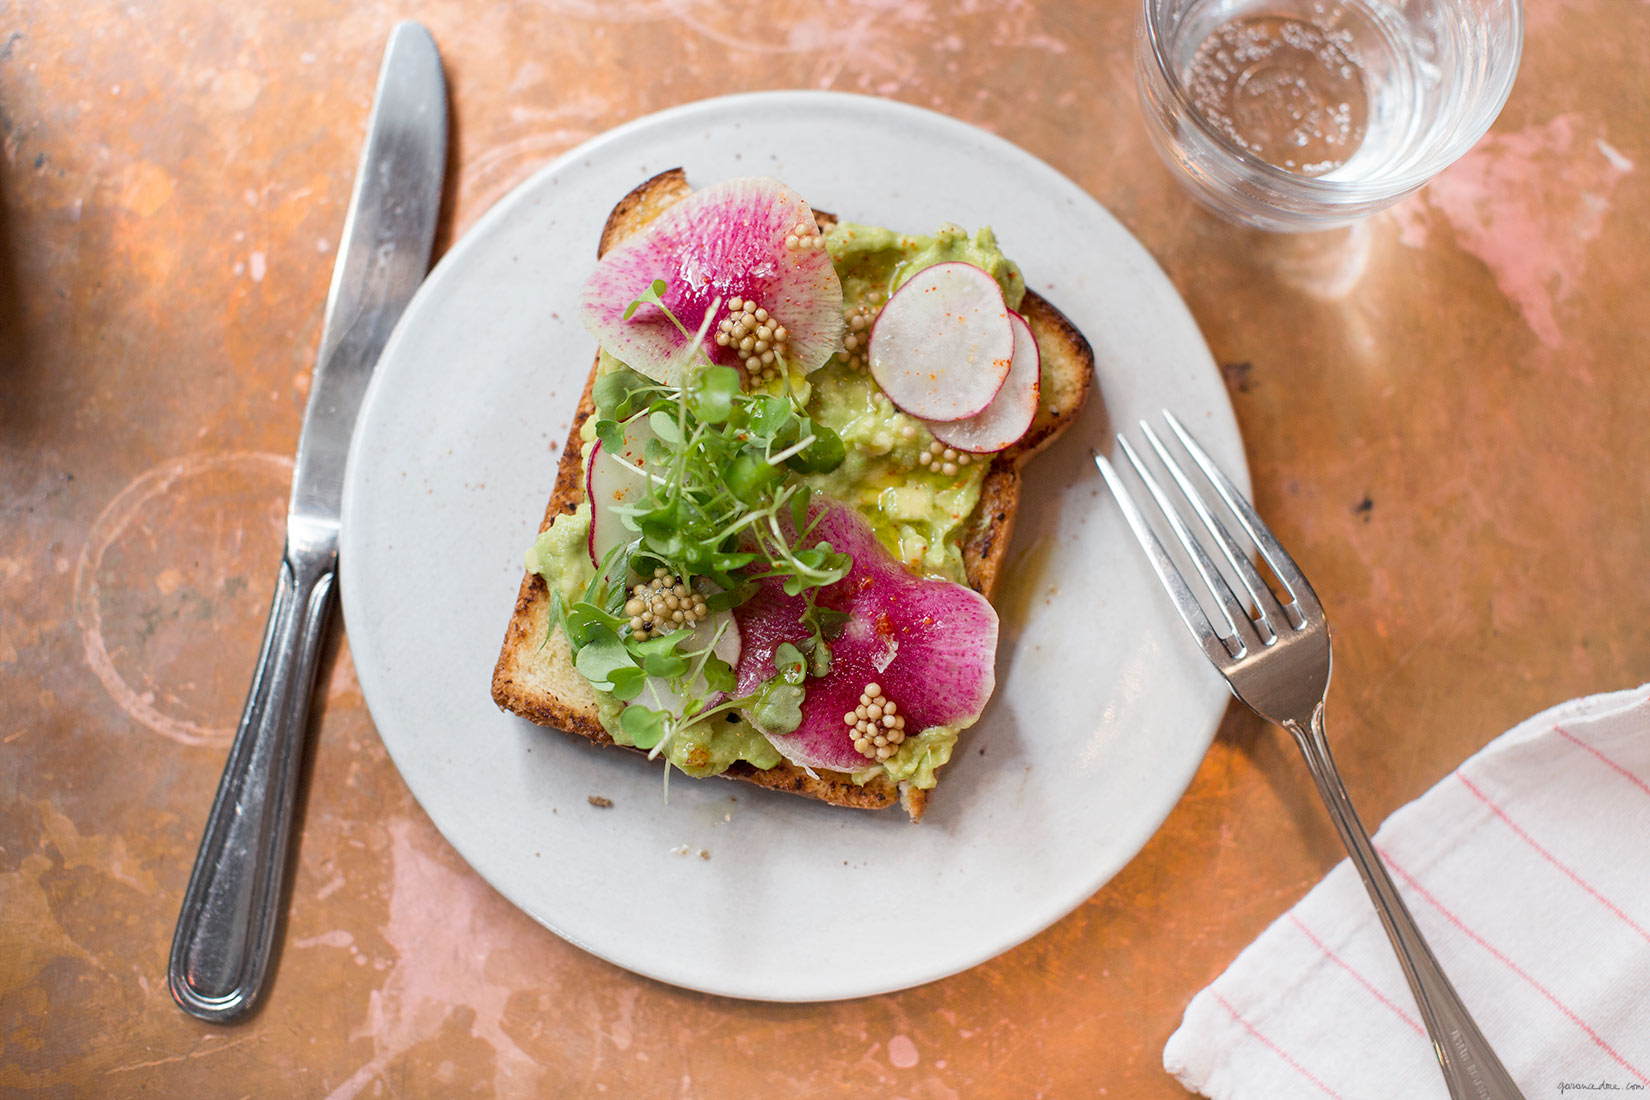
• 1-2 avocados, depending on size
• 1 1/2 tsp. lemon juice
• 2 thick slices of sour dough bread
• 8 slices of watermelon radish
• 1 scallion, sliced thin
• 2 sprigs of fresh parsley or chervil
• 2 tsp. pickled mustard seed
• 1 small pinch of chili powder
• 1 pinch of flakey sea salt
• 1 tablespoon of extra virgin olive oil Recipe:
1. In a bowl, mash avocado.
2. Add lemon juice and a pinch of kosher salt.
3. Toast bread and layer with avocado mash, followed by radish, scallion, herbs, and mustard seed.
4. Finish with a sprinkling of chili, sea salt and a drizzle of olive oil.
Mustard Seed
Ingredients:
• 1 cup mustard seeds
• 1 1/2 cup water
• 1 1/2 cup rice vinegar
• 1/2 cup sugar
• 1 tbl salt
Recipe:
1. In a small pot, add mustard seeds and cold water to cover. Bring to boil and immediately drain and repeat three times. On the final time, drain seeds and transfer into a jar.
2. Warm the water, vinegar, sugar and salt. Once it comes to a simmer and the sugar has dissolved, pour into jar with mustard seeds and allow to pickle for at least 3 hours before using.
Did you know? Even though the avocado has a green hue and savory taste, it is technically considered a fruit, and even more specifically, a single-seeded berry. Well if not, now you do.
Photo: Andrew Purcell; Food Styling by Carrie Purcell
Guacamole is always an easy, delicious hit as a part of any party spread. Who doesn’t love it? This version gives the classic Mexican dip an Asian twist, and calls for savory sesame, soy sauce, and chili-garlic paste to give it a real punch.
1) Spicy Sesame Guacamole
Ingredients
4 medium ripe avocados, peeled and pitted
1/4 cup (about 2 limes) fresh lime juice
4 green onions, coarsely chopped, plus extra for garnish
4 tablespoons chopped cilantro
2 teaspoons chili garlic paste
1 teaspoon soy sauce
1/2 teaspoon salt (I recommend himalayan pink)
1/4 teaspoon sesame seeds
Directions
In a large bowl, mash avocados and lime juice with a fork or potato masher to desired consistency, leaving some chunks. Stir in green onions, cilantro, chili garlic paste, soy sauce, and salt.
Garnish with sesame seeds and extra green onions, and serve immediately with tortilla chips. To make ahead, place plastic wrap directly on top of guacamole and leave one of the seeds in the bowl to prevent browning, and refrigerate. Of course toss the seed when serving.
Source: Country Living
2) Apple and Avocado Chicken Salad Sandwich by chef Julie Yoon
The tart Granny Smith apple kind of disappears into the background and adds just the right amount of sweetness, as well as a great texture and refreshing crunch. Trust me, along with the creamy cool avocado, it just works.
HOW TO:
CUT & TWIST: cut into the avocado lengthwise, producing two long avocado halves that are still connected in the middle by the seed. Next you take hold of both halves and twist them in opposite directions until they naturally separate.
Do you have a simple & delicious avocado recipe you’d like to share?
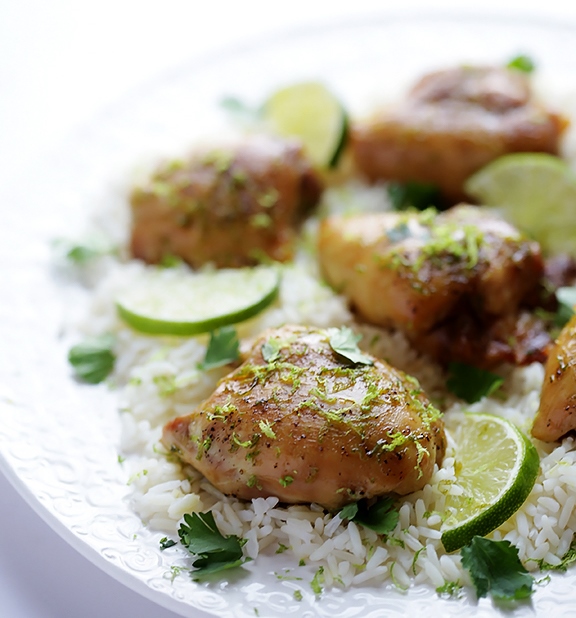
This dish takes a small amount of time to prepare, but is BIG on great flavor!
INGREDIENTS:
2 lbs. chicken thighs (boneless or bone-in — or you can also substitute chicken breasts or drumsticks). Basically whatever you prefer but I found that thighs worked well as they’re generally meaty and the dark meat has extra flavour.
1/2 cup freshly-squeezed lime juice
2 cloves garlic, minced
1 Tbsp. worchestershire sauce
1 tsp. salt
1 tsp. black pepper
2 Tbsp. melted butter
zest of two limes
1/2 cup chopped fresh cilantro
additional lime wedges (for garnish)
DIRECTIONS:
Add chicken thighs, lime juice, garlic, worchestershire sauce, salt and pepper to a large ziplock bag. Seal and toss to combine ingredients until the chicken is evenly coated. Refrigerate for at least 30 minutes or up to 8 hours. I left it overnight.
Preheat oven to 425 degrees F and grease a baking dish with cooking spray. Remove chicken from bag with a slotted spoon, reserving the marinade, and arrange in a single layer in the baking dish. Brush chicken with melted butter (to brown), and season with additional salt and pepper if desired. Bake for about 20 minutes, the remove and brush chicken with the reserved marinade. Bake for an additional 20-30 minutes, or until the chicken is cooked through and the juices run clear. (Baking times may shift for different types of chicken.) Remove and sprinkle chicken with lime zest and fresh cilantro.
Serve over rice or quinoa garnished with lime wedges. *TIP: Add tequila to the above mix if you want for some extra kick. Should serve six.
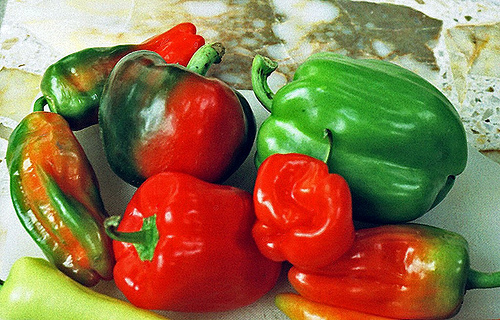
You know the drill. You’ve clipped or printed out a recipe that’s supposed to be tonight’s dinner. Except, the grocery store betrays you—not having those few essential items you need – specifically a certain CHILE. The people at Chile Pepper magazine have substitutes for recipes calling for chili peppers that may be difficult to find. For example, in certain regions, some chiles like cayenne are impossible to find fresh.
The key to finding an adequate chile replacement is knowing its heat level, sweetness, and smokiness. We pooled our resources to come up with a substitution guide for whole chiles. While it focuses on whole fresh or dried chiles, you can always use a hot sauce in lieu of ground chile.
Anaheim: A mild green chile named after the California city, this pepper also goes by the name “California chile” and is often used for chile rellenos; the red strain is called Chile Colorado. Substitution: Canned green chiles or fresh Poblano chiles.
Banana Pepper: The sweet pepper, shaped like its namesake fruit, is also called yellow wax pepper. Substitution: Any mild chile like Anaheim or even bell peppers.
Bhut Jolokia: Also known as Naga Jolokia or ghost chile, this is the world’s hottest chile.Substitution: Red Savina Habanero (lots of them).
Cayenne: A bright red, hot pepper, usually sold dried. Substitution: Chile de Arbol or Guajillo. Crushed red pepper flakes are from cayenne, so it would be the easiest substitute, along with ground cayenne powder.
Chipotle chiles in adobo: The smoked incarnation of the jalapeno that’s mixed with adobo sauce. Substitution: One tablespoon ketchup + 1/2 teaspoon liquid smoke + 1 jalapeno.
Habanero: A small, lantern-shaped chile that’s intensely hot. Substitution: Scotch Bonnets or double the dose of jalapenos.
Jalapenos: Smooth, dark green chiles that can vary from medium-hot to hot. Substitution: Half the amount of Serrano chiles.
Pasilla chile: The dried, medium-hot chile also goes by chile negro. Substitution: Ancho chile (sweeter) or Mulato chile (earthier flavor).
Scotch Bonnets: They belong to the same chile variety as the habanero. Used for jerk chicken in Jamaica. Substitution: Habaneros.
Serrano chiles: A hot, slightly-pointed chile available in various colors. Substitution: Habanero or jalapeno chiles.
Thai chiles: A thin-skinned chile typically found in red and green, popular in numerous Asian dishes. (Bird chile is the name of the dried form; drying the chile gives it the hook shape, similar to a bird’s beak.) Substitution: Fresh or dried cayenne peppers or serrano chiles.
Also, Gourmet Sleuthhas a magical solution: just plug in the missing ingredient and the website will spit out a substitution.
Source: Andrea Lynn, senior editor of Chile Pepper magazine.
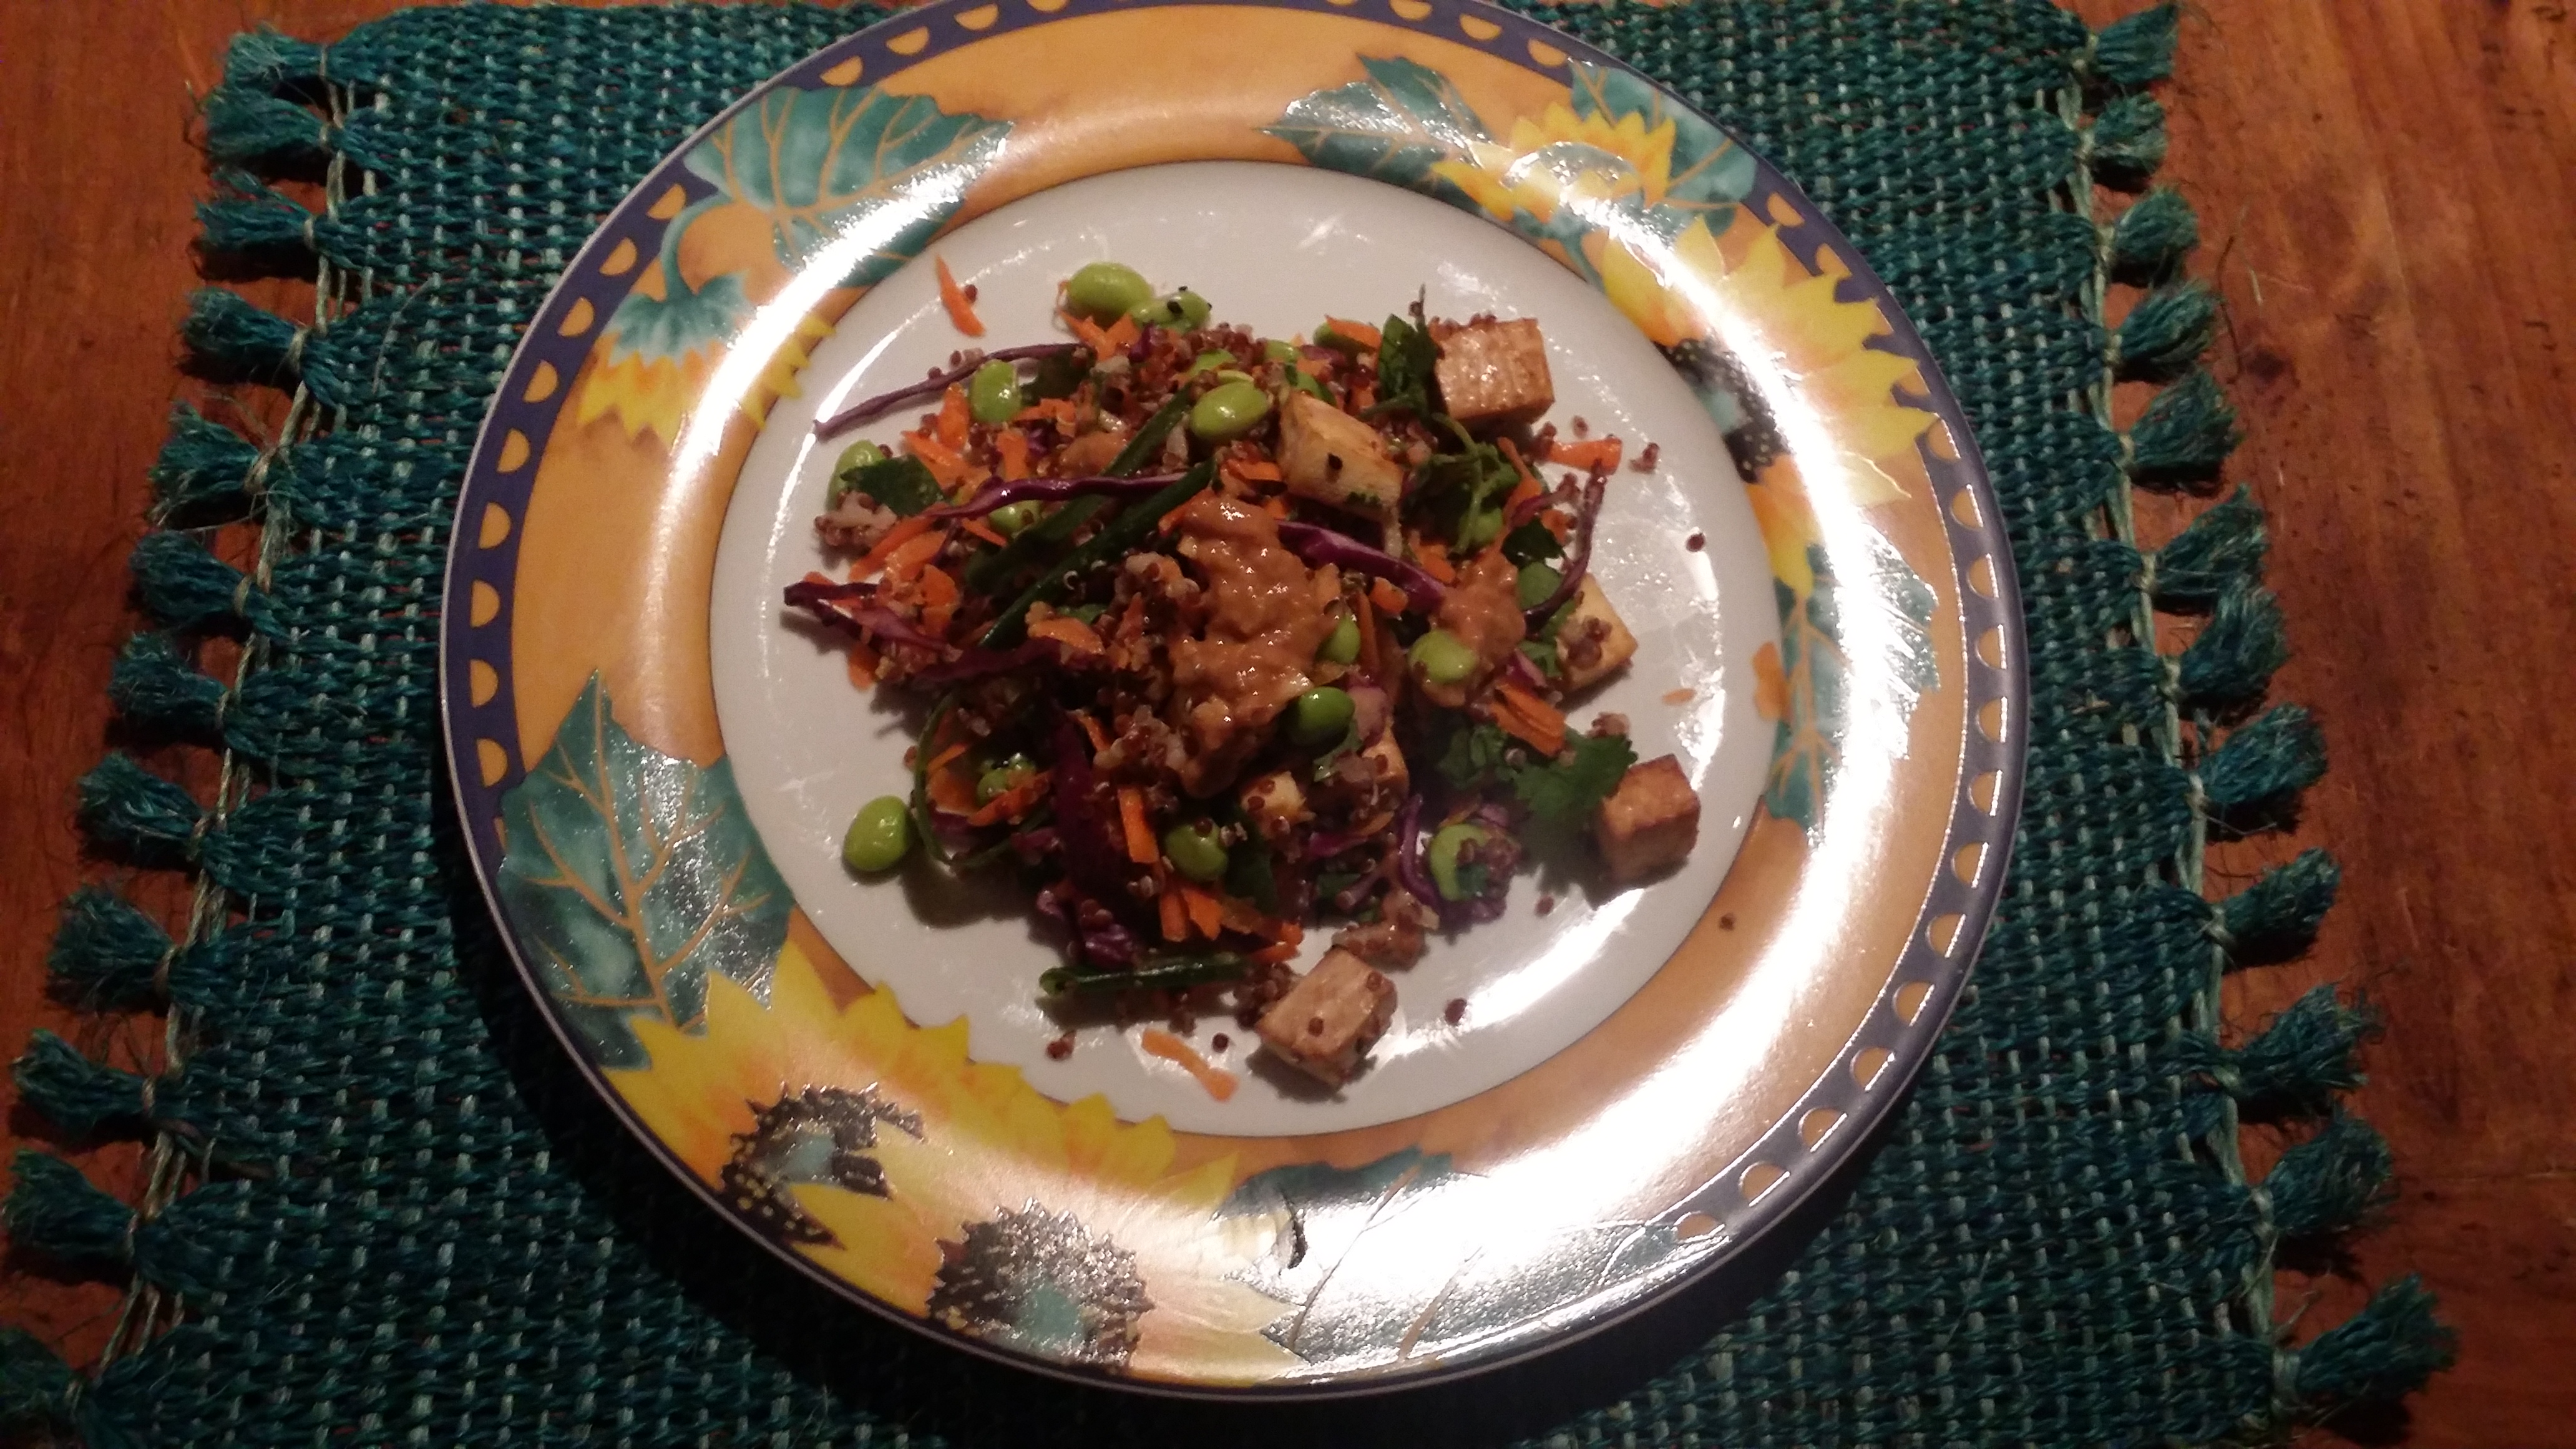
This healthy low-calorie, high-protein dish is simply delish!It makes a great lunch but can easily suffice as a side salad for dinner (especially with salmon or chicken). Serves 4. It’s only 330 calories per serving.
Ingredients:
Extra-Firm Tofu
Quinoa
2 Carrots
Red Cabbage
Frozen Edamame
Green Onion
Cilantro
Sauce:
Lime juice (from ½ a lime)
Natural Peanut Butter
*Tamari (or low-sodium soy sauce)
Honey
Grated Ginger
2 Garlic Cloves
Hot Chili Flakes
Sesame Seeds
Preheat oven to 400F. Line a baking sheet with foil or parchment paper and spray with oil. Arrange half of a 350g package of extra-firm tofu (patted dry and cut into 3/4 in. cubes) on prepared sheet. Bake in centre of oven until tofu is golden brown – about 20 minutes. Transer to a rack and cool completely, about 30 minutes.
Cook ¾ cup rinsed quinoa in a medium saucepan according to package directions. Scoop quinoa into large bowl to cool completely, about 30 minutes. You can also make this in advance, like a day or two ahead.
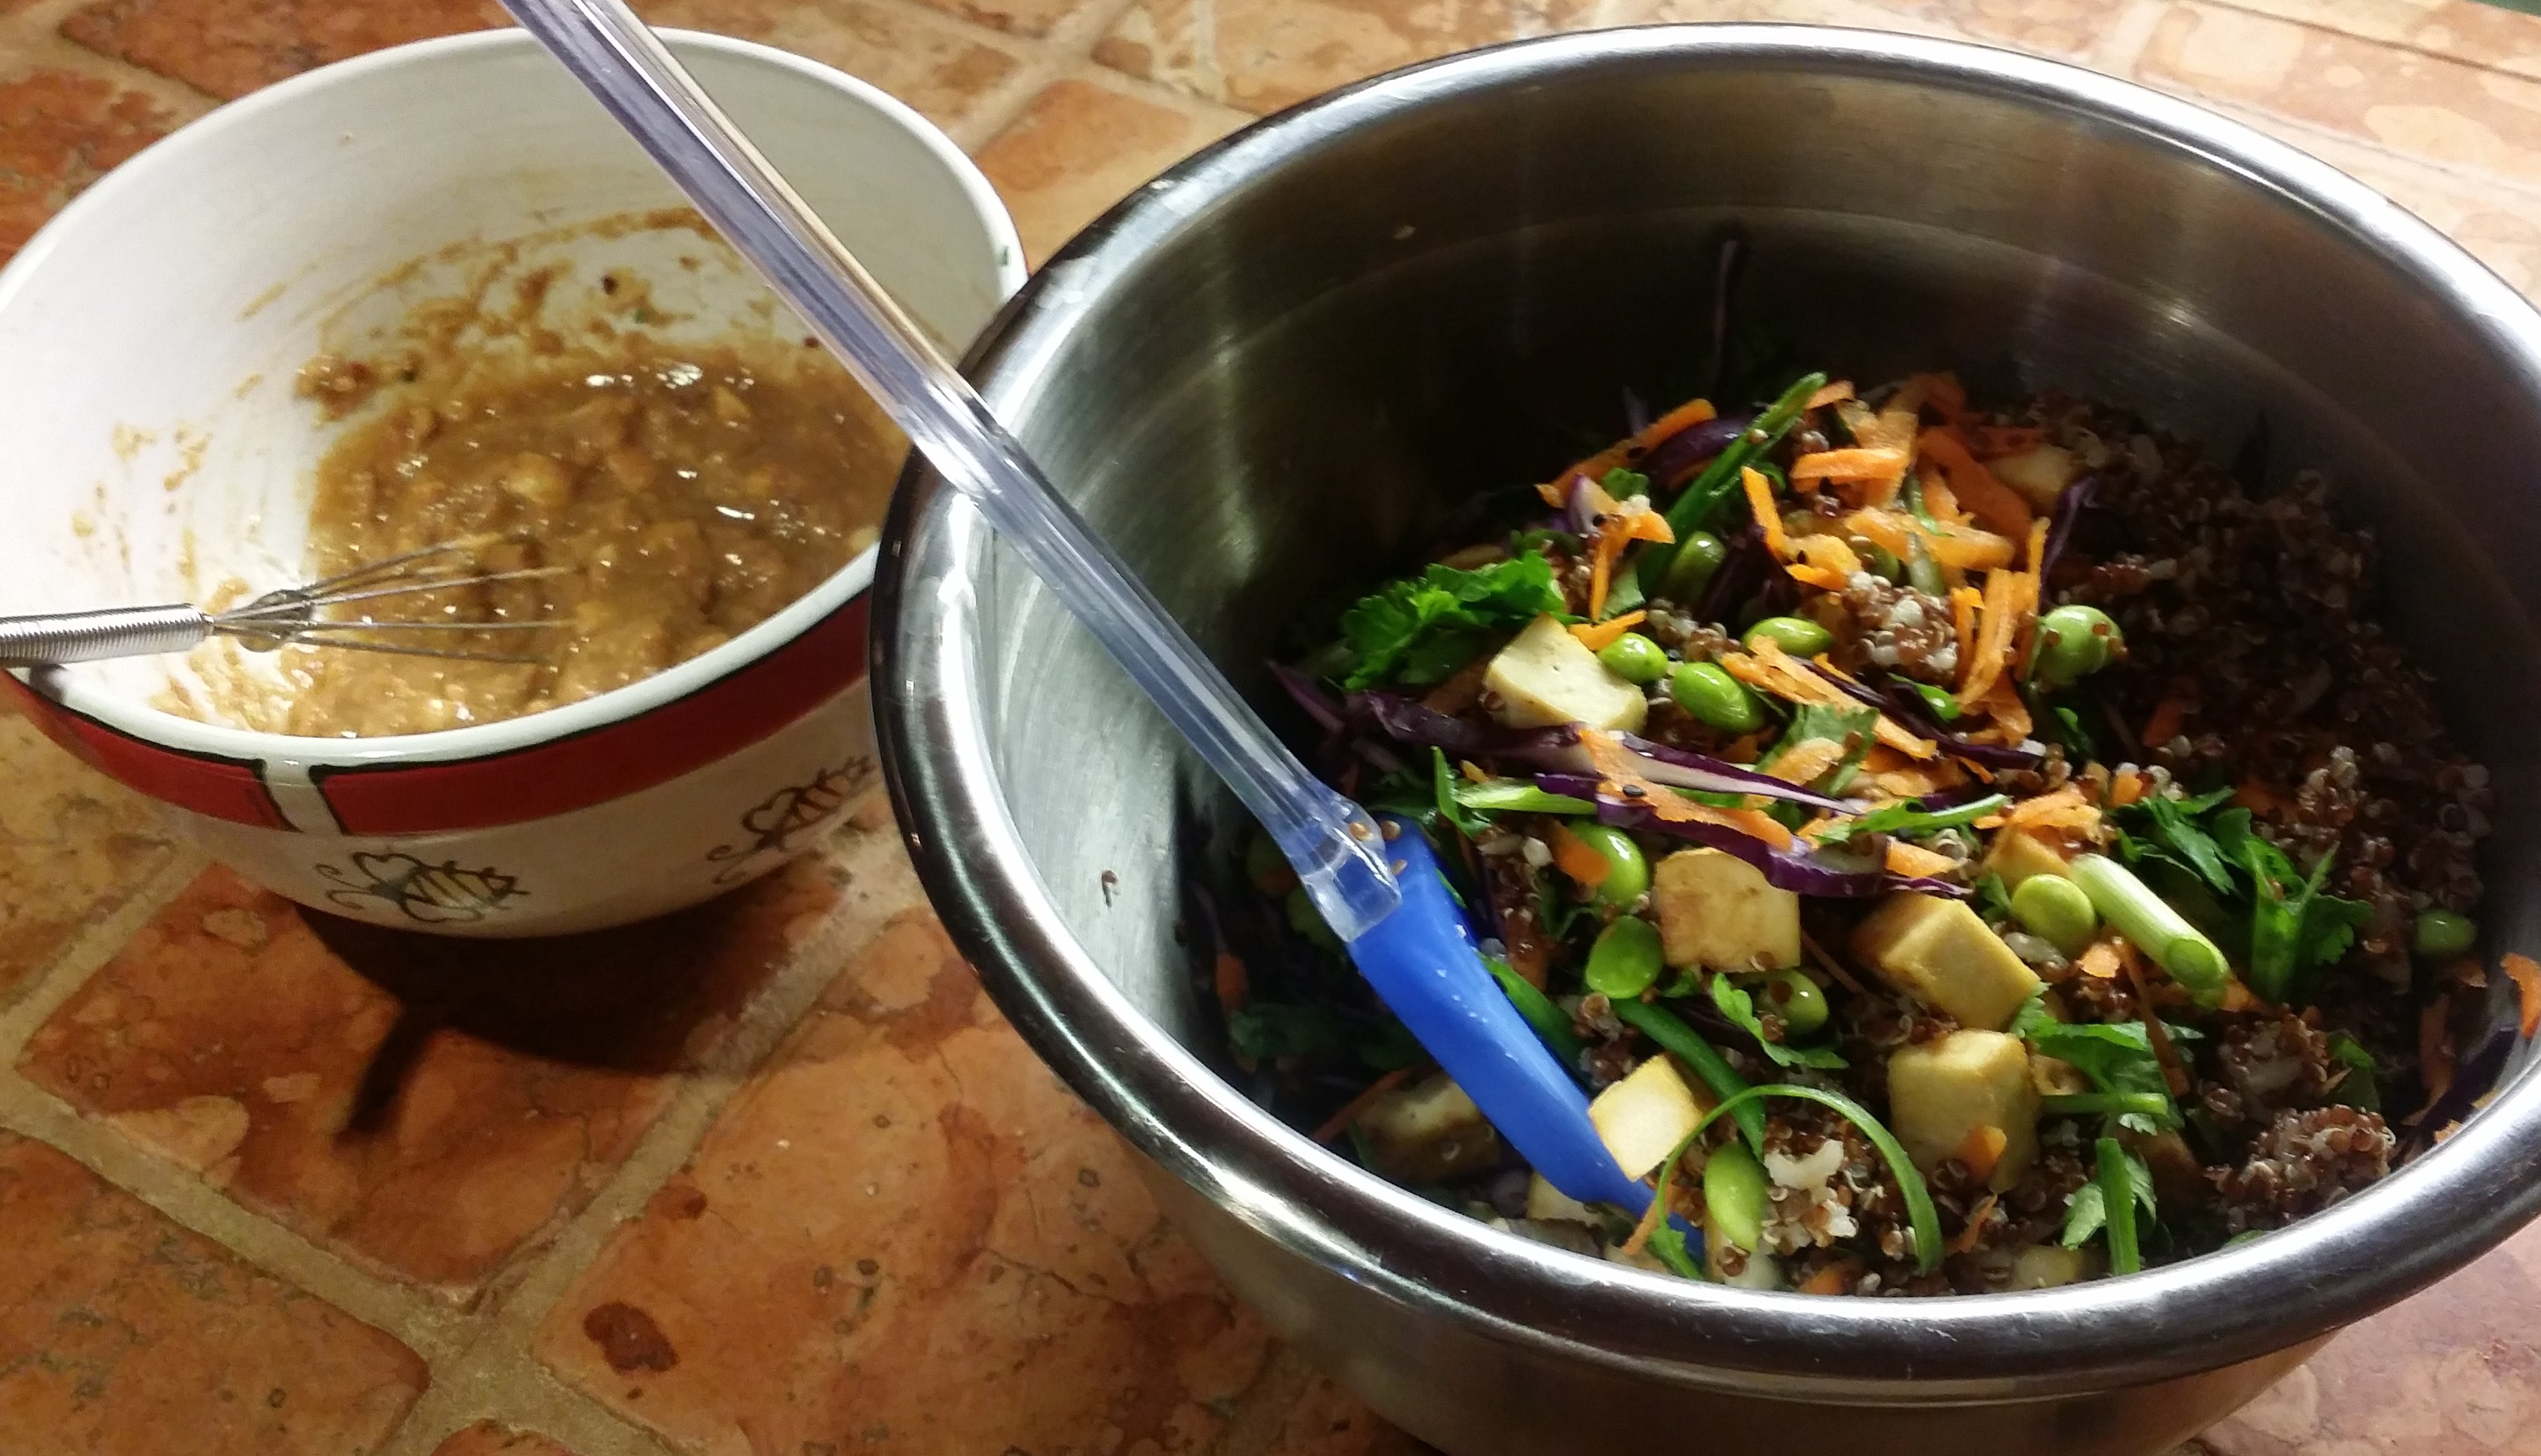
Whisk 2 Tbsp. lime juice (half of a regular size lime) with 2 Tbsp. natural peanut butter, 1 Tbsp. water, 1 Tbsp. Tamari, 2 tsp. honey, 2 tsp. finely grated ginger, 1 or 2 minced garlic cloves and ½ – 1 tsp. hot red chili flakes in a small bowl. Set aside.
Stir 2 coarsely grated carrots into cooled quinoa along with 1 cup thinly sliced red cabbage, 1 cup thawed frozen edamame, 1 thinly sliced green onion, ½ cup chopped cilantro, 4 tsp. toasted sesame seeds and cooled tofu. Drizzle with dressing, then toss to coat.
Serve cold or at room temperature.
Do you know the difference between Tamari & Soy?
Even though both sauces are similar in color and flavor, there are actually a number of differences between the two. While both soy sauce and tamari are byproducts of fermented soybeans, the main difference between the two is the presence of wheat. Many recipes that call for soy sauce often include a note to substitute tamari in its place to make the recipe gluten-free.
Tamari: Little to no wheat (always double-check if avoiding gluten)
Soy Sauce: Includes wheat (not gluten-free)
Other Differences – Soy sauce and its many forms are found widely throughout Asia, but tamari is specifically a Japanese form of soy sauce, traditionally made as a byproduct of miso paste. The differences in production give each sauce its own unique flavor. Tamari has a darker color and richer flavor than the common Chinese soy sauce you may be more familiar with. It also tastes more balanced and less salty than the sometimes harsh bite of soy sauce, which makes it great for dipping.
Instead of keeping one or the other in your cupboard, consider stocking up on both sauces and experimenting with them in dishes that call for soy.
I’m always in the mood to eat cookiesbut I don’t always feel like making them. Part of the problem is that whenever I do make them I end up eating more than I should. This recipe is really easy and fairly healthy as far as cookies go…..(brown sugar instead of white, oats and only 1 egg) so I couldn’t wait to make them. They’re quick and delicious and I just added coconut flakes. You can double the recipe but if you want to ensure you don’t eat too many, maybe it’s a good idea to stick to the original.
Brown Sugar Chocolate-Chip Oatmeal Cookies
1 cup all-purpose flour
½ tsp. baking soda
½ tsp. fine sea salt
½ cup unsalted butter, either at room temperature or slightly chilled
1 egg
1 tsp. vanilla
½ quick oats
1 cup milk chocolate chips
unsweetened coconut flakes (optional)
Preheatoven to 325F. Line 2 baking sheets with parchment paper. If you don’t have parchment then spray baking sheets lightly with oil.
Stir flour, baking soda and salt in a medium bowl. Beat butter with sugar in a large bowl until fluffy. Beat in egg and vanilla. Using a wooden spoon, stir in flour mixture until combined. Stir in oats and chocolate chips. Spoon 2 Tbsp. portions of dough, 3 in. apart, onto prepared sheets. Flatten them slightly using your fingers.
Bake in centre of oven until edges are golden but centres are soft, 12-15 minutes. Transfer cookies to a rack to cool completely. Pour yourself a glass of milk!
Store at room temperature in an airtight container for up to 1 week. But let’s face it – they’ll only last one or two days at most.
Makes 12-16 cookies.
If you really need to know they’re about 200 calories per cookie.
Below are links to some other cookie recipes I’ve made and posted before (all equally delicious):
I enjoy a really good Jerk chicken and have the perfect recipe for those who are daring enough to try it.
FIRST, a bit of history (you can always skip this part & cut right to the chase but I think it’s a good idea to let people know where the dish originated from).
It all started with survival (and if you really want to take it a step further I guess you can say that that’s how all food started). The beginning doesn’t sound too appetizing. Escaped slaves living in the Jamaican jungle interior had to develop many survival techniques – but none more impressive than the way they hunted wild pigs (cleaning them between run-ins with the law) and covering them with a mysterious spice paste and then cooking them over an aromatic wood fire. Now this spice mixture is so popular, inspiring commercial spice mixes, bottled marinades and the use of the word “jerk” around the world. What about the word used to describe this dish? Most Jamaicans offer the non-scholarly explanation that the word refers to the jerking motion either in turning the meat over the coals or in chopping off some for customers.
However…JERK….is the English form of a Spanish word of Indian origin. The original Indian word meant to prepare pork in the manner of the Quichua Indians. Now Jerk is prepared with chicken, fish, shrimp even lobster. Several of the best jerk purveyors are still on the beach at Boston Bay, Portland (not in Oregon) somewhat off the tourist track mostly frequented by Jamaicans, not tourists. But I was lucky enough to try some from a local stand (actually no more than a thatch-roof hut built over low-lying , smoldering fire) – and it’s never tasted better.
The jerk sellers tend to be characters with colorful nicknames and singsong sales pitches that tell you why their jerk is the best on the island. They’ll even pull out a glass jar of jerk paste with lethal scotch bonnet peppers and scoop out some for you to try. This definitely will require a *red stripe to cool down the flames. *Red Stripe is the beer of Jamaica. Oh my, I almost forgot I have a recipe.
Jerrific Jerk Chicken
This recipe is great served with rice and peas. It can be made more authentic by doubling all the dry spices – including the fiery chili flakes! You could also substitute a whole chicken cut into serving size pieces instead of chicken breasts with terrific results. At this time of year you can grill the chicken under the broiler instead of on the barbecue.
1 Tbsp. ground allspice
1Tbsp. dried thyme
1 ½ tsp. dried chili flakes
1 ½ tsp. freshly ground black pepper
1 ½ tsp. ground sage
¾ tsp. ground nutmeg
¾ tsp. ground cinnamon
1 Tbsp. salt
2 Tbsp. garlic powder
1 Tbsp. brown, cane or coconut sugar
¼ cup olive oil
¼ cup low-sodium soy sauce
¾ cup vinegar (either regular white or apple cider)
½ cup orange juice (freshly squeezed is best)
Juice of one lime
1 fresh *scotch bonnet pepper, seeded & chopped
1 cup chopped onion
3 green onions, finely chopped
6 single chicken breasts, skin and bones removed.
Preparation:
In a large bowl, combine all dry ingredients. Slowly whisk in oil, soy sauce, vinegar, orange and lime juices. Stir in scotch bonnet pepper and onions. Add chicken, cover and marinate at least 4 hours.
Preheat barbecue to medium (or oven to 350 degrees). Remove chicken from marinade; grill 6 minutes each side or until cooked through with no pink remaining. Baste with marinade while grilling or cooking. Bring remaining marinade to boil; spoon over chicken. Makes 4-6 servings.
*Scotch bonnet is a very hot chili pepper available at West and East Indian food shops and at some supermarkets. If unavailable, substitute a fresh jalapeno or extra dried chili flakes to taste.
Recipe courtesy of Sugar Reef Caribbean Cooking (McGraw-Hill)
History & Photos courtesy of The Food of Jamaica – authentic recipes from the Jewel of the Caribbean.
The girl who would be King spent several years (off & on but mostly on) traveling all over this beautiful island sampling resorts, jerk, rum, coffee and…..whatever else.
Another recommendation – Blue Mountain Coffee preferably on the top of Strawberry Hill.
Looking at my photos from Italy got me thinking about the simplicity of good, fresh, local ingredients.
Many of the farmers markets are open until the end of October so you can pick up a nice selection of fresh tomatoes.
This is a quick, easy, and delicious basic tomato sauce that can be dressed up with spices and herbs for pasta, stews and pizzas. Although the recipe calls for heirloom, you can use any kind of tomatoes you like – it will make an array of prettily colored sauces.
INGREDIENTS:
4lbs tomatoes quartered
4 garlic cloves
1 yellow onion sliced
4 bay leaves
6 sprigs of fresh thyme
¼ cup of fresh oregano leaves
2 teaspoons smoked Pimenton
¼ cup of extra virgin olive oil
Sea salt & cracked black pepper to taste
Selection of sterilized jars with tight fitting lids
PREPARATION:
Preheat the oven to 425°F.
Place all the ingredients in a large ceramic baking dish and stir to combine. Season with salt and pepper. Roast in the preheated oven for 45 minutes, stirring half way through.
Remove from the oven and take out the bay leaves. Rest the tomatoes for 10 minutes.
Reduce the oven heat to 250°F.
Place the tomato mixture in the blender and working in batches, turning the tomatoes either either smooth or slightly chunky depending on your preference.
Pour the sauce into the prepared sterilized jars leaving a ¼” space and screw the lids on. Tap the jars on the counter top to get rid of air pockets and wipe clean with a damp cloth. Place in the oven for 30 minutes to seal.
Remove from the oven and cool on a wire rack. You will hear a pinging sound as each lid seals. Check to make sure that the center of the lid is concaved. (If a jar does not seal store in the fridge for up to 2 weeks.)
Label and enjoy!
Recipe courtesy of Valerie Aikman-Smith for Goop.com


She brought it over for a Grammy party and everyone raved about how amazing it tasted so it was only right to ask her to share the recipe. She said she didn’t have one (don’t you hate it when people say that?) but thankfully she wrote down the steps:


You must be logged in to post a comment.