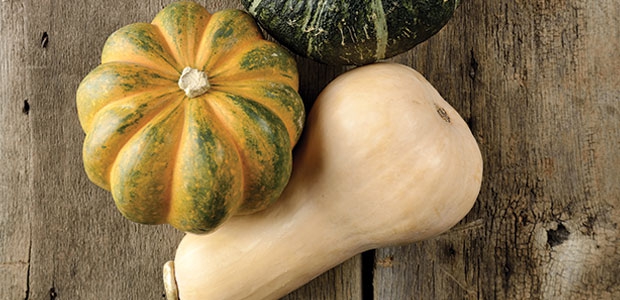
GOOD GOURD. Winter squash comes in a wide range of shapes, sizes and tastes.
Acorn & Butternut – 2 favourites
It’s always fun to incorporate a new variety into your winter menu. No matter which gourd you gravitate toward, make sure that it is heavy for its size, with taut skin and no soft spots or cracks.
Low-calorie winter squash contains an impressive slew of nutrients, including potassium, magnesium, vitamin C, fibre, and beta carotene. Beyond its function as a potent antioxidant, beta carotene can be converted to vitamin A in the body to boost immunity and eye health. A recent study also found that higher intakes of beta carotene could help reduce the risk for atrial fibrillation, a potentially dangerous irregular heartbeat.
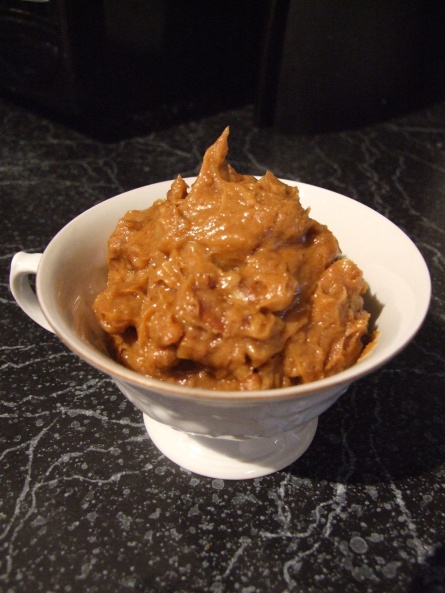
Pecan Squash Butter
Ridiculously Easy Recipe:
Use this healthy & heavenly spread on your morning toast, slices of apple, or pieces of dark chocolate.
2 cups (500 ml) pecans
2 Tbsp (30 ml) melted coconut oil or other oil of choice
2 Tbsp (30 ml) honey
1 Cup (250 ml) squash puree
1/2 tsp. (2 ml) cinnamon
1/4 tsp. (1 ml) nutmeg
Place pecans, oil, and honey in container of food processor or high-powered blender and blend on high until mixture becomes creamy, about 2 to 5 minutes, depending on the machine you are using. Wipe down sides as needed during blending. If mixture is not becoming smooth enough, add a little extra oil to help smooth it out.
Place squash, cinnamon, and nutmeg in container and blend until smooth. Store in refrigerator for up to 2 weeks. Serves 12
Selecting a Squash:
Acorn This guise of squash gleans its name from the tree nut it resembles and has mostly dark green skin, with yellow-orange flesh that has subtle taste notes of black pepper and hazelnuts.
Try it: Roasted acorn halves are perfect for stuffing with various grain salads. Adorn acorn slices with syrup reduction sauces, such as balsamic or pomegranate.
Buttercup This squash has a hard green skin with creamy orange flesh and turbanlike shape. It’s one of the sweetest tasting varieties.
Try it: Buttercup’s natural sweetness is a welcome addition to soups and other purées, such as baked goods or dips.
Butternut Hourglasslike butternut is blessed with a silky texture and taste reminiscent of sweet potato bathed in butter.
Try it: Roast or steam into cubes for a nutritious and tasty addition to salads, frittatas, and tacos. Or mash it and use as a stuffing for ravioli, a spread for sandwiches, or even as a pizza sauce.
Delicata The oblong delicata has a pale yellow skin and is not too shy to show off its green strips. The pulp is creamy and tastes a bit like a love child of corn and sweet potatoes.
Try it: Slice in half lengthwise and use as a squash boat for all sorts of stuffings. Roasted slices with a butter maple syrup glaze will quickly turn into a favourite winter side dish. Unlike other squash, delicata’s thinner skin is edible once cooked.
Hubbard
This giant of the squash world is available in blue-grey, green, or orange-red varieties, all with warty skin and grainy, mildly sweet flesh.
Try it: Cut into cubes and string onto kebab skewers or toss with other seasonal items such as parsnips and rutabaga for a roasted vegetable medley.
Spaghetti Watermelon-shaped with golden yellow rind, this squash is aptly named—once cooked, the flesh pulls apart into slightly nutty, spaghetti-like strands.
Try it: Toss strands with pesto or top with meat sauce for a twist on pasta night.
Taken from alive – Canada’s Natural Health and Wellness Magazine.
PICTURE THIS: you throw everything into a pot — go run errands or even go to work for the day — and return to a perfectly-cooked dish. This is the beauty of a slow cooker: no hovering over a stove necessary.
Limited oven space? Cooking dishes in a slow cooker frees up space for roasting or baking pre-dinner parties. You can adapt most traditional recipes for use of a slow cooker — just make sure to get the dust off first.
How to Adapt a Recipe to a Slow Cooker
For starters, when selecting recipes to transform, look for buzz words like braised or slow-roasted, or soups and stews. Most recipes that require finishing in the oven or any sort of baking make for great slow cooker candidates. That being said, you really can make anything in a slow cooker: pulled pork, soups, chilli, even yogurt. Get creative and experiment with your favorite recipes (you can find many online) while following these simple guidelines.
Prep your ingredients!
As always, make sure to chop all your ingredients uniformly — so that they cook evenly.
Meat: You can use any type or cut of meat; however, tougher, cheaper cuts of meat work best. We recommend browning meat and draining away excess fat prior to adding to to slow cooker.
Chicken: Be weary of the cut of meat you are using — for instance, boneless chicken breasts take 2-3 hours and bone-in chicken breasts take 3-4 hours. The best cuts of chicken to use are chicken thighs, bone-in breasts, and drumsticks and wings, as opposed to boneless cuts.
Vegetables: Fresh will turn out better than frozen.
Rice: Pre-cook rice or par-boil. (And in their cookbook solely dedicated to slow cooker recipes, America’s Test Kitchen; recommends buying pre-cooked rice.) Personally I would just make a side of rice – it’s easy enough to do this and just add it to the recipe.
Aromatics: Sauteing onions and garlic prior to adding will help bring out the flavor.
Strategically place your ingredients within the pot.
For soups and stews put vegetables on the bottom and sides of the slow cooker and place meat on top. Then, add your liquid.
Any liquid required for a recipe should be halved; for most (non-soup or stew) recipes 1 cup of liquid is enough (and make sure to season in proportion with your reduced liquid). Alternatively, if a recipe does not call for any liquid, add at least 1/2 a cup of water or broth. If you’ve by accident over-added liquid, simply leave the top of the slow cooker off and let it evaporate.
Regardless of the sequence in the original recipe, add these ingredients in the final 30 minutes of cooking:
Herbs and spices — reduce the amount of seasoning or use whole herbs
Dairy — be careful as dairy can separate
Quick cooking vegetables like peas, corn or greens
Rice and pasta
Seafood
Practice safe slow cooking!
Bacteria grows over time and likes lower temperature environments. CooksIllustrated says the key is to get the temperature up to and past 140 degrees (the temperature in which bacteria cannot grow) as quickly as possible. Be sure to use a thermometer when applicable.
Cooking Time – If your recipe requires a certain amount of time in the oven, it will require a longer cooking time in the crock pot. As a general rule, 1 hour of cooking at 350 °F equals 6 to 8 hours on a low setting or 4 to 6 hours on high.
Photos by James Ransom
This article originally appeared on Food52.com: How to Adapt a Recipe to a Slow Cooker
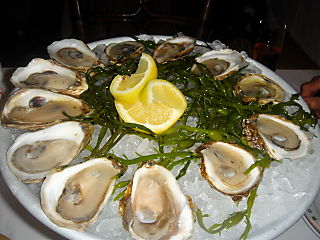
Many prefer them ‘as is’ but I like mine with lemon, horseradish, cocktail sauce & tabasco.
Fresh oysters on the half-shell – love them or leave them? On a hot summer afternoon with a nice glass of vino blanco or bubbly they make for a decadent happy hour. What about all the other months? Turns out they might be better.
All About Oysters: only eat oysters in the months with a letter ‘R’.
Exactly when and where the ‘R’ rule first appeared is a bit of a debate; but historically, for health and conservation practices, it was best to refrain from eating oysters during warm water months. During the warmer months, as ocean temperatures rise, oysters naturally tend to spawn or reproduce. For conservation practices, wild oysters were not harvested during the spawning seasons. In earlier times (c. 1700-1800’s, pre-refrigeration) it was dangerous to ship and, ultimately consume, oysters that sat out in the heat.
An oyster for all seasons: now, because of sustainable farming practices, strict water quality monitoring and advanced wet storage techniques it is healthy, and safe, to consume farmed oysters all year long. Yet oysters remain a sensitive species whose quality and nature fluctuate with the seasons.
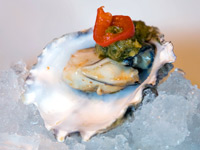
To those people who love oysters, there is little that can compare with a cold, plum, raw oyster that is sipped from its shell. Serve with a *homemade cocktail sauce (see recipe) and it is perfect!
When purchasing remember to keep the unopened oysters cold but do not store in water! Oysters are alive and need to breathe, so never seal them tightly in a plastic bag.
Open (shuck) shortly before serving – not more than 2 hours. The colder the oyster, the easier it is to shuck. Keep oysters cold at all times, partly for safety and very much to enhance flavor and texture.
How to Shuck an Oyster + recipe
How to Shuck an Oyster+ recipe
Make sure to take extra care with your knife when shucking, with the bade facing away from you. Also make sure your oysters are scrubbed clean (most of the oyster farms do this for you).
Using a clean towel or glove, hold the oyster down with one hand with the opening facing away from you. Stick your oyster knife through the back of the oyster (the hinge) with the blade angled down. Twist the knife upward to pop the hinge.
Slide the knife along the length of the shell at the opening and twist the knife again at the opposite side to remove the top shell.
Starting on the left, sweep the knife underneath the oyster to loosen the meat from the shell. Check for any pieces of broken shell and remove, being careful not to lose too much of the liquid. Serve on ice with horseradish or cocktail sauce.
Tips for shucking taken from Goop.com
TO PURCHASE OYSTERS – WHAT TO LOOK FOR:
When choosing oysters at the market, make sure that they are fresh. If one is open (which it shouldn’t be) it should snap shut emphatically once tapped. If an oyster doesn’t close immediately, don’t buy or use it.
Oysters should fee heavy and full in your hand. Oysters lose moisture once they are removed from the sea. The heaviness suggests that they are freshly harvested. Oyster tip: Tap two oysters together or one to the other. If there is a hollow sound, the oyster is dead. If the sound is solid, the oyster is alive.
Fresh oysters should smell sweet and briny like the sea.
HOW TO EAT OYSTERS ON THE HALF SHELL:
You can either use a little fork to pick the oyster out, or you can do like most people do and slurp them out of their shell into your mouth. Cradle the shell in a hand, grasping it with your thumb and first two fingers. Some people look for what they call the “sipping lip” part of the shell before planting their lips on it. When ready, slurp up the oyster, savoring the taste in your mouth. Drink up the salt-watery juice in the shell, too. It’s part of the treat! Eat the entire oyster in a single slurp. Remember, you don’t want to see what is inside an oyster. You just want to taste it!
SIMPLE HOMEMADE COCKTAIL SAUCE
1/2 cup ketchup (or chilli sauce)
2 Tbsp. hot cream-style horseradish
1/4 tsp. granulated sugar
1/2 tsp. coarse salt
1/2 tsp. freshly cracked black pepper
2 tsp. fresh-squeezed lemon juice
4 drops tabasco or your favorite hot sauce
1/2 tsp. Worcestershire sauce
2 garlic cloves, minced
In a small bowl, mix all the ingredients together to taste, cover and chill until ready to serve and to develop flavor. Makes 2/3 cup.
OYSTERS 101:
Contrary to popular opinion, not all oysters taste alike. Some are brinier, some are creamier, some are leaner, some are fatter, and some even have a “fruity” taste, vaguely suggestive of cucumber and melons. Some of the differences in taste have to do with the species, but mostly it has to do with the temperature of the waters in which they are harvested; as well as the oyster’s fabled muscle, which constantly opens and closes to allow a flow of water and nutrients.
Muscle Over Matter
While oysters are famously immobile — once an oyster finds its rock, there it remains — they do have a powerful muscle that opens and shuts its gnarly shell. Contrary to popular opinion, not all oysters are created equal. First of all, there are several species. Perhaps the best known oysters are those originating from the waters off the East Coast — from Nova Scotia all the way down to the gulfstream waters from Florida to Texas — that are often called Bluepoints (although Bluepoints technically come only from New York’s Long Island).
Not sure what type of oyster is best for you? Check the link below to find your ‘PERFECT MATCH.”
Fun Fact: You’ve heard the phrase “the world is your oyster.” Where does it come from?
Origin: It comes from Shakespeare– The Merry Wives of Windsor (1600). The world is the place from which one can extract success and profit, as a pearl can be extracted from an oyster.
You are in a position to take the opportunities that life has to offer.
“I can do anything I want to, the world’s my oyster.”
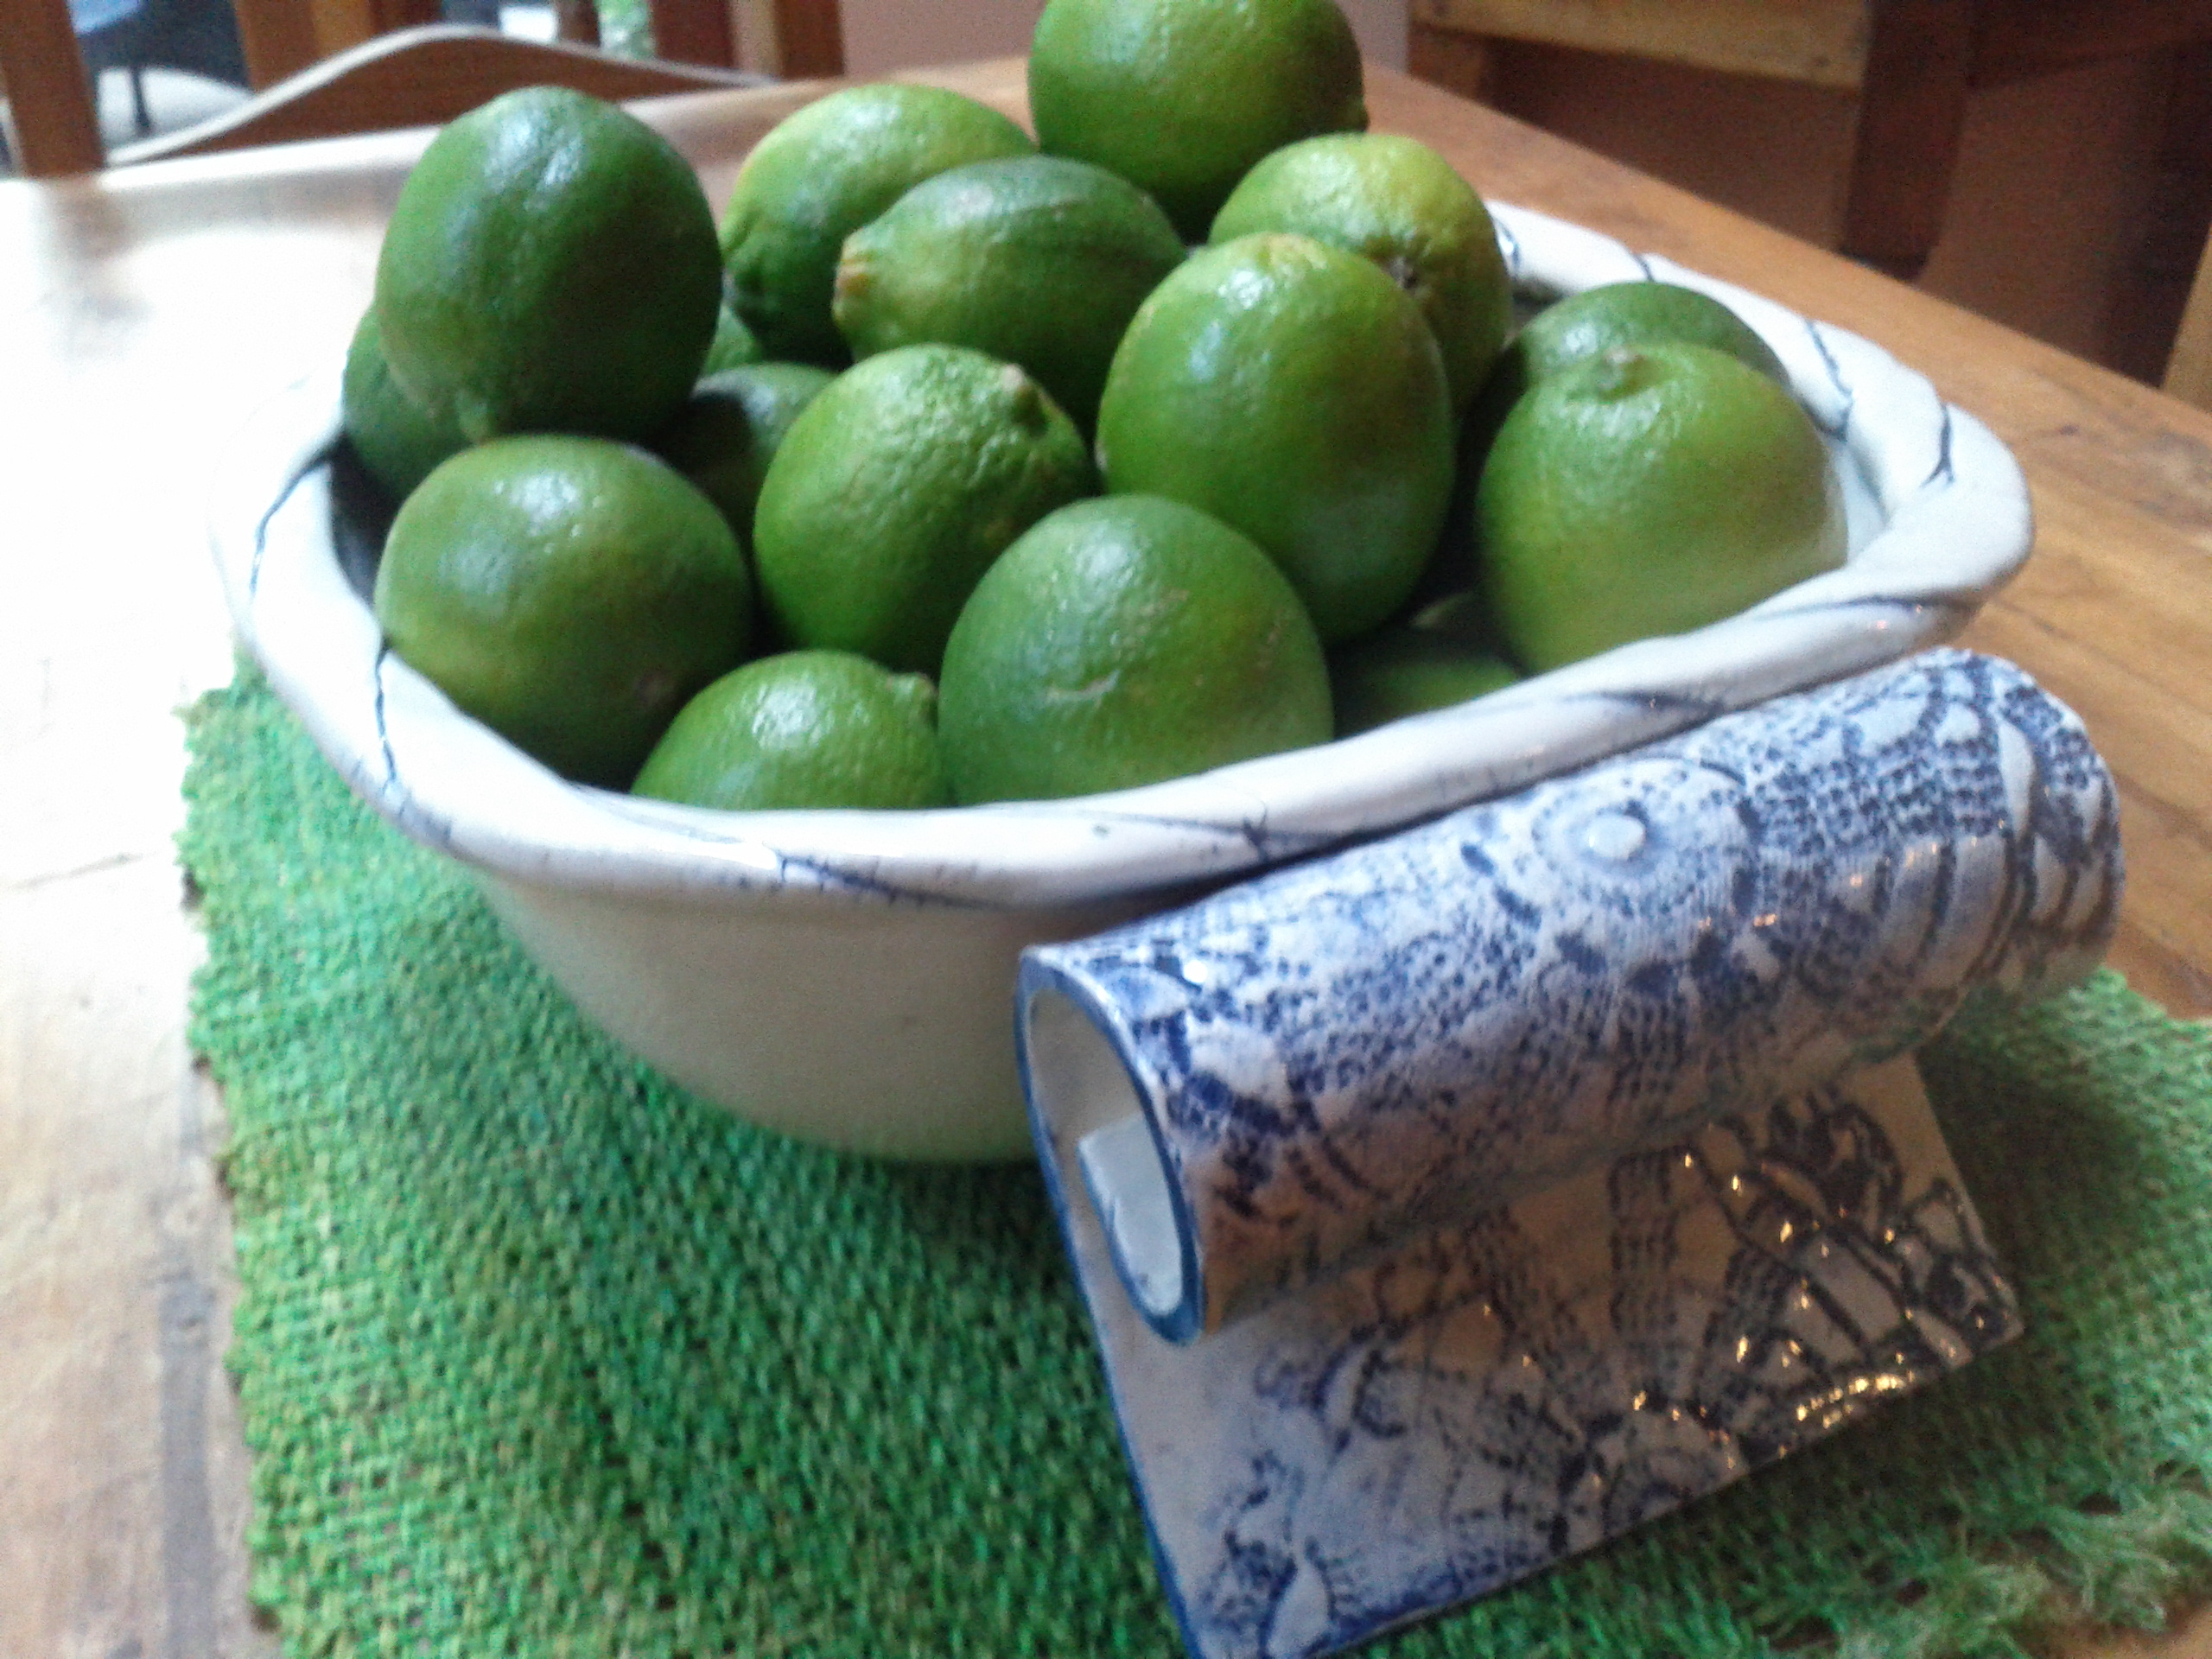
Yup, that’s it folks – one simple ingredient….limes, but dried!
Ha; did you think I ran out of recipes this week – or am I just being lazy? No, never! Actually I thought instead of sharing a new “IT” ingredient with you. That’s worth something isn’t it?
I use freshly squeezedlimes over so many things – fish, chicken, tortillas, ceviche, key lime pie of course & let’s not forget about margaritas (but that’s not really a food is it?). I use lime zest over many things too. Now I want to try dried limes. I’ll tell you why: the sourness of citrus with the tang of fermentation.
Not sure if this will surpass Kale, but in a quest to decipher what the new “IT” will be, about a zillion trendsetting chefs were consulted. Among them, Boston’s Barbara Lynch (The Butcher Shop), NYC’s Amanda Cohen (DirtCandy), San Francisco’s Evan and Sarah Rich (Rich Table), and Austin’s Jodi Elliott (Foreign & Domestic).
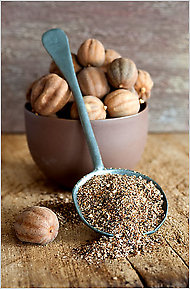
Concensus was difficult (why be unanimous when you can be unique?), but there was one ingredient that popped out: dried limes, a classic Middle Easternseasoning with a sour, aromatic tang and fermented undertones.
“Pound them up and grind them, and you have a powder for a spice,” says Sara Jenkins of NYC’s Porsena. “It brings a fresh brightness to anything,” adds Kim Alter of San Francisco’s Haven.
Though they look kind of like lumpy little rocks, dried limes actually have all kinds of uses as a flavoring. They are excellent used whole in soups and stews as well as lentil and bean dishes; when ground up, they’re great rubbed directly onto steaks or chops, or combined with other spices and a bit of oil to make a paste for rubbing on seafood.
First developed in Oman, dried limes are essential ingredients in the cooking of Iran, Iraq and the Gulf States. They also appear occasionally in northern Indian dishes. But unlike other once-exotic ingredients (preserved lemons and coconut milk come to mind), dried limes have remained well outside the mainstream pantry, even for more-adventurous American cooks. This is a shame. Dried limes turn out to be another one of those power ingredients that can transform a whole range of dishes with virtually no effort on your part.
The way they are produced could not be more straightforward: Small limes are boiled briefly in salt brine, and then they are laid out in the sun to dry over the course of several weeks.
In the Middle East, these limes are most often added whole to soups and stews. You simply wash them well, pierce them a couple of times with a sharp knife or a fork, and drop three of four of them into the pot. As the cooking liquid sluices through the limes, they add an evocative tang and a subtle complexity to the entire dish. It definitely brings new life to whatever seafood you rub it on too.
In Vancouver you can buy them at South China Seas Trading Company – Granville Island. This is where I buy my exotic spices & ingredients for Thai & Indian dishes.
both whole & crushed are available in Middle Eastern shops or Online.
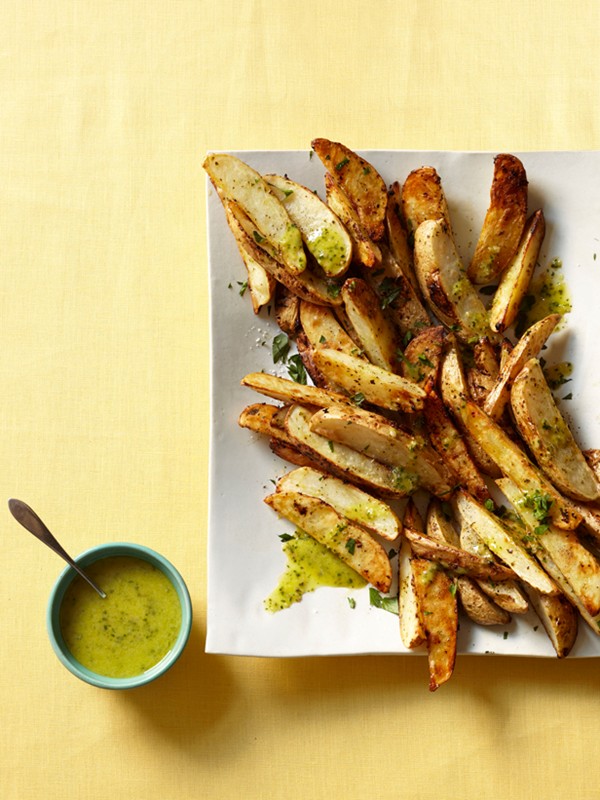
¼ cup fresh parsley leaves, plus 1 Tbsp. chopped, for serving
Kosher salt and fresh ground pepper
3 pounds large russet potatoes, cut lengthwise into wedges.
Preheatoven to 425 degrees. Put the olive oil, lemon juice, shallot, garlic, oregano and parsley in a food processor; add 1 tsp. salt, and pepper to taste. Puree until smooth.
Toss the potatoes with ½ cup of the prepared vinaigrette in a large bowl and spread in a single layer on a large rimmed baking sheet (reserve the remaining vinaigrette.) Roast the potatoes until tender and golden, turning occasionally, 45 minutes to 1 hour.
Transfer the potatoes to a platter and drizzle with some of the remaining vinaigrette. Season with salt and garnish with the chopped parsley.
Serve with the remaining vinaigrette on the side.
* Bobby BIO:
Bobby Flay is always busy with his hit Food Network shows: Barbecue Addiction, Throwdown, Boy Meets Grill and Food Network Star.
Bobby discovered his culinary identity at the age of 17, working as a cook at the famed theatre district haunt Joe Allen’s. The job had been arranged by his father, who was a partner in the restaurant. After a short time, Joe Allen himself became so impressed by Bobby’s talents that he paid the young cook’s tuition to the French Culinary Institute.
Following his graduation in 1984, Bobby worked with restaurateur/owner Jonathan Waxman at Buds and Jams, where he first discovered the sweet heat of Southwestern ingredients. It was at these burgeoning restaurants that he met other icons of the era – Wolfgang Puck, Jeremiah Tower — whom he credits with spawning an entire generation of chefs. After Jams, Bobby debuted as Executive Chef at the East Village’s Miracle Grill, where he caught the attention of restaurateur Jerome Kretchmer. Kretchmer offered the 25-year-old the opportunity to create his own sensation at Mesa Grill, which opened in 1991.
Bobby brought his unique amalgam of innovative food and inviting hospitality to Las Vegas with the 2004 opening of Mesa Grill at the legendary CaesarsPalace. The city’s upbeat urban energy provides an ideal backdrop for Mesa Grill’s lively cuisine. In March 2007, Bobby brought Mesa Grill to The Cove Atlantis in Paradise Island, Bahamas, and in July 2008, opened his first Bobby’s Burger Palace (BBP) in Long Island.
Unprocessed and uncooked organic produce has earned status as the gold standard in health food, but when it comes to vegetables, less (cooking time) isn’t always more. In fact, several varieties actually pack a bigger nutritional punch once they’ve been heated up above 115 degrees.
Taken from an article written by Jessica Chia
Compared to their raw counterparts, cooked tomatoes deliver more lycopene, an antioxidant that can lower the risk of prostate cancer, heart disease, and lung cancer. Likewise, heated carrots deliver a bigger dose of beta-carotene, a source of vitamin A. Spinach, mushrooms, asparagus, and cabbage also supply maximum antioxidants and nutrients when cooked, says Bonnie Taub-Dix, RD, author of *Read It Before You Eat It(this nationally recognized nutrition expert from New York tells shoppers exactly what should be going into their carts.)To lock in peak nutritional value, Taub-Dix recommends steaming vegetables to avoid overcooking, and adding flavor with fresh herbs and spices, rather than drowning them in rich sauces or fat-loaded batters. That means tempura is out and your easy, cheesy broccoli recipe was overdue for retirement, anyway.
Veggies that fare better fresh: beets’ brain-boosting folate, broccoli’s cancer-combating myrosinase, and red peppers’ immunity-improving vitamin C are all at their highest levels in their natural state. Other raw standouts include coconut, cacao, lettuce, cucumbers, nuts, and seeds.
Eating slices of plain beets or a handful of unsalted nuts not your style? Taub-Dix suggests tossing vegetables, fruit, nut milk, and nut butter in a blender for a nutritious, protein-rich, and surprisingly satisfying smoothie. Drizzling raw veggies with a little oil-based dressing is another way to add flavor without defeating your clean-eating efforts.
Here, Taub-Dix shares her favorite smoothie recipe, a trio of refreshing fruit, cholesterol-lowering kale, and heart-healthy chia seeds.
Fruit, Kale, and Chia Smoothie
½ banana
½ apple
½ mango
Handful of kale leaves
2 tablespoons chia seeds
1 cup water
2 ice cubes
About the book:
There is a wealth of information on labels, but most people have no idea that products labeled “trans-fat free” can contain trans-fats or that “all natural” is a meaningless phrase. Readers can bring this handy guide to the supermarket to help them interpret labels like a pro. How much sodium is too much? Are all carbs the kiss of death? And what does “organic” really mean? Taub-Dix clears up the confusion by showing readers how to make sense of the labels and sidestep tricky marketing ploys. She walks them through a typical grocery store and points out the best food choices to make in every aisle.
Also, **Don’t miss listening to “Transforming Health” with host Brad King for the most evocative and informative up-to-the-minute interviews with leading health professionals – Live every Wednesday @ 12PM-PST/3PM-EST on VoiceAmerica.com – #1 internet radio station in North America.
Always braise on low temperatures. The low temperature & slower cooking time helps to break down the tissues in the meat & makes tougher (and cheaper) cuts of meat turn out nice & tender.
after
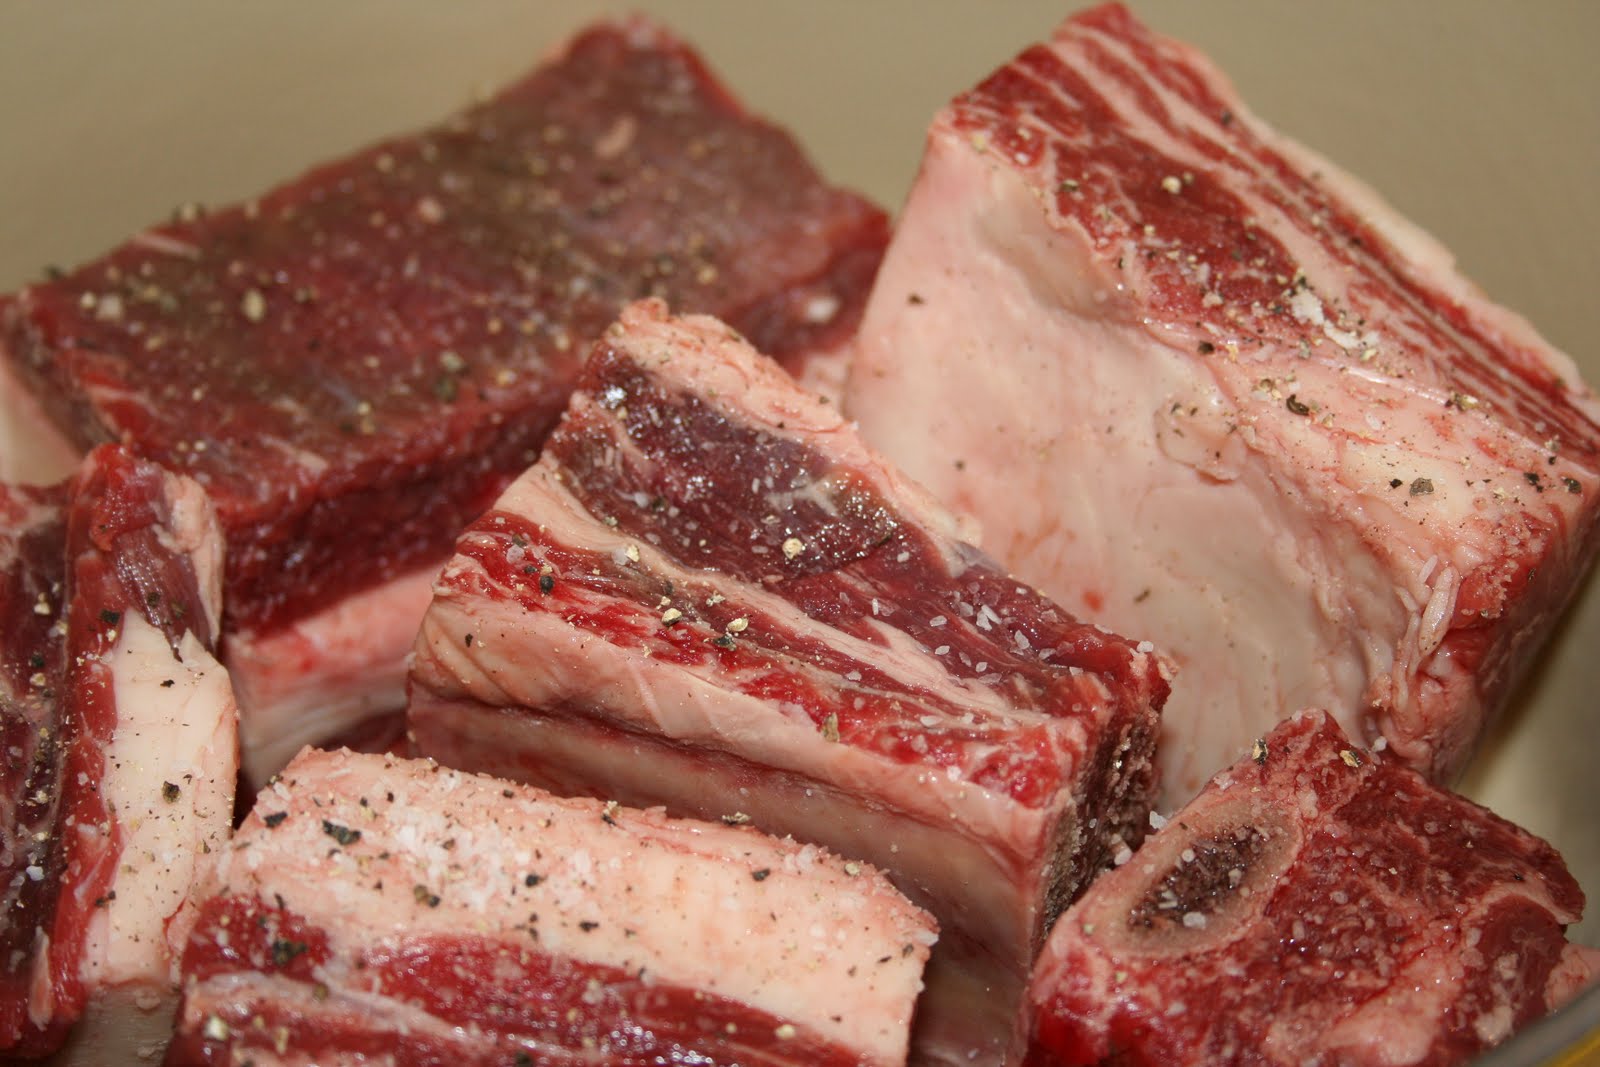
The amount of ribs will depend on the number of people – figure ½ lb. per person.
before
Preheat your oven to 300°F.
·Pat the meat dry with paper towels. This will help you get a nice brown crust on the meat in the next step. Sprinkle with garlic salt, onion salt + pepper.
·Heat a small amount of oil in a heavy-bottomed oven-proof braising pan or Dutch oven over high heat. When the oil is very hot, add the meat. Brown the meat for a minute or two on all sides. Remove the meat from the pan and set it aside.
·Lower the heat to medium and add aromatic vegetables like chopped onions, leeks, carrots and celery. You could also add a few cloves of garlic, peeled and crushed. Sauté for a few minutes or until the vegetables start to soften.
·Deglaze the pan with a flavorful liquid, such as stock, broth or wine (you can even use beer). I used beef stock. Scrape off any roasty bits (called fond) from the bottom of the pan and bring the liquid to a simmer. This liquid will add flavor to the braise. *The long, slow, moist heat of braising is the best way to soften tough cuts of meat.
·Check the level of the braising liquid. The liquid should just barely cover the meat. You can now add other flavorings and seasonings, like whole peppercorns or bay leaves.
· Bring the braising liquid back to a simmer, then cover the pan with a tight-fitting lid and transfer it to the 300°F oven.
·Braise for 1 to 5 hours, depending on the amount of ribs used. Figure about an hour per pound but check to make sure they’re tender.
· Remove the pan from the oven. Pour cooking liquid through a fine sieve set over a saucepan, discarding solids, and skim fat. If necessary, boil liquid to thicken it slightly, and spoon sauce over ribs. Or; to make a sauce or gravy from the braising liquid, first make a roux, then whisk some of the braising liquid (strain it first) into the roux until it thickens. Cook on low heat for a few minutes, then season.
Any remaining sauce would be great served over egg noodles.
Stock vs Broth – is there a difference?
Turns out that there is a slight but significant difference.
Stocks and broths both start off the same way: various kitchen scraps of vegetable, meat, and bone are slowly simmered to extract as much flavor as possible. For stock, it stops there — this is an unseasoned liquid that doesn’t taste all too great on its own, but makes a fantastic neutral base for soups, sauces, and other kitchen creations.
Broths, on the other hand, get some seasoning. We add salt, some other spices like black pepper, perhaps a splash of wine — all for the purpose of making this neutral stock taste delicious on its own. A more technical definition for broth would actually be “seasoned stock.” Now that the salt and other seasonings are added in, broth is tasty and satisfying.
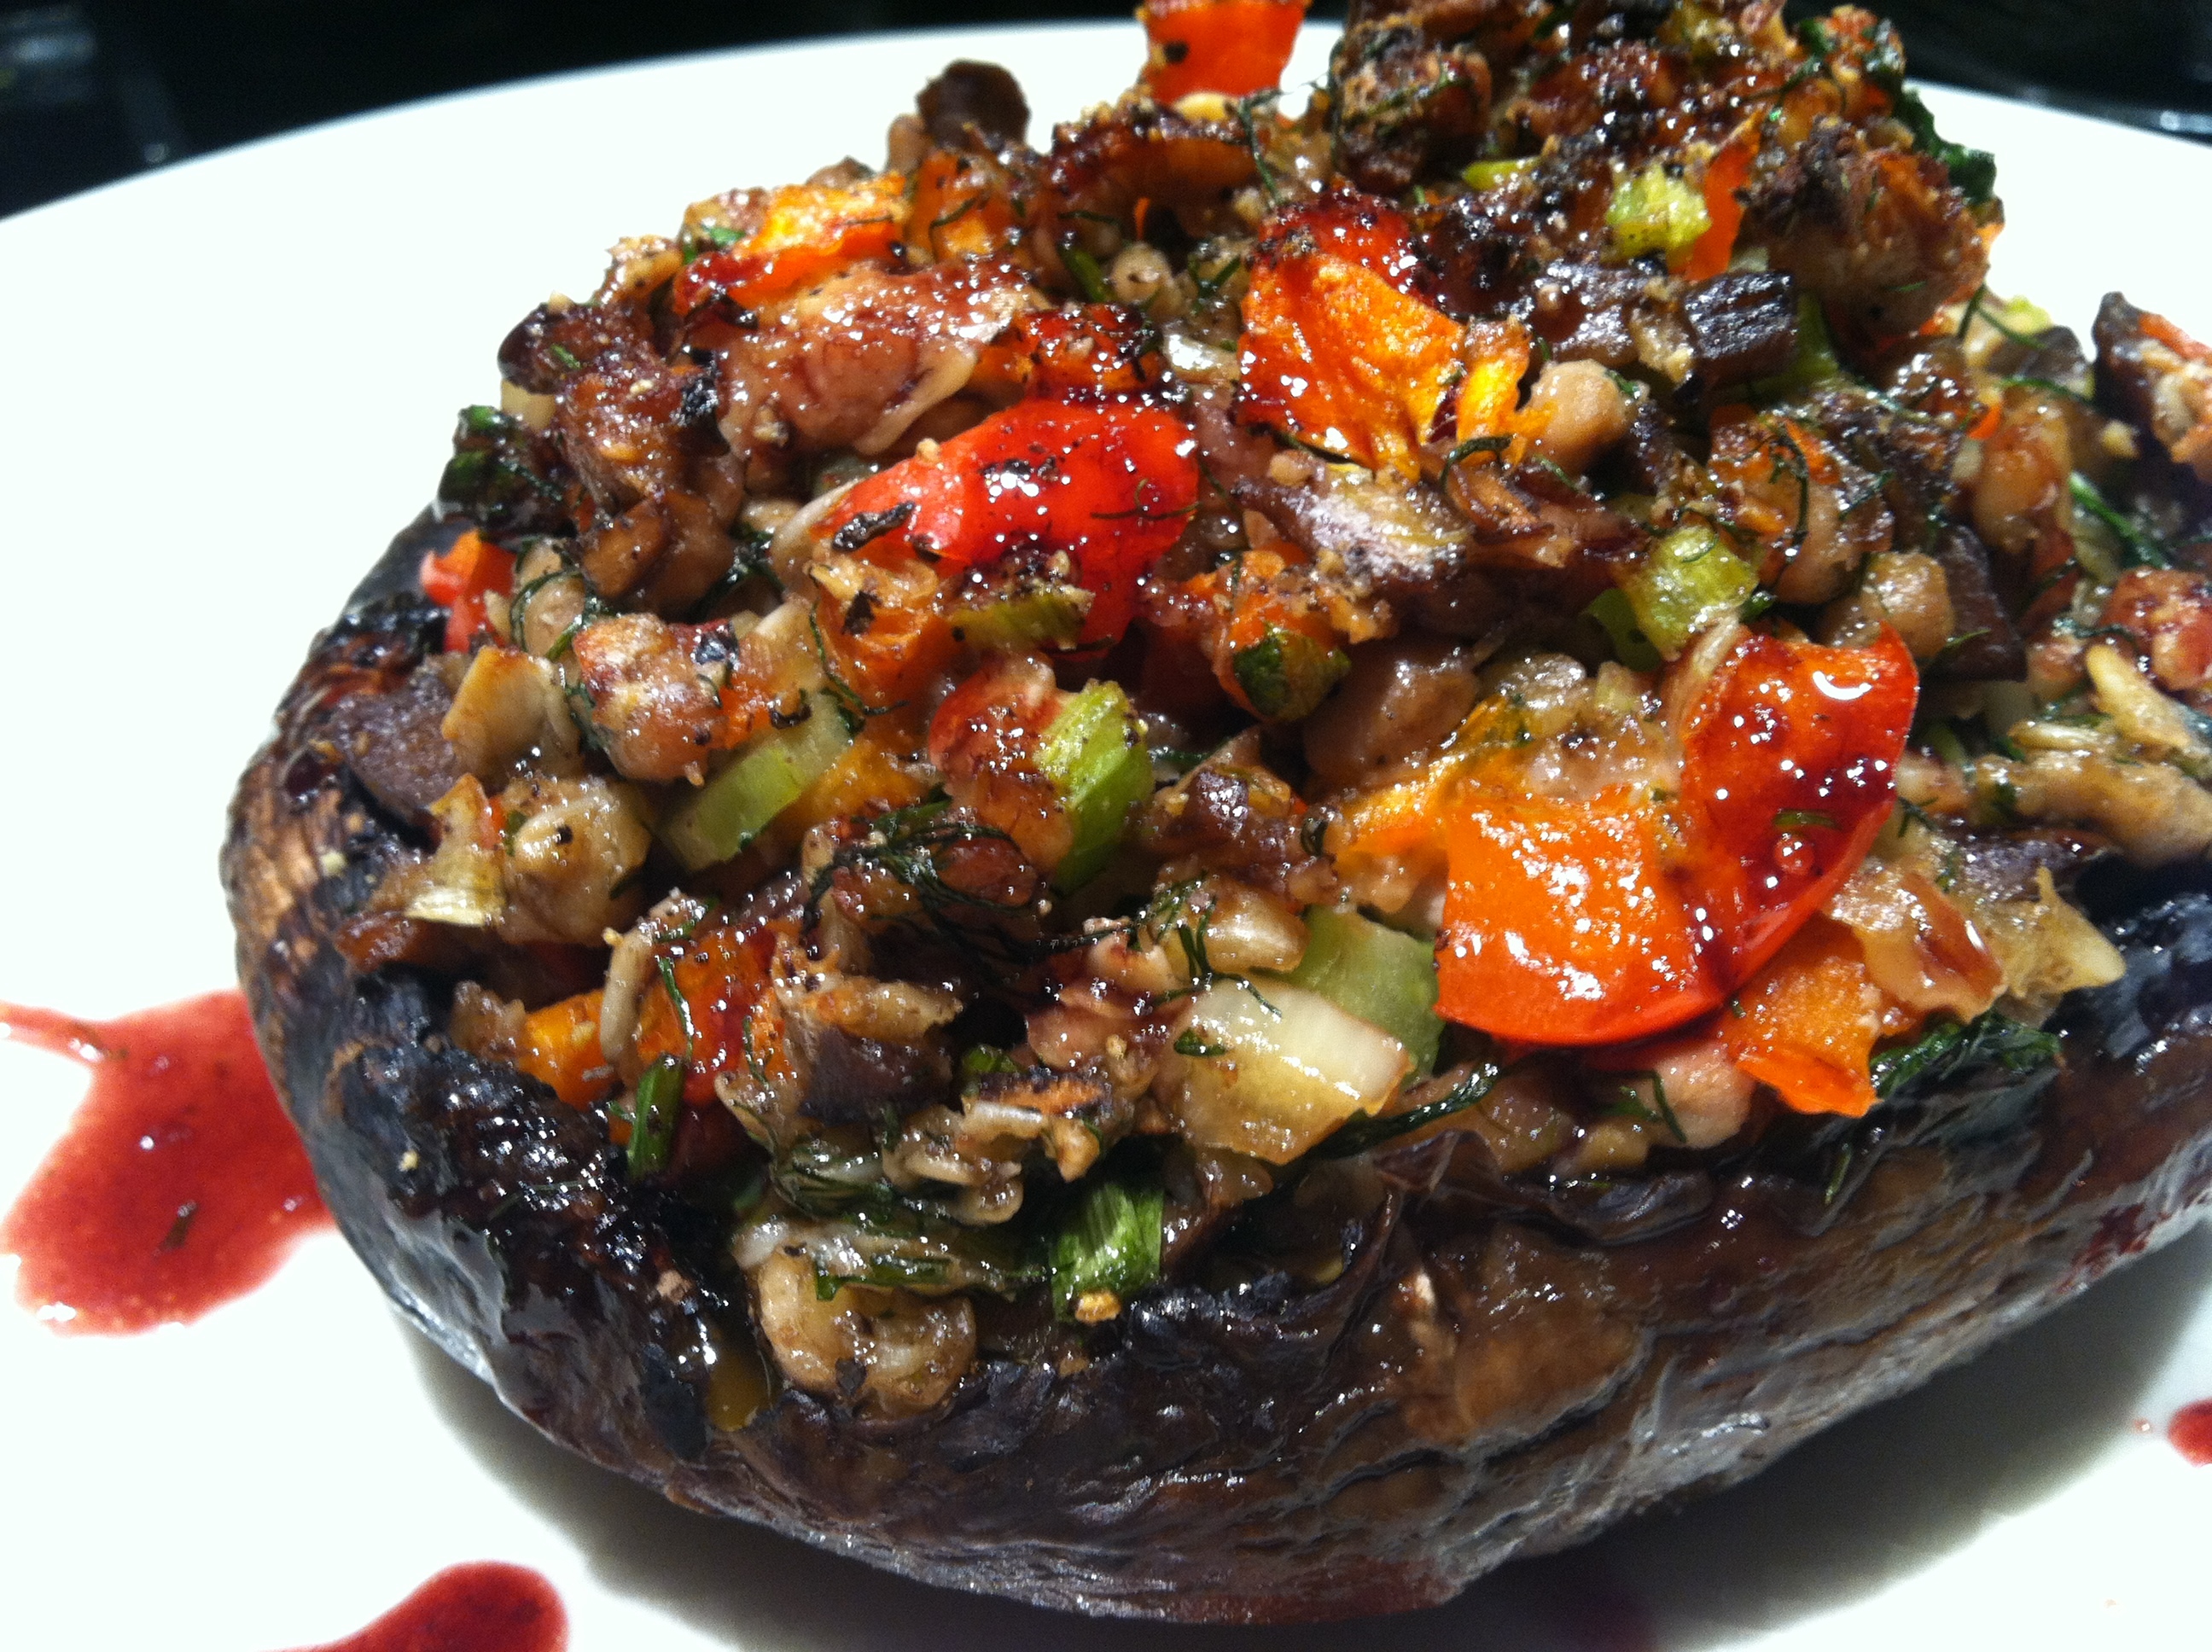
This can almost suffice as a meal on its own, but giant portabello mushrooms are terrific as a side dish for grilled fish or steak, or as a vegetarian main dish because they have that meaty ‘steak like’ texture. They’re healthy, filling and so satisfying. Here is a recipe that’s not really a recipe.
How-to:
Remove stems from mushrooms and reserve for another use, such as stock. Hollow out a bit of the mushroom taking care not to cut through the whole thing – just scoop out some of the flesh to make room for stuffing. Brush mushrooms all over with oil.
Prepare quinoa or rice (I recommend wild rice if you don’t want to use quinoa) ahead of time. Wash 1 ½ cups of quinoa or rice & place in pot with 3 cups of water/stock (I like chicken or veggie ‘better than’ bouillon). You’ll have more than enough – but more is always better.
In a separate pan with a bit of extra-virgin olive oil sauté the following vegetables (although you can improvise using whatever veggies you prefer).
I used what was on hand:
1 chopped onion, 1 chopped red pepper, french-cut green beans, sundried tomatoes & a few mushrooms (you can also use the stems which you must remove from the Portabello). Just sauté with s+p (plus other spices) until tender but still slightly crisp. I then added cuban-style black beans, corn, peas & quinoa (you decide how much) to the mix.
Place mushrooms, cut side down, on greased cookie sheet (or pyrex) in a 350F oven just until juices start to release, about 4 minutes. Take out of oven.
Turn mushrooms and spoon filling. At this point I added sliced green onions & feta on top (although parmesan would be nice too), drizzle with a bit more olive oil and cook mushrooms until tender, about 15 more minutes.
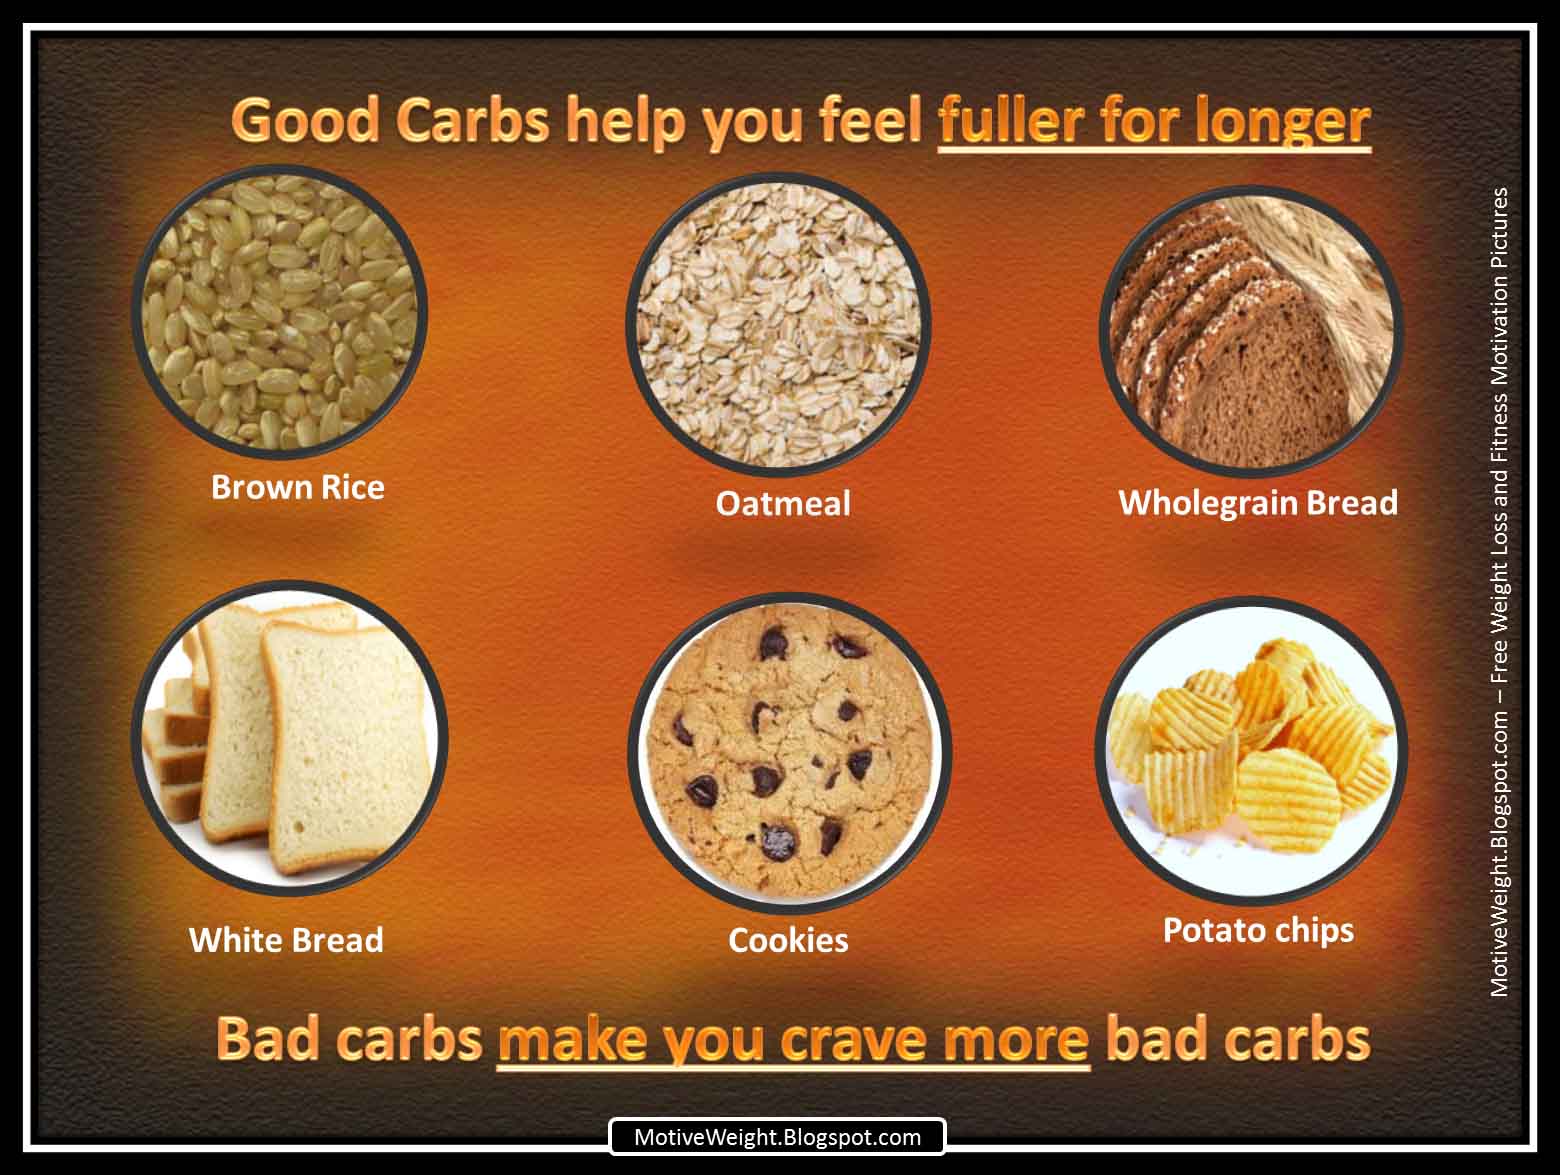
Little healthful tidbits that go a long way…the good, the bad & the plain ugly truth:
Don’t we know it by now! While carbs tend to get a lot of bad press (think the Atkins diet), they are an essential part of any diet if you expect to have energy and function at an optimal level. “Your body definitely needs carbs,” says nutritionist Kelly Aronica, who believes that they should make up at least 50-60% of the calories you consume daily. Why? Because glucose, the simplest type of carbohydrate, is the only thing that can be used to meet the energy needs of the body, support the brain and nervous system, and maintain a well-functioning digestive system.
How Carbs Can Help You Lose Weight
Though the body has a backup plan if no carbohydrates are eaten, it’s not perfect (hence why it’s meant as a backup plan). As Aronica explains it, if there’s a lack of carbohydrates, the body essentially converts protein and fat into glucose, which is what the body converts into fuel so we have energy. The problem is that this system is less efficient and slower than just consuming carbohydrates and, depending on your sensitivity level, it often leads to low energy and light-headedness. But that’s not the only reason to eat carbs.
As Aronica puts it, carbs are also needed because their presence lets the body know to release insulin, which is necessary to use the glucose to build muscle, energy storage, and even fat (if you have excess glucose). Now if the mention of fat made you start to believe all those anti-carb rants, then you need to remember that there’s a big difference between carbs that provide fiber, nutrients, and vitamins and ones that only supply sugar. Don’t believe us? Aronica points out that a recent study from the New England Journal of Medicine “showed that eating refined potato products, sweetened drinks, sweets and desserts, fruit juice, and other refined grains were linked to weight gain where high-fiber carbs were linked to long term weight loss.” So instead of banishing carbs from your diet, be more particular about the ones you eat.
Avoid refined carbohydrates (like white bread) and opt for the carbs that have high-fiber levels and a bounty of nutrients and vitamins, like folate and heart healthy omega-3’s. While most of the fibers in food aren’t actually digestible, they provide a lot of other important health benefits to keep you operating at your best and are a necessary part of any diet. To help you make better choices, we put together a list of the carbs that are best for your body.
Don’t miss listening to “Transforming Health” with host Brad King for the most evocative and informative up-to-the-minute interviews with leading health professionals – Live every Wednesday @ 12PM-PST/3PM-EST on VoiceAmerica.com – #1 internet radio station in North America.
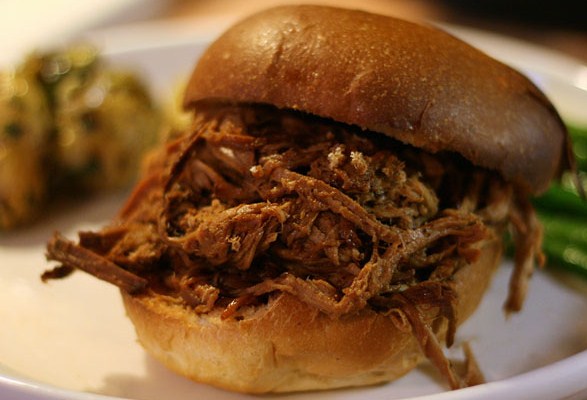
Southern Comfort. I have a sneaking suspicion that you can put a pork shoulder into a *slow cooker all on its own (with no rub, sauce, etc.) and it will still turn out pretty darn tasty…but why chance it. This delicious ‘once on occasion’ recipe (as filed under guilty pleasures or football games) was served on buns this past weekend (with other food like stuffed peppers, etc.) as a request.
Pulled Pork
One 3 or 4 lb. boneless pork shoulder (boneless is easier for shredding). Have butcher roll and tie for you if it doesn’t come packaged that way.
Combine the following dry spices and rub them all over the pork. Make sure you get all surfaces well covered. Place seasoned pork in a bowl, cover and refrigerate overnight.
2 Tbsp. brown sugar
2 Tbsp. kosher salt
2 Tbsp. smoked paprika
1 Tbsp. black pepper
1 Tbsp. ancho chili powder (or any Mexican chili powder)
1 tsp. ground coriander
1 tsp. ground cumin
Next morning – remove the pork from refrigerator.
Put into slow cooker the following:
1/2 cup of water
1 cup of apple juice
1 cup of barbecue sauce (if you buy it try to get one with a smoky BBQ flavor – I like Kentucky wild whiskey or a wild hickory smoke). See homemade version below.
Juice of 1 lime
hot sauce, to taste
Add pork shoulder, cover & turn on low for at least 8 hours.
When done, remove roast from stoneware (slow cooker), and pull the meat into shredded pieces using two forks. Pour out any liquid in the stoneware. Combine shredded pork with a chopped medium onion & put back into stoneware with about 1/2 cup of the reserved liquid & bit more barbeque sauce. Turn on low for one more hour. Keep warm until serving on hamburger buns or rolls. Warm up extra BBQ for buns if needed.
*If you don’t have a slow cooker then put it into a covered roasting pan set on a low heat (250 F) for same amount of time. Just be sure to check & baste periodically.
Homemade BBQ Sauce (great for ribs too). A little more time but I promise it’s totally worth it:
2 Tbsp. tomato paste
1 Tbsp. dark brown sugar
1 Tbsp. molasses
1 Tbsp. apple cider vinegar
1 Tbsp. soy sauce
1 Tbsp. honey
1 Tbsp. ketchup
1 tsp. yellow mustard like dijon, Worcestershire sauce, garlic powder, onion powder and kosher (or Lawry’s seasoned) salt.
1 cup chopped onion (optional)
1/2 cup strong black coffee
dash of Louisiana-style hot sauce
(makes two cups)
Combine all ingredients in a saucepan. Whisk thoroughly or combine with a hand-held blender to ensure there are no lumps. Simmer over low heat while stirring frequently for 1 hour (this pasteurizes the sauce). Cool for at least 1 hour before transferring to an airtight container for storage. Store for up to 1 month in the refrigerator but you can also freeze what you don’t use.


You must be logged in to post a comment.