Fabulous Food – creamy Herb dressing

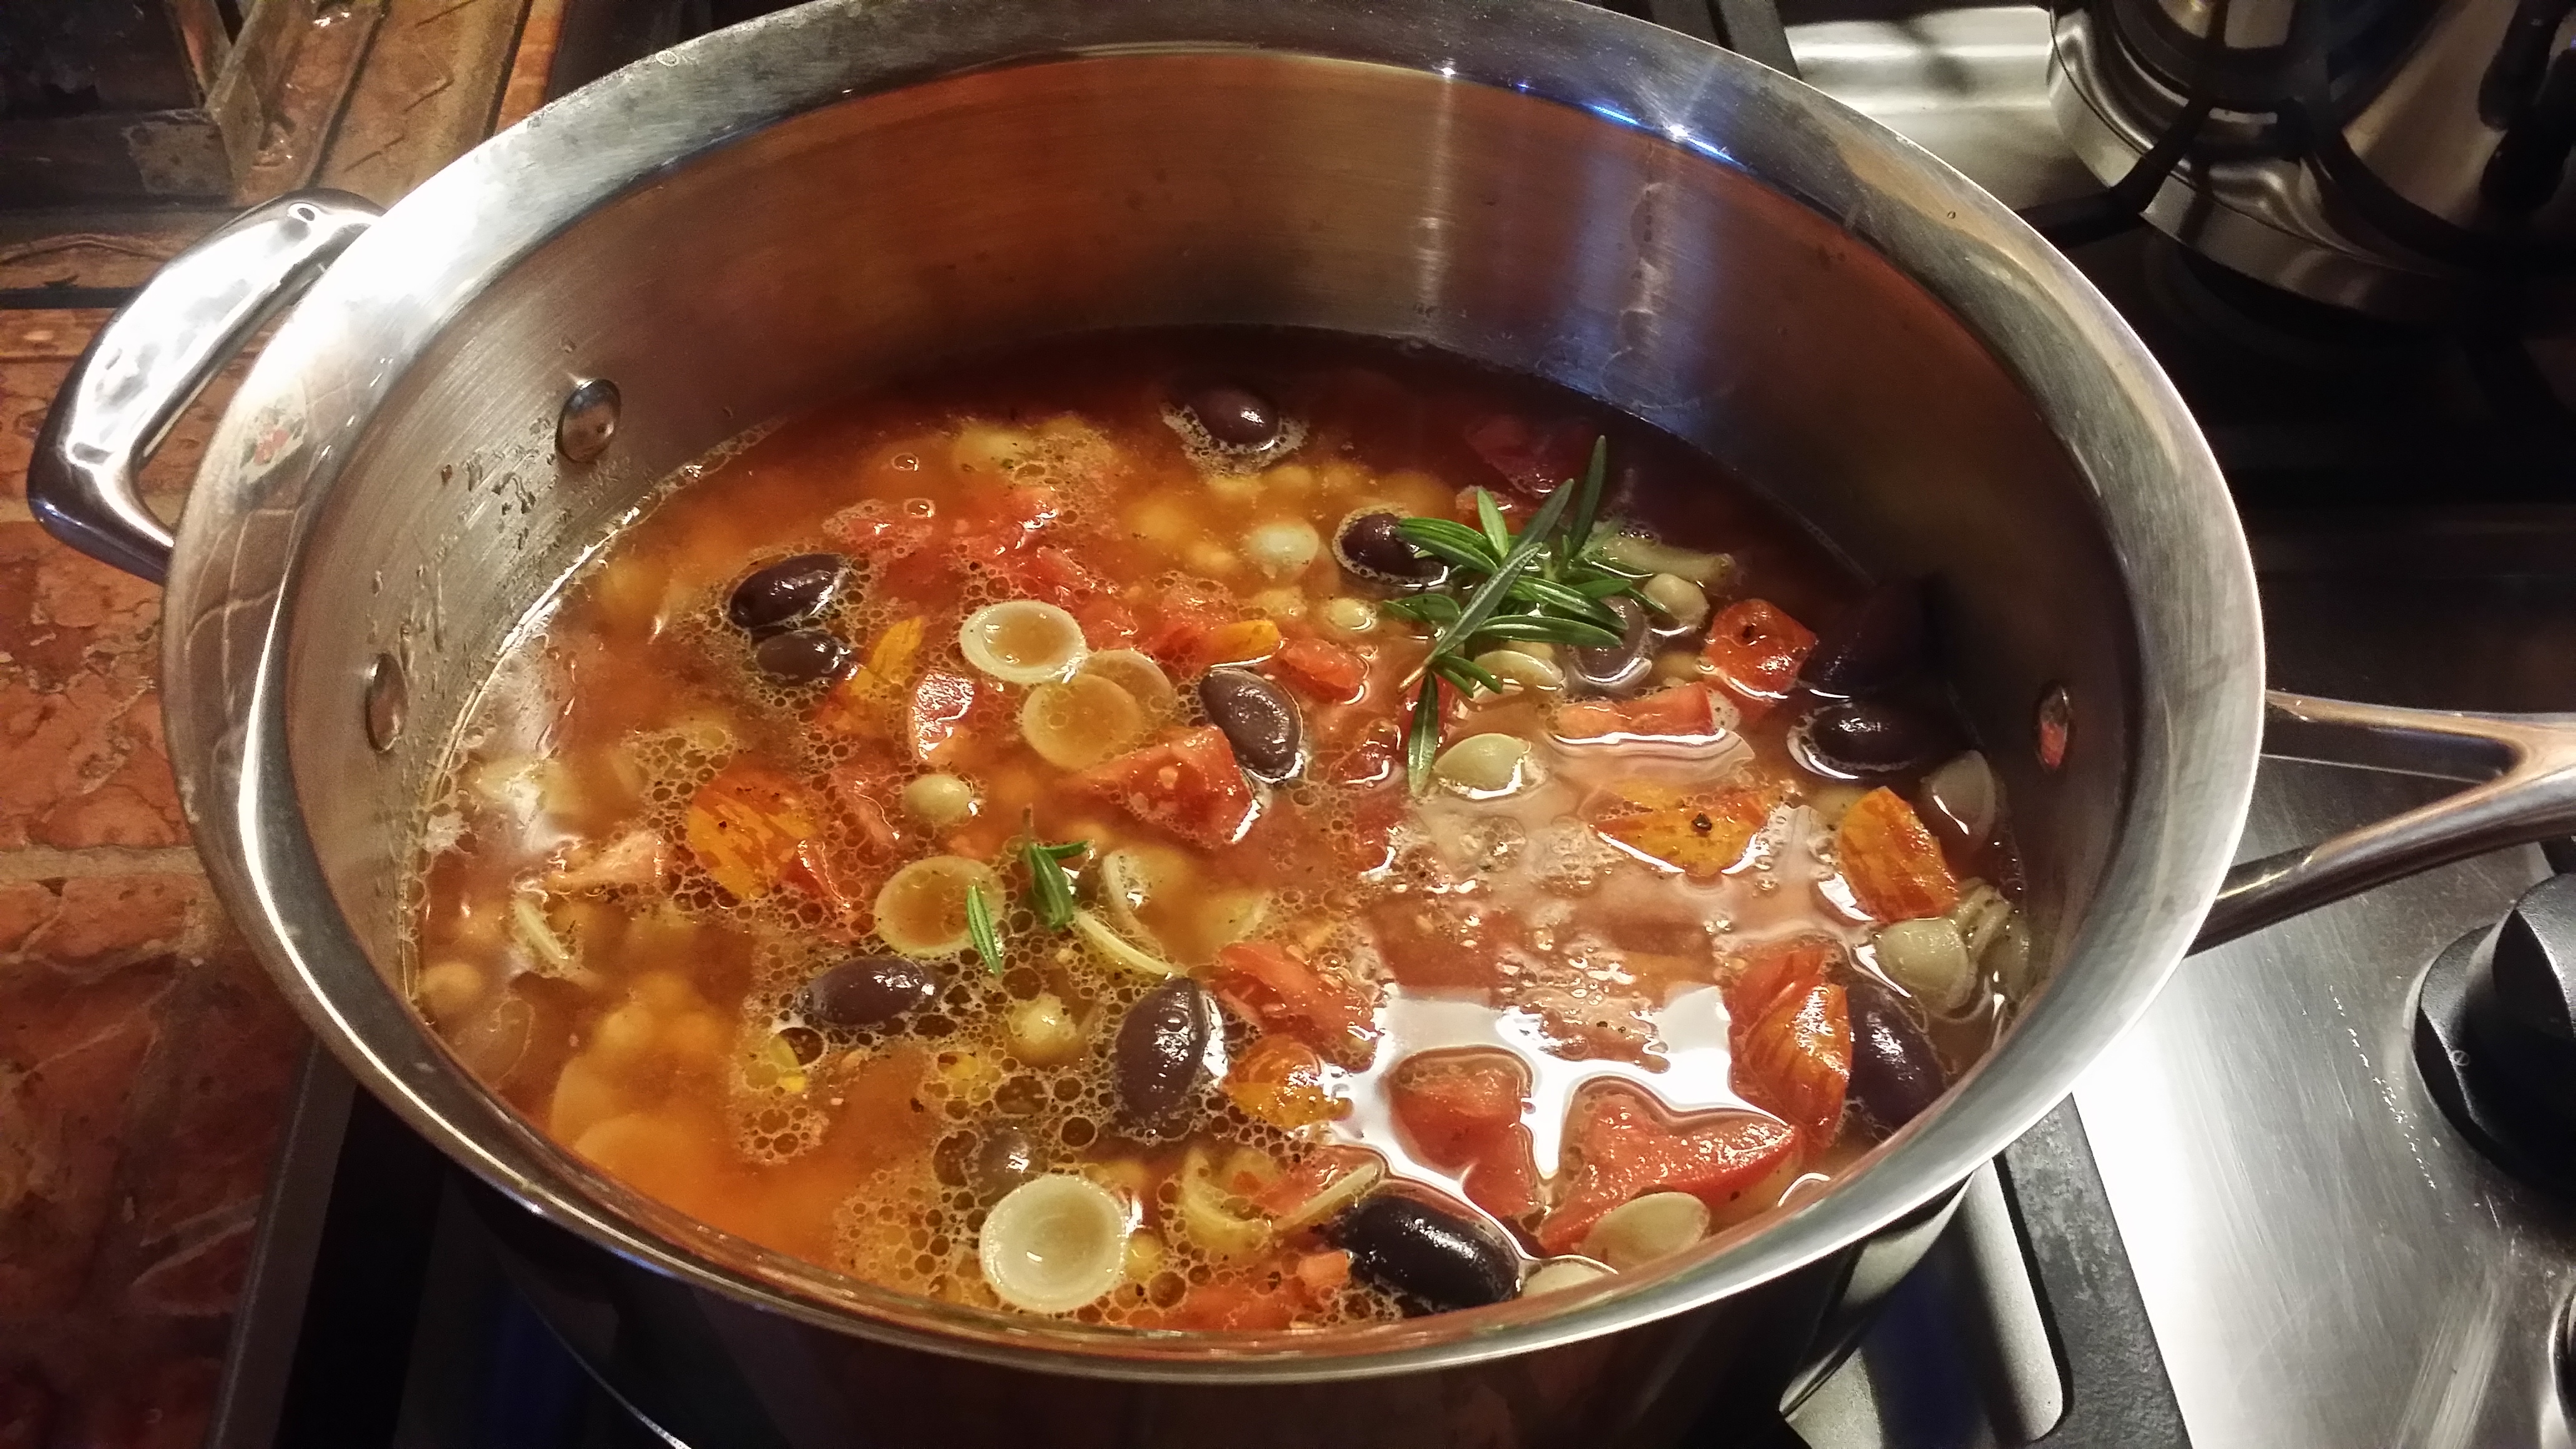
If you’re like me you put fresh herbs in everything from egg salad sandwiches to soups and pastas. Even pizza!creamyherbdressing2 It really does improve the taste and I love the ritual of cutting a few fresh stems from my herb garden. Well right now my herb garden is not looking so great except for the oregano and thyme (which is thriving since I re-potted them in a huge pot together – they seem to get along very well).  I’ve been looking for ways to preserve their freshness for as long as possible.  Nothing wrong with using dried but I love garnishing with fresh almost as much as cooking with them. So here’s an idea for preserving your soon-to-be-sad-looking herbs and a recipe for a simple dressing which you can use for everything from coleslaw & cucumber salad to potato salad or simple mixed greens.

Preserving: 

Summer might be waning, but your money-saving herb garden can be harvested until the first frost. Preserve those wonderful green bits for winter with these tips.

At the household blog Tipnut, they’ve put together a rather exhaustive list of ways you can preserve the bounty of your summer garden. On top of more traditional methods like hanging herbs to air dry, they have some rather novel approaches to stashing them away for the winter. Want to preserve your more oily herbs as-is, instead of drying them out? Try this trick:

Chop herbs then sprinkle them into ice cube trays (measure into each cube the most common amount you use in cooking). Cover with water and freeze (can also cover with stock or olive oil). Pop them out once they’re frozen, package in freezer bags and store in the freezer (remove as much air as possible from the bags before freezing). When needed for cooking, just take out a cube and pop it in the dish that’s cooking (thawing first is optional–remember to account for the frozen liquid in your recipe). Tip: Try mixing your favorite blends of fresh herbs before freezing.

If you have a consistent stable of recipes, the ice cube trick would be a great way to preserve fresh herbs and oil for easy use.

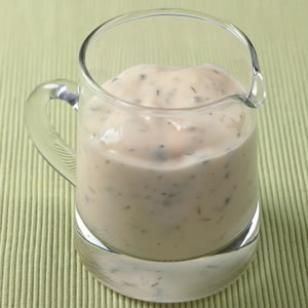
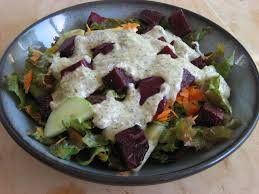
And now for the low calorie, low-fat RECIPE – Creamy always sounds more fattening right?

creamyherbdressing1Creamy Herbed Dressing

  • 1/2 cup low-fat mayonnaise (try avocado or southwest)
  • 1/3 cup nonfat plain yogurt
  • 1/4 cup reduced-fat sour cream
  • 3 tablespoons rice vinegar or white-wine vinegar
  • 1 tablespoon Dijon mustard
  • 1 tablespoon honey (optional)
  • 1 ½ teaspoons dried minced onion or chopped chives
  • 1 teaspoon chopped tarragon or dill (or use both)
  • 1 teaspoon onion salt or celery salt or 1/4 teaspoon of each
  • White pepper to tastecreamyherbdressing3
  1. Preparation: Combine mayonnaise, yogurt, sour cream, vinegar, mustard, honey, onion or chives, tarragon (or dill) and onion salt (and/or celery salt) in a bowl until well blended. Season with white pepper. Taste and adjust seasonings, if desired.
  2. Make Ahead Tip: Cover and refrigerate the dressing for up to 5 days. Stir before using.
  3. Nutritional per Tbsp: 16 measely calories & 1 G FAT

 Tell me how you LOVE IT (a switch over from reliable olive oil, balsamic & lemon juice!)

If you were wondering: black pepper is unripe fruit (green), picked and sun dried til it turns black. White pepper is the fully ripe seed stripped of its outer husk.

Furthermore….white pepper has a little milder flavor than black pepper but in some things it shouldn’t matter. Some recipes will specifically call for white pepper but I routinely substitute black pepper for white in my recipes. Keep this in mind… if you are making a cream soup or a lighter colored soup, usually the recipe calls for white pepper so it doesn’t look like you have dirt floating around in your soup. You can’t see the white pepper like you see the black pepper. But as long as you don’t mind the color… the taste is usually just the same.


Simply Satisfying –   gluten free CHOCOLATE ALMOND TORTE

torte1Also known as Torta Caprese (named for the island of Capri from which this recipe originates).

If you like chocolate with almonds you will love this flourless recipe.  It is simply delicious and fairly easy to make.  You might ask, what is the difference between a torte and a cake?  The answer is nothing because the word “torte” comes from the Italian word “torta” which means a round bread or cake. So it is in fact a cake.  In Europe, most cakes are called tortes.

When comparing tortes and cakes, you will notice that the cake is lighter than the torte. Cakes are made with cake flour which makes them very light because of the gluten content of the flour. You’ll find that tortes are denser and richer therefore a smaller piece should be enough to satisfy.

Ingredients:

1 ¾ sticks (7/8 cup) unsalted butter

7 ounces (1 ¼ cups) blanched whole almonds

6 ounces (170kg) of the finest quality bittersweet chocolate (not unsweetened) you can find.  I use Callebaut.

4 large eggs

1 cup fine coconut sugar (original recipe calls for granulated sugar)

Garnish with confectioners’ sugar (I sprinkle it over the cake with a fine sieve) and serve with whipped cream & berries. I like using raspberries because they have a sharpness which marries well with the sweetness (but it is not overly sweet) of the chocolate.  They also add prettiness to the final presentation.

Preheat oven to 350F and butter a 10-inch cake pan.  Line bottom of pan with a round of wax paper and butter paper.

Melt butter and cool.  In a food processor finely grind together almonds and chocolate.

Separate the eggs – yolks from whites.

In a bowl with an electric mixer beat yolks with sugar until very thick and pale, then beat in almond mixture with butter.

In another bowl with cleaned beaters beat whites with a pinch of salt until they just hold stiff peaks and whisk one fourth into almond mixture.  Fold in remaining whites gently but thoroughly and spread batter evenly in pan.

Bake torte in middle of oven for about 50 minutes, or until it begins to pull away from side of pan and a tester comes out with moist crumbs remaining.  Cool on rack 5 minutes and then invert onto another rack.  Discard wax paper and cool torte completely.  Invert onto a plate.

A restaurant style presentation with a touch of mint & a chocolate wafer.
Try a lovely restaurant style presentation with a touch of mint & a chocolate wafer.

Torte may be made one day ahead and kept, wrapped well in plastic wrap, at room temperature.

Enjoy!


Simply Satisfying – Scallops in Sparkling Wine

Yesterday’s post got me reminiscing about cooking with wine which is something I do all the time on occasion.  Sometimes I even put it in the food (yeah, we’ve all heard that one before).  20140817_144919

Visiting wine country (where ever there is a country with a wine growing region to be found) is a fun experience and you learn (or at least taste) something new every time.  One of the wine regions I really like to visit in Canada (besides the Okanagan in British Columbia) is Niagara-on-the-Lake, Ontario.  This recipe is from a cookbook bought at the Hillebrand Estates Winery which I made tons of tasty recipes from.  It’s a guide to creating the perfect union between fine wine and superb food. Many people cook with the standby white for seafood and red for meat dishes but how many have tried sparkly?20140817_144946

Sparkling wine is wonderful to drink and this recipe is simple to prepare.  The tiny bubbles add sophistication and a sense of celebration to any event.  It is also a great ingredient in wine country cooking. The happy little bubbles work magic to transform sea scallops into the most delicate shellfish you will ever taste. This is Tony de Luca’s version of famous Mexican *ceviche.

Ingredients:

1/4 cup lime juice

1/4 cup olive oil

1/2 cup sparkling wine

1 Tbsp. coriander, finely chopped

1 tsp. lightly toasted mustard seeds

2 tsp. fresh ginger, finely grated

1 tsp. granulated sugar

pinch of cayenne pepper

1 lb. (500g) fresh sea scallops

Add all the ingredients except the scallops to a large bowl and whisk to combine.  Add the scallops and cover the bowl with plastic wrap.  Refrigerate for 3 hours.  Remove the scallops from the marinade.  Discard the marinade and serve the scallops.  Makes 6 servings.  Enjoy!

*Traditional Halibut Ceviche from a previous blog post: https://girlwhowouldbeking.com/2012/08/21/simple-and-satisfying-3/

wineBook Review: the book is organized by wine variety, from light and lively to full-bodied. Each chapter begins with a description of the wine, followed by seasonal menus complete with detailed ingredient lists, thorough explanations of techniques and easy-to-follow instructions.  The author displays wit and wisdom from years of international culinary experience.  The ART of fine dining in the comfort of your home.

Simply Satisfying – Chili-Sauce Kale Chips

Healthy Kale Chips with a KICK and a Crunch!

from Martha Stewart
from Martha Stewart Living

Bake seasoned kale leaves to turn them into irresistible, good-for-you crispy snacks. Sriracha sauce adds a delicious bite.  For a milder version, simply omit the chili sauce. – SERVINGS:6

  • 2 bunches curly kale (20 ounces each), stems removed, leaves torn into 2-inch pieces
  • 2 tablespoons extra-virgin olive oil
  • 5 teaspoons *Sriracha sauce, or more if desired
  • Coarse salt

COOK’S NOTE

To store, keep in a large zip-top plastic bag at room temperature, up to 3 days.

Preheat oven to 300 degrees, with racks in upper and lower thirds. Wash and dry kale and divide between two rimmed baking sheets (kale will shrink as it cooks). In a small bowl, stir together oil and Sriracha and drizzle over kale; season with salt. Using your hands, toss to coat. Bake until kale is crisp and just beginning to brown at edges, about 35 minutes, tossing kale every 10 minutes. Let cool on sheets on wire racks.

Opt for these irresistible snacks instead of potato chips and work more greens into your  diet.

yes, this one - you've seen it!
yes, this one – you’ve seen it!


*Sriracha is made from sun ripen chilies which are ground into a smooth paste along with garlic and packaged in a convenient squeeze bottle. It is excellent in soups, sauces, pastas, pizzas, hot dogs, hamburgers, chowmein or on anything else to give it a delicious, spicy taste.

Simply Italian: One-pan Orecciette with Chickpeas and Olives

getting started
getting started looks almost like soup

Here we go again….cooking with chickpeas.  Chickpeas (otherwise known as Garbanzo beans), like most legumes have long been valued for their fiber content. Do you know that people who consume garbanzo beans on a regular basis have better blood fat regulation including lower levels of LDL-cholesterol, total cholesterol, and triglycerides?

Orecciette pasta is much easier to find nowadays (I don’t remember how many stores I went through trying to find it years ago) – it has a tiny ear-shape look to it.  It really means just that:  from orecchio (ear) + etto (small).  There, now you can speak some Italian!

This recipe is from Everyday Food by Martha Stewart and it is a very simple but tasty dish.  So very Italian!

Then it becomes more

Ingredients to Serve 4:

12 ounces Orecchiette

1 can (15.5 ounces) chickpeas, drained and rinsed

½ cup of Kalamata olives, pitted

2 Tbsp. tomato paste

3 cloves of garlic, thinly sliced

1 6-inch sprig of Rosemary

3 Tbsp. extra-virgin olive oil, plus more for serving

¼ tsp. red-pepper flakes, plus more for serving

Coarse salt and freshly ground pepper

½ cup grated Parmigiano-Reggiano (about 1 ½ ounces), plus more for serving

2 cups baby arugula (about 2 ounces)

Combine pasta, chickpeas, olives, tomato paste, garlic, rosemary, oil, pepper flakes, and 4 cups of water in a large straight-sided skillet.  Season generously with salt and pepper.  Bring to a boil, then cook over medium-high heat, stirring occasionally, until pasta is al dente and liquid is reduced to a sauce that coats pasta, 12 to 15 minutes.

Remove skillet from heat, discard rosemary, and stir in arugula until just wilted and cheese to coat.  Add more water only if needed to thin out sauce, a few tablespoons at a time. Divide pasta among bowls and serve immediately, drizzled with oil and sprinkled with cheese and pepper flakes.

Finally
Finished Product.  I added Truffle Oil

buon appetito!


GRILL TALK – simply satisfying SKEWERS

Party on a STICK!kebab1 If you can slide it on a skewer, you can GRILL it.  These simple KEBAB combos make them foolproof.  Just match a marinade or glaze to meat and/or veggies and your barbeque just got a lot more flavourful.

kebab2Kebab Confidential: they can be tricky since different meats and veggies cook at different times. The key is to make single ingredient skewers.  If combining ingredients (which I like because they look prettier) choose those with similar cooking times. It makes sense that peppers will take a bit longer than cherry tomatoes, etc.

Marinate chicken, beef, lamb, or pork 8 to 24 hours for best results.  Before marinating the meat, reserve some marinade to brush over the kebabs while they cook.  Discard any remaining marinade.  For fish: 20 to 40 minutes is enough, since doing so for any longer could “cook” the fish kind of like a ceviche.  Marinating shrimp can make them tough.

you can try tofu too
try chunks of tofu.
try pieces of corn-on-the-cob
try cut up corn-on-the-cob.

Adding vegetables – skewer them all in the same direction so that they cook evenly. Brush marinade or glaze on while cooking: don’t marinate them.

All grilled: heirloom tomatoes (feta was grilled on tinfoil) on crusty french bread.
All grilled: heirloom tomatoes (feta was grilled on tinfoil) on crusty french bread.  Delish!

20140707_191933Bread – I’m talking about hearty, crusty bread (not sandwich style) …it toasts beautifully on the Barbie.  As with veggies, brush marinade/glaze on while grilling.  You can add cubes to your skewers too.

A few good Marinades:

In a liquid measuring cup, combine ingredients.  Reserve ¼ cup and pour remaining marinade into a zip-lock bag.  Add 1 ½ pounds of meat (for 4 people) and toss to coat.  Refrigerate.  Use reserve to brush over meat and vegetables while grilling.

Buttermilk-Dill: great for chicken or lamb.  Combine ¾ cup buttermilk, 3 garlic cloves (crushed with a press), ¼ cup chopped fresh dill, 1 tsp. salt and ½ tsp. pepper.

Balsamic-Rosemary: great for beef, lamb or chicken.  Combine ½ cup balsamic vinegar, ¼ cup olive oil, 1 Tbsp. chopped fresh rosemary, 1 tsp. salt and 2 tsp. pepper.

Lemon-Oregano: great for chicken or fish.  Combine ½ cup olive oil, ¼ cup lemon juice, 3 Tbsp. chopped fresh oregano, 1 tsp. salt, and ½ tsp. pepper.

Orange-Coriander: great for pork, beef or chicken.  Combine 1 Tbsp. finely grated orange zest plus ½ cup juice, ¼ cup olive oil, 2 Tbsp. toasted coriander seed, coarsely crushed: I Tbsp. toasted fennel seed, coarsely crushed:  1 tsp. salt and ½ tsp. pepper.

Quick & Easy BBQ GLAZE:

In a small bowl combine all ingredients.  Liberally brush on meat and veggies throughout grilling.

Combine ½ cup ketchup, 3 Tbsp. cider vinegar, 2 Tbsp. each brown sugar & Worcestershire sauce. 1 tsp. salt, and ½ tsp. pepper.  Add a dash of hot sauce & garlic if you like.

I almost forgot – prevent your wooden sticks from catching fire or burning by soaking them in water for half an hour before grilling.

Don’t you just LOVE SUMMER GRILLING!


simply satisfying: Indian Sour Chickpeas

This is what I made for a “celebration of life” pot-luck dinner last Saturday.

adding the reserve mixture

Edna (the lovely woman who passed away) had quite the reputation for her love of cooking, doing it amazingly well and of course, she had a repertoire of recipes, many of them Indian.  We were requested to cook & bring one of her recipes.

rinsed & waiting
rinsed & waiting

I love Indian but hadn’t made a vegetarian Indian dish in a long time.  I must admit that this one didn’t sound especially appealing at first but trust me, the end result was so delicious….especially when all the flavors from the spices melded together.  The end result was more like a chickpea stew and you could taste the ginger and lemon which I love. It’s healthy too! I served it alongside cut up pieces of Naan bread.  I didn’t change a thing about the recipe (as I wanted to re-create it exactly as she had) but I think it would look nice with a few sprigs of cilantro sprinkled over top for garnish. Oh, when I went back to the buffet table for a second platter (remember, they were mostly her recipes) it had vanished.  So Enjoy!

After a bit of research I found out that the origin of this recipe is Delhi street vendor style.

Ingredients:

Use either ¾ lb. of dried chickpeas or 1 x 16 oz. can.  If using dried, cover them with water and bring to a boil, and let sit for an hour.  If using canned, rinse well and soak them overnight.

3 pints water (6 cups)

3 or 4 very finely chopped onions

2 ½ tsp salt

1 finely chopped hot chili

3 or 4 tbsp finely grated fresh ginger

4 tbsp lemon juice (from two small lemons)

1/3 cup cooking oil (preferably coconut, or canola)

2 or 3 chopped tomatoes

1 ½ tbsp ground coriander

1 ½ tbsp ground cumin

1 tsp turmeric

3 tsp garam masala (see recipe below)

½ tsp cayenne pepper

Bring peas and water to a boil, and let simmer till beans are tender, approx. one hour.  This is for both dried or canned.

It should look like this
The reserve mixture should look like this.

Meanwhile, mix 2 tbsp chopped onion, ½ tsp salt, chili, ginger and lemon juice in a small cup or bowl.  Set aside.

Heat oil in heavy pan on medium heat and add remaining onions, stirring and frying till they have reddish brown spots (about 10 minutes). Add tomatoes, stir and fry another 4 or 5 minutes. Add coriander, cumin and turmeric and stir and cook for about half a minute. Add drained chickpeas, about a cup of the cooking liquid, 2 tsp. salt, the garam masala and cayenne, stir and simmer very gently for about 20 or 25 minutes.

Add the reserved onion mixture and stir to mix. Serve hot or lukewarm.chickpea1TIPS:  onions should be soft & nicely browned.  It should turn out quite lemony & very well cooked.  I used a 19 oz. can of chickpeas for this and 1 red thai chili (but you can use any hot chili).

I made my own blend Garam Masala (a warming spice mix) from an Indian cookbook so I used that, but of course they sell it already packaged.  I just thought it would be cool to make my own.  Should you feel so inclined I’ll share the recipe:

Garam Masala from scratch:

8 Cardamon pods (remove the seeds from the cardamon pods).

2 Indian bay leaves (cassia leaves) – break them into small pieces.

1 tsp. black peppercorns

2 tsp. cumin seeds

2 tsp. coriander seeds

5 cm. (2 in.) cinnamon stick

1 tsp. cloves

Put everything into a spice grinder (or pestle and mortar) and grind to a fine powder.  Store in a small airtight container until needed.

Now make something to go with it.

Food board on Pinterest: http://www.pinterest.com/intrigueimports/foodsavour-taste-flavor-relish-palate-enjoyment/


Simply Satisfying – CANADA DAY red & white layered Smoothie

canada2FUN & FESTIVE for FAMILY and FRIENDS
This Smoothie recipe canada1is not only very pretty to look at but it tastes good, takes little time to prepare and is the perfect drink for a Canada Day celebration.
You can turn it into a cocktail by adding a bit of vodka to the mix.  If you want a deeper red colour for the first layer, just drop in a bit of red food colouring until you hit the shade you desire.
Prep time:  10 mins
Serves: 8
Ingredients
  • Red Layer:
  • 1 cup of ice
  • 1 frozen banana, sliced
  • 2 cups strawberries, halved
  • ½ cup pomegranate juice
  • White Layer:
  • ¼ cup orange juice
  • 1 cup of ice
  • 1 cup of greek yogurt (plain or vanilla)
  • 1 frozen banana, sliced
  • Topping:
  • ½ cup raspberries
 Instructions
  1. Red Layer:
  2. Pour the pomegranate juice into the blender. Add in the strawberries, bananas and ice and blend until fully smooth.
  3. Pour your red layer into the bottom of each glass, tap the glasses gently on the counter to help level out your smoothie.
  4. Now place your glasses into the freezer to allow them to set while you’re working on the white layer.
  5. White Layer:
  6. Rinse out your blender and place the ice, banana, orange juice and greek yogurt into it. Bend until smooth and retrieve your cups from the freezer.
  7. Gently scoop the white smoothie layer into the cups on top of the red layer, again tap the cup on the counter to level the contents.
  8. Topping: Rinse your blender and puree raspberries then drizzle them on top for a red swirl.

TIP:  If you want to make this for Independence Day on 4th of July – use blueberries instead of raspberries for the topping.

HAPPY CELEBRATINGcanada4


Grill Talk: FISH in the PAN

It’s officially summer!

getting started
getting started

You want to keep things easy, breezy but still want to impress your guests? With this non-recipe recipe you can feel like you’re dining in a little village somewhere in France or Italy. I’m talking a delicious “one-pan” dinner using any meaty white fleshed fish.   Here’s what you do:

Place the *fish (already sprinkled with salt, pepper and any other spices you want) atop cherry tomatoes, thinly sliced onion, artichoke hearts, pitted Kalamata olives, caper berries, and lemon slices in a pan.

Pour in some white wine and olive oil.  Put the pan on grill, cover the grill, and cook just until the juices bubble and the fish is cooked through (roughly ten minutes or so).

end result
end result

Serve it from the pan – with lots of crusty bread to sop up the sauce.

*For the fish I prefer halibut but you can use monkfish or cod. I used sole fillets once & it worked out fine.

Thank me later!


Simply Satisfying – Summer Salads

I’m enjoying experimenting with different kinds of salads.  While I always love a classic green or Cobb salad, these two are a fresh and tasty change.

salad1

If you’re looking for a cool and refreshing salad recipe for this summer, look no further.
This salad is light and sweet, with a perfect balance between fruit and vegetables. Not only is it delicious, but it also features two extremely hydrating foods – watermelon and cucumber, making it perfect for the summer. Serve it up at barbecues or throw it together at lunchtime. Either way it’s a winner.

As far as the herbs, freshness is key. If you don’t have mint on hand, you can easily substitute basil, for a dish that will be just as delicious.

Ingredients

1/4 watermelon, diced into bite-sized chunks
1/2 cucumber, diced into bite-sized chunks
2 ounces feta, crumbled
1 lime
1 Tbsp. extra virgin olive oil
4-5 fresh mint leaves, chiffonnade (cut into thin strips)
freshly ground black pepper

Directions

Toss the watermelon and cucumber together in a large bowl. Sprinkle the cheese on top and season with olive oil, lime juice and black pepper. Sprinkle the chiffonnade of mint leaves over the top of the salad as a garnish.

The colors of the salad look best before tossing, so if you’re making this for company, I recommend serving like this and tossing at the table. Alternatively, you can toss the watermelon and cucumber with the oil, lime juice, salt and pepper and then add the cheese and mint at the end. Or, you can slice larger pieces of watermelon and place large thin slices of feta over top which gives this an elegant look.

beet, feta, proscuitto, artichoke hearts, sweet onionFor this one you must love cooked beats (not pickled), artichoke hearts, sweet onion & prosciutto (Italian word for ham that is cured & very thinly sliced). 

 Ingredients:

Sliced cooked beets

Sliced Artichoke Hearts

Thinly sliced sweet onion

Good Quality Feta Cheese (I always ask for the “Barrel” sheep Feta from Minerva’s Greek)

Top with torn crisp Prosciutto.  (Cook in frypan on medium-high heat (turn once) until done – should only take a couple of minutes).

Just arrange on the plate to your liking and drizzle with organic olive oil, a splash of lemon juice & balsamic vinegar (I used one with fig & dates).  Simply delicious!

My FOOD Board on Pinteresthttp://www.pinterest.com/intrigueimports/foodsavour-taste-flavor-relish-palate-enjoyment/

Most of all, enjoy your SUMMER