Confectionately Yours: MEYER LEMON TART

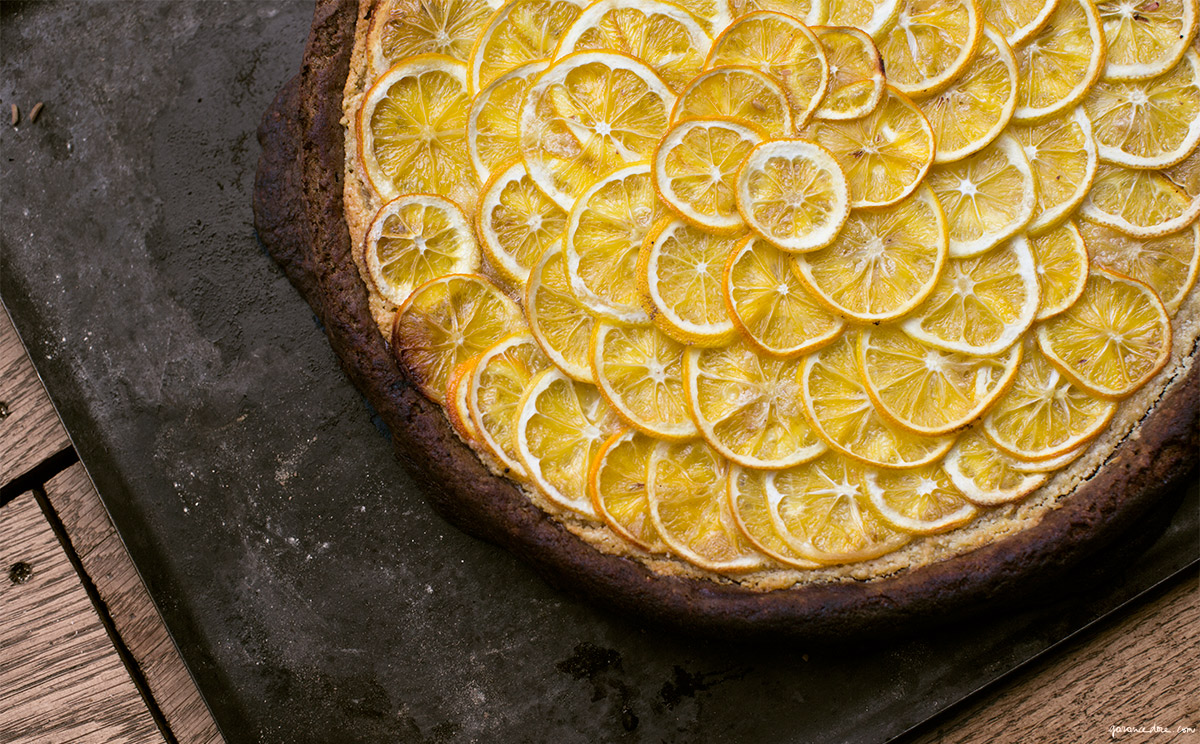
Lemon tarts are one of my favourite desserts. Chef James Henry from the restaurant Bones in Paris has perfected the lemon tart, according to Garance Doré and her team who visited the restaurant while in Paris. He shares his recipe which is big enough for a large dinner party, or to last you a while if you’d prefer not to share.  

bones_lemon-tart_garance-dore_11

For Pastry:

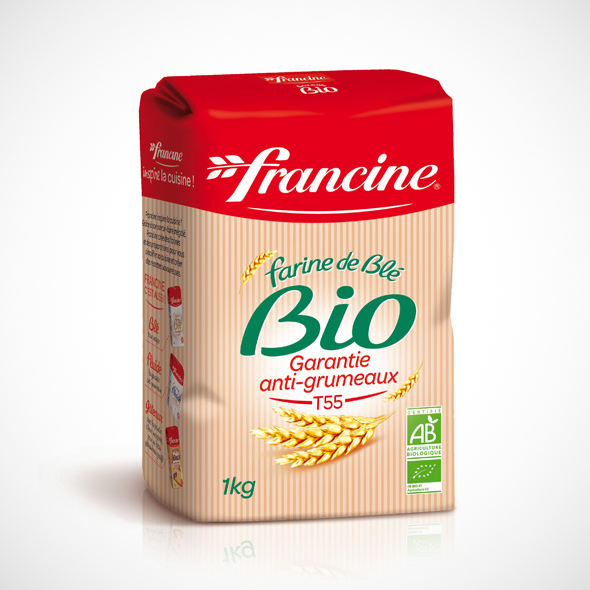
2 ¾ cups of pastry flour (preferably *type 55 bio which is an organic lump-free wheat flour from France – which is what they used for this recipe).  You can use all-purpose.

5 oz. malted barley powder

2 ¾ cups butter

2 ¾ cups sugar    

1/4 tsp. salt      

1 egg yolk

5 oz. milk  

Mix dry ingredients, stir.  Add butter and fold in.  Finish with wet ingredients, stirring to an even consistency.

For Frangipane (filling):
1 1/8 cup almond powder
1 1/8 cup soft butter
1 1/8 cup icing sugar
4 eggs
Zest of two lemons

Mix sugar, flour and butter until combined to a good consistency
Add eggs and stir to finish

Plus: 10 meyer lemons for slicing

Directions:

Roll out pastry and fit evenly to a large tart shell, put in fridge to rest for two hours
Slice 10 meyer lemons finely crosswise and remove all seeds
Blind bake shell until golden, let cool and then fill with frangipane
Layer thin lemon slices on top of frangipane
Bake in oven at 350 degrees fahrenheit for 20 minutes uncovered, then cover with foil and bake for another 20 minutes
Check regularly by inserting a small knife – if it comes out dry, tart is ready

*the type flour they use
*the type flour used for this recipe – see #’s below.

Voila ! Bon appetit !

Bones / 43, Rue Godefroy Cavaignac – 75011 Paris, France


A lesson in numbers – for popular European flour types:

French flour type numbers indicate the ash content (in milligrams) per 10 g flour. The numbers are a factor 10 lower than the German types. Type 55 is the standard, hard-wheat white flour for baking, including puff pastries (“pâte feuilletée”). Type 45 is often called pastry flour, and is generally from a softer wheat (this corresponds to what older French texts call “farine de gruau”). Some recipes use Type 45 for croissants although many French bakers use Type 55 or a combination of Types 45 and 55. Types 65, 80, and 110 are strong bread flours of increasing darkness, and type 150 is a wholemeal flour. Note that there is no type 40 French flour like the German type 405, the closest is type 45.

Food: appy hour – salmon paté

This is an easy appy idea that your guests will love! It’s a take on an old-fashioned recipe. salmon pate My mom used to serve something like this in an actual salmon-shaped mold.  I’ll be on the lookout for one of those, but in the meantime if you know where to find one please let me know.

One 213g tin of wild red salmon (preferably Sockeye) drained

One 227g package – lite cream cheese (or a bit less) softened

Panko (Japanese bread crumbs) about ½ cup or a combo of panko and chopped Walnuts

Grated cheese (like Parmesan or Asiago) about ½ cup

Chopped green onions (2-3)

1 tsp. prepared Horseradish

Worcestershire Sauce to taste

Dash of Hot Pepper Sauce

Lemon Pepper Seasoning

1 Tbsp, fresh lemon juice

Chopped parsley (optional)

Leave it in the fridge overnight before forming it into a ball, it will be much easier.

Decorate with chopped parsley or green onion.

Serve with crackers, tortilla chips or plain melba toast.

recipe: ridiculously good homemade protein bars

These addictive energy bars are easy to make, easy to store and really easy to eat!  I love to eat one after a run or when I’m feeling a bit run down and need an energy boost.

?

My Recipe:

1 cup whole raw almonds

1 cup pitted dates

1 cup raisins

2 Tbsp. sunflower seeds

1 Tbsp. flax seeds                                                                                                                 

1 Tbsp. chia seeds

1/2 tsp. cinnamon

1 tsp. pure Vanilla Powder (I used Cook’s Vanilla Bean Extract)

1 scoop of high quality protein powder (I use Brad King’s Ultimate Vegan)

1/2 cup unsweetened coconut flakes 

Put all ingredients into a food processor and pulse until ingredients form into a ball (the dates hold everything together, so if you need to, add a bit more). energyPour the mix onto parchment paper & pat down with your hands.

removed from parchment and ready to cut

Refrigerate for 1-2 hours. Cut into squares, wrap in parchment paper and store in your refrigerator.  You can freeze them too.energy2

Tip #1: Cut a small piece of parchment paper to help pat the mixture down with.  This will prevent mix from sticking to your hands.

TIP #2: Medjool dates are the best and easiest for removing the pits.

TIP #3: Experiment with different combinations like cranberries instead of raisins, or a combo of half sour cherries & half raisins. This time I used raisins and unsweetened bing cherries – delicious combo!

 Enjoy!

Something Sweet – Homemade Candy Bars

From savoury to sweetI’ve been making so much savoury the last while that it was time for a sweet treat – and I mean SWEET! This is the first time I’ve made chocolate bars from scratch.  Cakes, cookies, fudge, truffles, different types of chocolate bark and even brownies is what I’m used to, but never bars.  Just never attempted to try them before. Why now? Why not!barsThis recipe happens in 3 stages. The end result tastes like a deliciously rich fudge brownie with a caramel-like consistency in the middle.  Read through the whole ingredient list and instructions before diving in. If you want to attempt this (or any candy making) I really recommend that you buy a *candy thermometer or better still, a laser thermometer for this recipe.

STAGE I

2 OZ. BAKING CHOCOLATE – UNSWEETENED

½ CUP BUTTER

2 EGGS BEATEN

1 CUP SUGAR

½ CUP FLOUR

1 CUP CHOPPED PECANS

1 TEASPOON VANILLA

  1. Line a 9×13” baking sheet with some parchment paper, leave a little bit spilling off the sides.

    speading it out
    spreading it out
  2. Melt chocolate and butter together and cool.
  3. Add eggs then remaining ingredients to the melted chocolate.
  4. Spread in your lined 9×13″ sheet and bake for 10 minutes at 350′. DO NOT OVERCOOK.

STAGE II

1½  CUPS POWDERED SUGAR

½ CUP BUTTER

½ CUP WHIPPING CREAM (WHIPPING CREAM, NOT WHIPPED CREAM)

  1. Mix ingredients together and then cook to “softball stage” over medium/low heat (softball stage means a candy thermometer reaches 240F ).second
  2. Spread over your baked layer.

STAGE III

2 OZ. UNSWEETENED CHOCOLATE

1 T BUTTER

  1. Melt together and spread carefully on top of powdered sugar mix.
  2. Cool in refrigerator for several hours until top chocolate layer is hard.
  3. Cut into small bars and store in refrigerator.

    I cut them into brownie-style squares
    I cut them into brownie-style squares and put unsweetened coconut on top – stage three.
  • Stage One was easy enough. The key with this first step is NOT to overcook the layer. So if you have an oven that runs hot, bring the baking time down by 1-2 minutes.
  • Stage Two – The softball stage is bit of a pain. *I didn’t have a candy thermometer and at the time I decided to make this, all the ingredients were in place except for the handy thermometer. Being the practical person that I am, I ended up using a meat thermometer instead – was too impatient to go out & buy a proper one on the spot. So I used one I have for roasts and it only goes up to 200F so I let it go up all the way to the very end past 200 (I figured this to be about 220) and left if for an additional 2 minutes.  Luckily for me it worked out fine but I wouldn’t normally recommend doing this.
  • Stage Three was no fuss.  You can find some fancy wrappers at a kitchen store or use plain parchment to wrap them.  They freeze well.
  • Stage Foureat and enjoy.  They’re sweet but not sickly sweet.  You may want to eat more than one but try to use control. I’m trying.

Source: http://impatientfoodie.com

This is the food website of  Elettra Wiedemann, the daughter of Isabella Rossellini.

ALSO;

There are still a few tickets available for the DOWNTOWN FOOD & AGAVE SAFARI on Thursday May 28th – 7pm.

Join us to experience delicious food and drink pairings as we visit some of Vancouver’s top restaurants and watering holes. We start at Joe Fortes Seafood & Chophouse, and then we’ll board a trolley to culinary nirvana – exploring gastronomic delights at every stop -­ all exquisitely paired with tequila and mezcal to sip alongside the chefs’ creations! Stops at: Joe Fortes Seafood & Chophouse, Coast, Lift Bar & Grill, and Left Bank, before heading to Uva Wine and Cocktail Bar to end the night with…more culinary goodness paired with agave spirits!  Tickets: $95  Order tickets at :  http://www.vantequilaexpo.com/about_expo.php

CooKing – Crazy for Curry

It’s been too long since I made an Indian curry. curry3Now that I have I won’t leave it so long until the next time.  Kind of crazy because curries are one of my favourite foods.

This recipe from scratch comes courtesy (sort of) from a friend’s grandmother who was from England and lived in India for many years.  When I used to visit her she always fed me this amazing curry and I always wanted her recipe.  Only thing was she didn’t have one.  So I asked her to invite me over the next time she made it and I sat and watched and copied down everything she put into it.  This is the way I work sometimes.

A lot of the spices you might already have.  If not, buy them and you’ll be using them over and over again.  Plus these are so beneficial (especially turmeric) for you health wise.

Chicken Currycurry4Chicken (either 1 medium chicken, disjointed with the skin removed, or boneless chicken pieces).

Two medium size russet potatoes (cut into bite size cubes)

3 Tbsp. organic coconut oil

3 medium onions (finely sliced – they boil down)

1 tsp. Himalayan salt

1 tsp. powdered ginger

1 tsp. cayenne pepper

1 tsp. paprika

1 tsp. coriander

1 tsp. curry powder

1 tsp. turmeric

½ tsp. allspice

½ tsp. dried mustard

After:

Juice from ½ squeezed lemon

3 Tbsp. plain greek yogurt

2 Tbsp. ketchup

  • Season dry chicken with dry spices (mix of lemon pepper, masala curry powder & everyday seasoning). Rub all over chicken.
  • Brown chicken with a bit of coconut oil in an oven-proof skillet. Sauté on all sides until nicely browned & remove from pan.
  • Next, in the same skillet heat the 3 Tbsp. of oil & sauté the onions until slightly brown.
  • Mix all ingredients (omitting the lemon juice, yogurt & ketchup) with half vinegar & half cold water to form a paste. About 4 tsp. of each (not too thick but not watery).
  • Drop paste into skillet with onions & fry gently for 5 minutes, stirring over medium heat.
  • Place cut up (already browned) chicken pieces in skillet with the potatoes & stir to prevent sticking.
  • Add 2 cups of hot water or *chicken stock (I prefer using stock) and simmer with lid on and cook until tender. At least 30 minutes. Do not let liquid dry out – if so then add more water.
  • When cooked through add the lemon juice, plain yogurt & ketchup to skillet and stir well until mixed thoroughly.
  • Serve with plain white *basmati rice (well rinsed) or savoury rice. Don’t forget to get your add-ons like lime pickle & mango chutney.  Also Tandoori Naan bread. Some of the breads now you can put right into the toaster. Garnish with cilantro.

    sweet mango chutney, lime pickle & mango/coconut sauce.
    sweet mango chutney, lime pickle & mango/coconut sauce.

*For this recipe I prefer using plain basmati and mix a bit of raisins or currants, a little peas & carrots and sliced almonds into the pot at the end. Top with saffron.

For savoury just add a bit of curry powder & turmeric.  Use bouillon in hot water for the liquid.

Enjoy!


Food: best BAKED back RIBS

Talking about Austin Texas and barbeques yesterday got me thinking about mouth watering ribsribs2Of course you cannot beat barbequed ribs for the best smoky flavour but I just made an amazing batch of ribs that were completely baked in the oven – while still maintaining a smoky flavour.  That’s right!  Even I was surprised at how delicious they turned out.  I first rubbed them all over with a homemade tex-mex dry rub which I provided the link to below (from a previous blog post) but you can always improvise.

  • 3 -5 lbs pork ribs (I used baby back ribs)
  • 3 or more tablespoons dry rub (use your favourite and add a smoked sea salt as part of your seasoning – Trader Joe’s makes an excellent one).
  • 1 cup barbeque sauce (this time I used Stubb’s Hickory Bourbon but there’s a link at bottom for a good one made from scratch).ribs1

DIRECTIONS

  1. Pre-heat oven to 300* F.
  2. Season all sides of the ribs with the dry rub of your choice.
  3. Using a 13x9x2 baking dish (or most likely a larger 15x11x2), place the rib slabs *meaty side up into the pan but make sure not to over crowd.  I usually put the baking dish (or pan) right on top of another slightly larger pan/dish that has at least a half inch of water in it.  This helps tenderize the ribs and keep them from drying out.  You can always try it without but this seems to work better.
  4. Cover the baking dish with foil and place on center rack of pre-heated oven. Bake for approximately 2 1/2 – 3 hours (depending on the size of the ribs you are using).
  5. Remove the ribs from oven and drain any grease from dish; reserving the foil. Slather with your favorite BBQ sauce and return the dish to the oven (un-covered) for an additional 30 minutes.
  6. Once done, remove the ribs to a platter, loosely tent the platter with the reserved foil, and allow to rest for 10 minutes. (This step is important — the resting period gives the ribs time to re-distribute their juices, just like a steak would).
  7. Enjoy!

*other recipes call for you to first place the ribs with the bone side facing up – until step #5 when you put the barbeque sauce on at which time you flip them over to the meaty side up.  I’m just telling you this but the way I did it (above) turned out to be excellent.

Dry Rub Recipe:

https://girlwhowouldbeking.com/2013/06/04/simply-satisfying-dry-rub-drumsticks/

Homemade Barbeque Sauce Recipe:

https://girlwhowouldbeking.com/2013/09/24/simply-satisfying-slow-cooked-pulled-pork/

If you make them, let me know how they turn out.


Confections – Chewy Chocolate Almond Cookies

 Chocolate + Almond = Delicious Cookies!

I was looking to buy a bowl of soup and Tourtière (a Québécoise meat pie) from Tartine bakery in Vancouver when I discovered this delightful bag of cookies. 20150311_144409 They tasted amazing, so light and chewy with the perfect combination of almond to chocolate. It  really reminded me of another dessert I make – a chocolate almond torte but in cookie form.  Since I don’t have their exact recipe here is the next best thing.  Just add icing sugar to finish it off.

That's a sour cherry tart in the middle - for a little variety.
That’s a sour cherry tart in the middle – for a little variety.

Chewy Chocolate Almond Cookies

INGREDIENTS:

1/2 pound (2 sticks) unsalted butter; room temperature
3/4 cup light brown sugar, packed
1 cup granulated sugar
2 teaspoons pure vanilla extract
2 large eggs at room temperature
2/3 cup unsweetened cocoa (I used Scharffen Berger)
2 cups flour
1 teaspoon baking soda
1 teaspoon kosher salt
2 cups semi-sweet chocolate chips
1/2 cup blanched slivered almonds; coarsely chopped

DIRECTIONS:

1. In the bowl of an electric mixer fitted with the paddle attachment, cream the butter and both sugars until light and fluffy.

2. Add the vanilla, then the eggs, one at a time, and mix well. Scrape down the sides of the bowl after the addition of each egg.

3. Sift together the cocoa, flour, baking soda, and salt. Turn your mixer to low and gradually add the sifted ingredients; mix until just combined.

4. Fold in the chocolate chips and almonds. *Refrigerate dough for 1 hour.

5. Preheat the oven to 350 degrees F. Line a baking sheet with parchment or a silicone baking mat.

6. Measure the dough using a 1 1/2 tablespoon scoop or a rounded tablespoon. Roll the dough in your hands until it forms a uniform ball and place on your lined baking sheet.

7.  Bake the cookies for 11-12 minutes (the cookies will seem underdone).  Remove from the oven and let cool slightly (about 3 minutes) and transfer to wire rack and let cool completely.

Yields about 30 cookies.

*Trick: stick the dough in the freezer for a little while to allow the flavors to marry and the dough to slightly stiffen.  It makes it easier to form the cookies with.

Source: mybakingaddiction.com

Tartine Bread & Pies: 770 Beach Ave, Vancouver.

p.s.  I think this post was influenced by yesterdays post.


Have your Cake and eat your Candy too!

Look what I found! Perhaps it’s because I’ve spent a lot of time in Mexico and never had an easy time of breaking the piñatas, or maybe it’s just that I love eating candycake1

Here you can have the best (or worst) of both worlds and it’s a whole lot easier to break through.

Beautiful Rainbow Piñata  Cake

My dream filling would be smarties, gummi bears, licorice bites, mars, snickers and kit kat minis, sour patch kids and jelly bellys with a sprinkling of marshmallows.

I have not yet make this kind of cake but doesn’t it look appealing? Hey, there’s always a birthday or an occasion.

To make this wonderful rainbow piñata cake first you have to bake two semicircular cake sponges (find a sponge cake recipe if you don’t already have one – it’s not that hard).

Scoop out the center of both the sponges and fill the lower one with candies.  Join the upper semicircle to the lower with frosting in between.

Then divide your buttercream frosting (if you don’t already have a recipe just find one) in three to four parts depending upon the number of food colours available. Colour each part with a different food colour and fill the piping bag with dollops of alternate coloured frostings. Make sure not to mix them. Pipe out rosettes on the cake and voila! Your rainbow piñata  cake is ready.

OR; you can keep it real simple and just hollow out a cake recipe you’re already familiar with & fill it with candy.  Just don’t forget to put the top back on.  Frost it however you like.

What would you fill it with?

Source: Stylish Board


Food:  Sablefish Salad

This recipe is from Steve Clifton, the proprietor of Palmina Winery in the Lompoc wine ghetto, Santa Barbara county.

edible, Santa Barbara

The fish is so buttery, high in omega-3’s and really, really flavorful” he says.  That’s why you don’t need to add much to it.  Black Cod (Sablefish) also happens to be one of my all-time favourite fish and so I look forward to trying this dish.

Makes 4 Servings:

1 ½ pounds filet of black cod (sablefish).  Filets need to be no longer than 8 inches.

3 Tbsp. chopped dill

2 Tbsp. and 1 tsp. lemon zest (from roughly 2 small lemons or 1 large)

1 Tbsp. and 1 tsp. olive oil (divided)

½ tsp. kosher salt

½ tsp. ground black pepper

For the SALAD:

2 cups baby arugula

Juice of ½ lemon

2 Tbsp. olive oil

Pinch of salt

1 cooked fingerling potatoes, sliced

Directions:

Preheat oven to 450F.  Lay the filtets out, remove any bones.  Brush the top side of the filets with 1 Tbsp. olive oil and sprinkle the remaining ingredients evenly on the filets (2 Tbsp lemon zest, dill, salt & pepper).

Roll up the filets lengthwise into a spiral and tie with kitchen twine.  Place on an edged baking sheet lined with parchment paper.  Drizzle filets lightly with 1 tsp. olive oil and 1 tsp. lemon zest, and salt/pepper.  Bake fish for 25 minutes.

In a small bowl mix arugula, lemon juice and olive oil until all the arugula is coated.  Remove fish, plate over arugula and serve with 2 sliced fingerling potatoes.  Yum!

Wine pairing:  look for medium bodied whites with high aromatics and rich full-bodied whites aged in oak.

Source: Edible Santa Barbara: Celebrating the Local Food and Wine Culture of Santa Barbara County.


Health MATTERS – facts about mayonnaise

 Last Tuesday I posted a few simple DIY recipes for making mayo because I had a difficult time choosing a relatively healthy brand (as far as mayos go) from the grocery store. I saw many reduced-fat varieties that were not very good for you.  Too bad because we use it often to make dips & for sandwiches. In the end you have two choices: go to a health food store or make it yourself.

simplyfreshcooking.com

Whatever type of mayonnaise you eat, however, you should limit your intake as much as possible.  Here’s the deal:

Calories

One tablespoon of typical mayonnaise contains about 90 calories. That is roughly 4.5 percent of your daily recommended caloric intake in a single tablespoon. It can be easy to forget to factor into your diet calories like those from mayonnaise and similar foods. So, individuals who eat mayonnaise regularly may find themselves dramatically overshooting their daily caloric recommendation without realizing it, which can lead to weight gain and even obesity.

Fat

Each tablespoon of mayonnaise contains 10 g of total fat, which is 15.4 percent of your daily recommended intake, and 1.5 g of saturated fat, which is 7.5 percent of your daily recommended intake. Although limited fat consumption is acceptable for active individuals, many people regularly consume far more fat than is healthy — particularly saturated fat. According to the Harvard School of Public Health, eating too much saturated fat can drastically increase your risk of developing harmful health conditions, such as heart disease.

Cholesterol

A tablespoon of mayonnaise contains 5 mg of cholesterol, which is about 1.7 percent of your daily recommended cholesterol intake. According to the Centers for Disease control, excess cholesterol intake can lead to buildups in your arteries. This can also potentially lead to heart disease, stroke, and similar health problems.

Sodium

Each tablespoon of mayonnaise contains 90 milligrams of sodium — that is 3.8 percent of your recommended daily intake. According to the University of Maryland Medical Center, your body needs some sodium to help keep systems like your nerves and muscles functioning, but most people include far too much sodium in their diets; this can lead excessively high blood pressure and similar complications.

Hope I didn’t ruin your day.

DIY mayonnaise: https://girlwhowouldbeking.com/2015/02/09/food-making-mayo/

 Source for Facts: Livestrong.com